Book Management
Book Series
Operations regarding book series will be reflected in real-time on the user interface. Administrators can edit the categorization based on the actual book series, and these edits will ultimately be displayed on the user side for category viewing.
 On the Book Series Management page, you can perform operations such as adding, editing, and deleting series. Please be aware that these actions are irreversible, so exercise caution when performing them.
① Click the "Add" button to trigger the input box popup. Fields marked with an asterisk (*) are required. Enter the necessary details and press "Save" to successfully add a series. The newly added book series will be immediately displayed in the front-end series module.

② To delete an individual series, select a row in the list and click the "Delete" button in the action column. For bulk deletion, check multiple book series and then use the "Batch Delete" button at the top of the list. Once deleted, the selected book series will no longer be visible in the list or the front-end series module.
③ To view detailed information about a book series, click the "View" button.
④ To modify a book series, select the corresponding row and click the "Edit" button to update the data.
Tags
The many-to-many relationship between tags and books allows each tag to be flexibly associated with multiple books, while each book can be described by several tags. By carefully defining tags, we effectively achieve refined categorization and management of books.
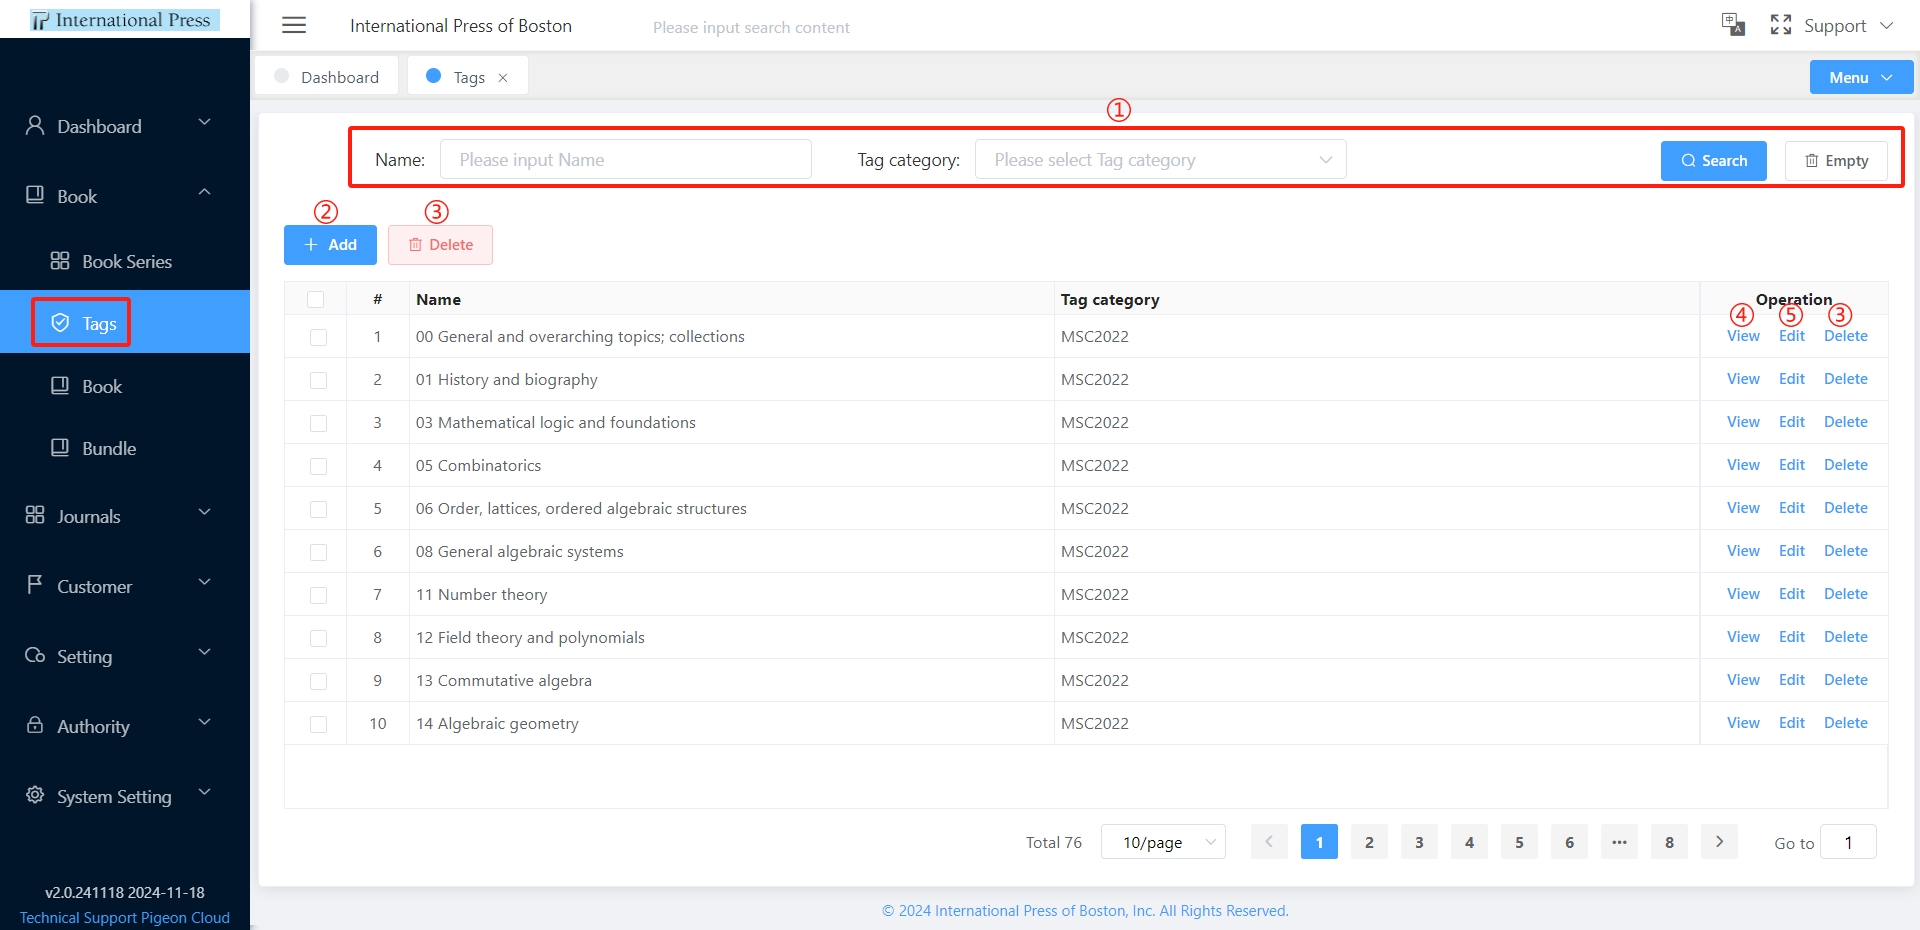
① Enter the filtering criteria in the tag list and click the 'Search' button to initiate the search. To clear the input, simply press the 'Empty' button to reset the search conditions.
② To add a new tag, click the 'Add' button to bring up the input box. Fields marked with an asterisk (*) are required. Fill in the necessary information and click 'Save' to successfully add the tag, which will then be available for selection in the book module.
 ③ For tag management, select a row and click the 'Delete' button to remove a single tag. For bulk deletion, check multiple tags and use the 'Delete' button at the top of the list. Once deleted, the tag will be removed from the list and will not be selectable in the book module.
④ To edit tag information, select the tag row and click the 'Edit' button to update the data.
⑤ For detailed tag information, select the tag row and click the 'View' button to see the tag details.
Books
Under the Books menu, you can query and edit already published books, as well as publish new ones. The management of book functionalities is primarily concentrated within this menu. Due to the complexity of the details involved, please be particularly aware that all operations are irreversible. Therefore, it is crucial to exercise extreme caution when performing editing (especially deletion) actions.
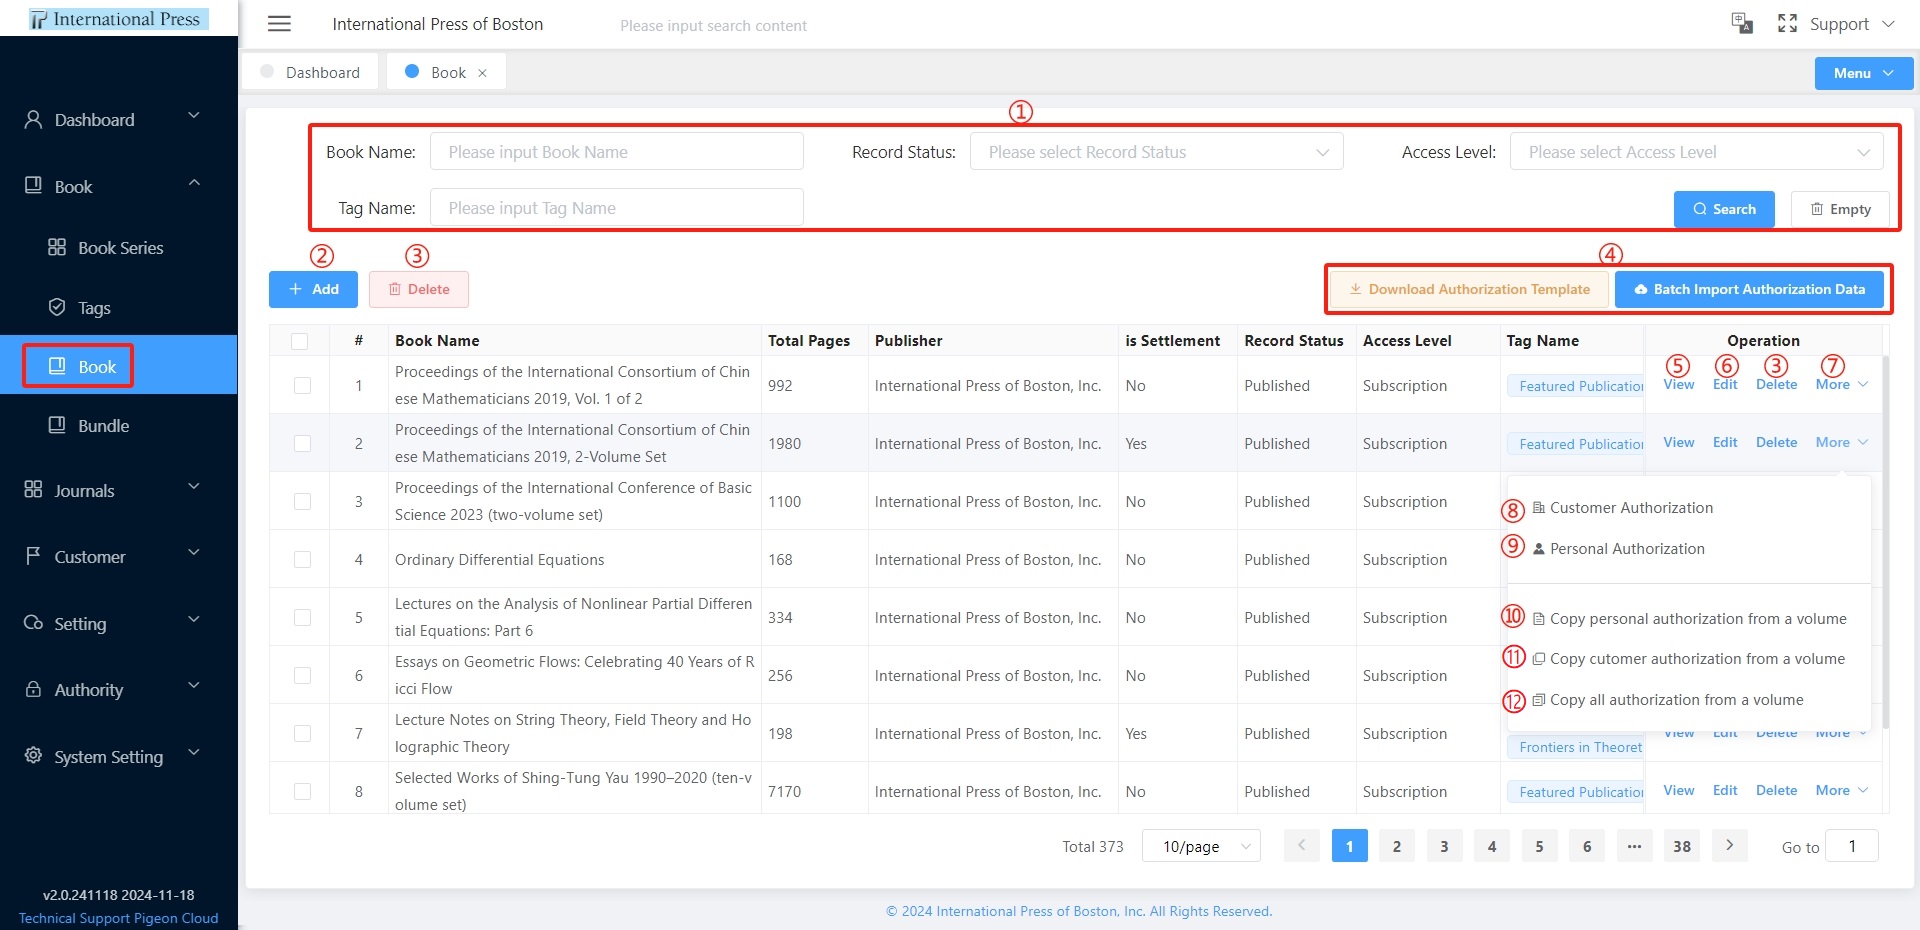
① Utilize the book filtering feature to quickly locate content by entering criteria and clicking the "Search" button. To reset, click the "Empty" button to erase all search conditions in one go.
② Click the “Add” button to navigate to the new book page.
③ Select a book row and click the "Delete" button to remove an individual book, or select multiple books and use the "Delete" button at the top of the list for bulk deletion. This action will synchronously remove the book display from the list and the front-end module.
④ Click on "Download Authorization Template" to get an Excel template. After filling in the data, choose "Batch lmport Authorization Data" to upload. Once batch authorization is complete, you can view the authorization status in the book information.
⑤ Click the "View" button in the data row to access detailed book information.
⑥ Click the "Edit" button in the book row to modify book information.
⑦ Hover over the "More" button to expand additional operation options.
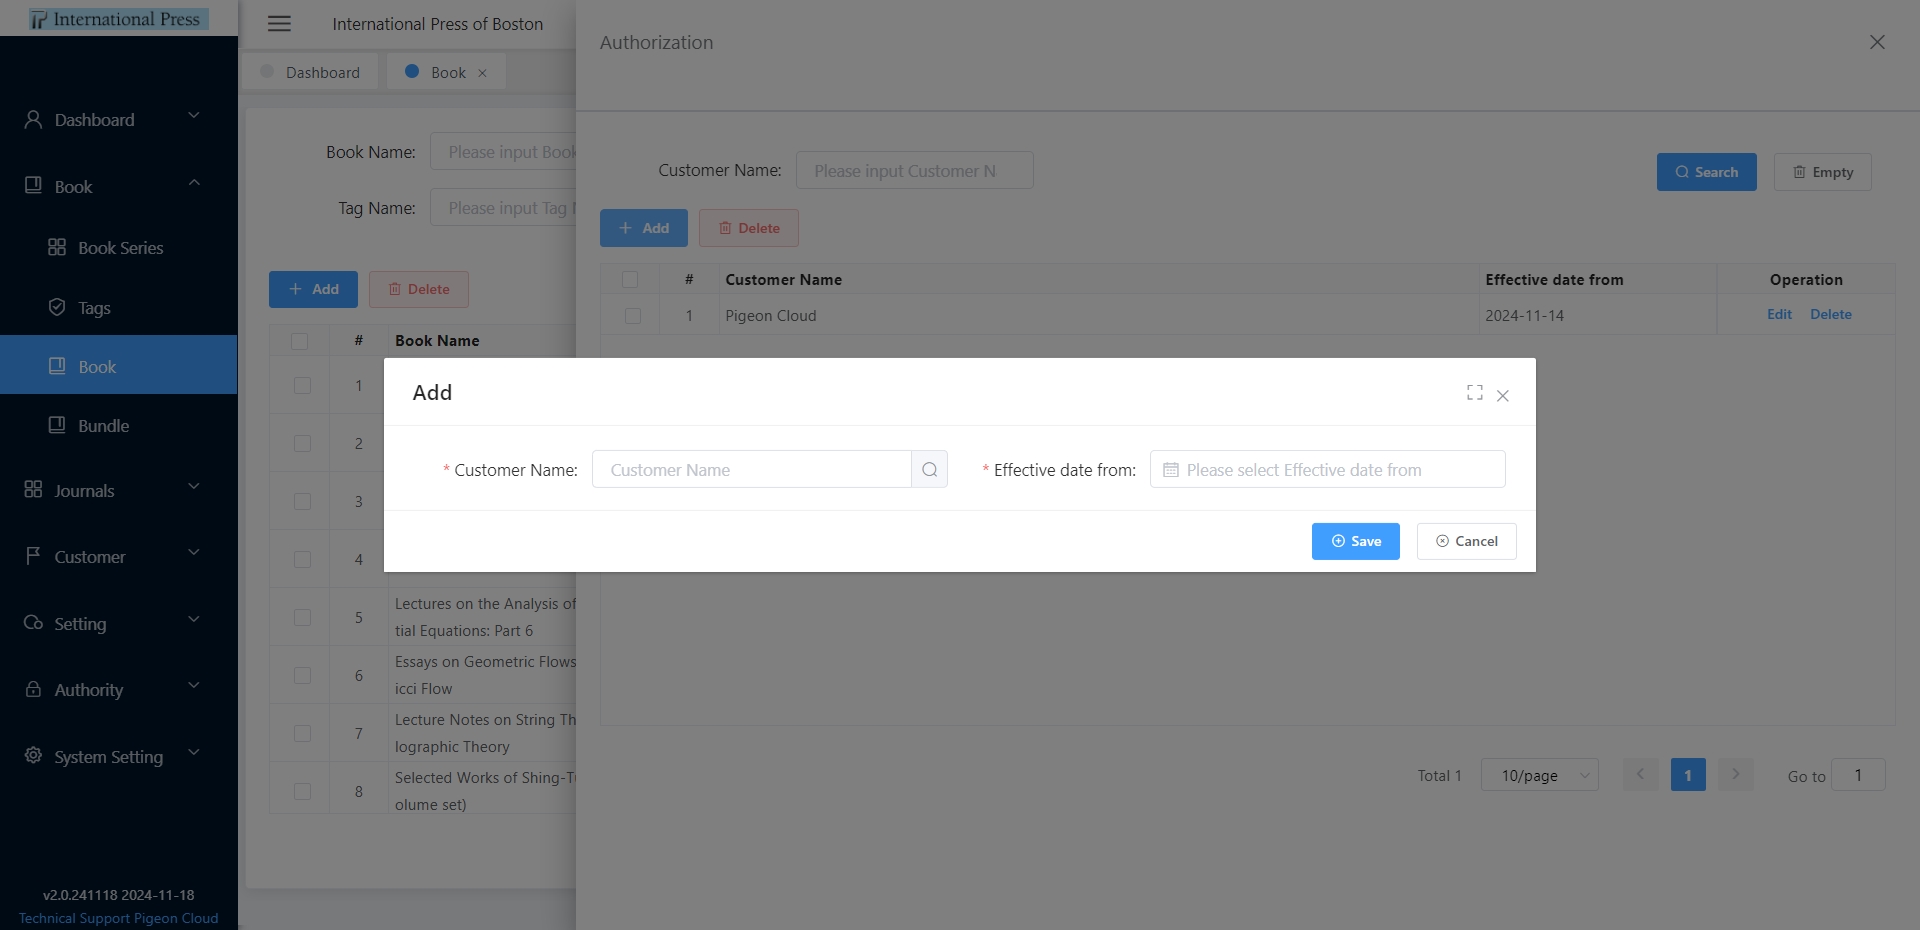
⑧ Click on "Customer Authorization" to perform customer authorization operations.
- Set up the authorization organization, fill in the authorization period, and easily complete the authorization addition process.
⑨ Click on "Personal Authorization" to carry out personal authorization operations.
⑩ Click on "Copy personal authorization from a volume" to swiftly copy personal authorization information from other books.
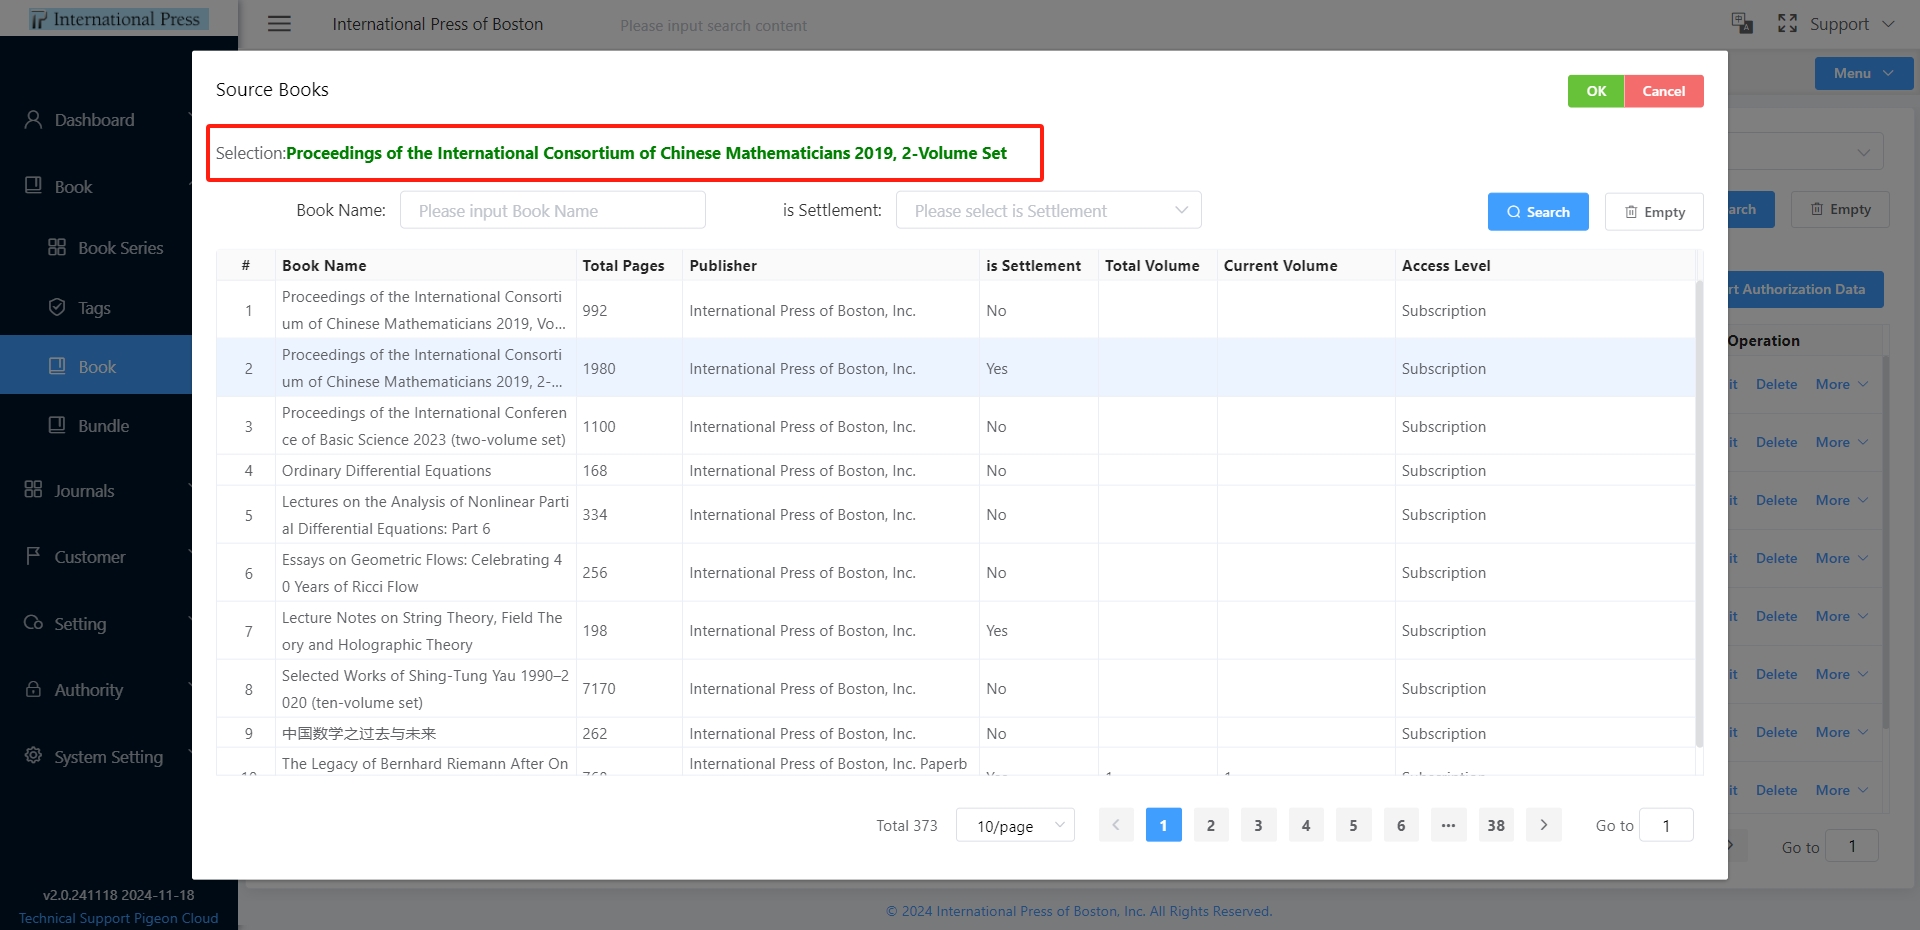 ⑪ Click on "Copy cutomer authorization from a volume" to quickly duplicate customer authorization information from other books.
⑫ Click on "Copy all authorization from a volume" to rapidly duplicate both customer and personal authorization information from other books.
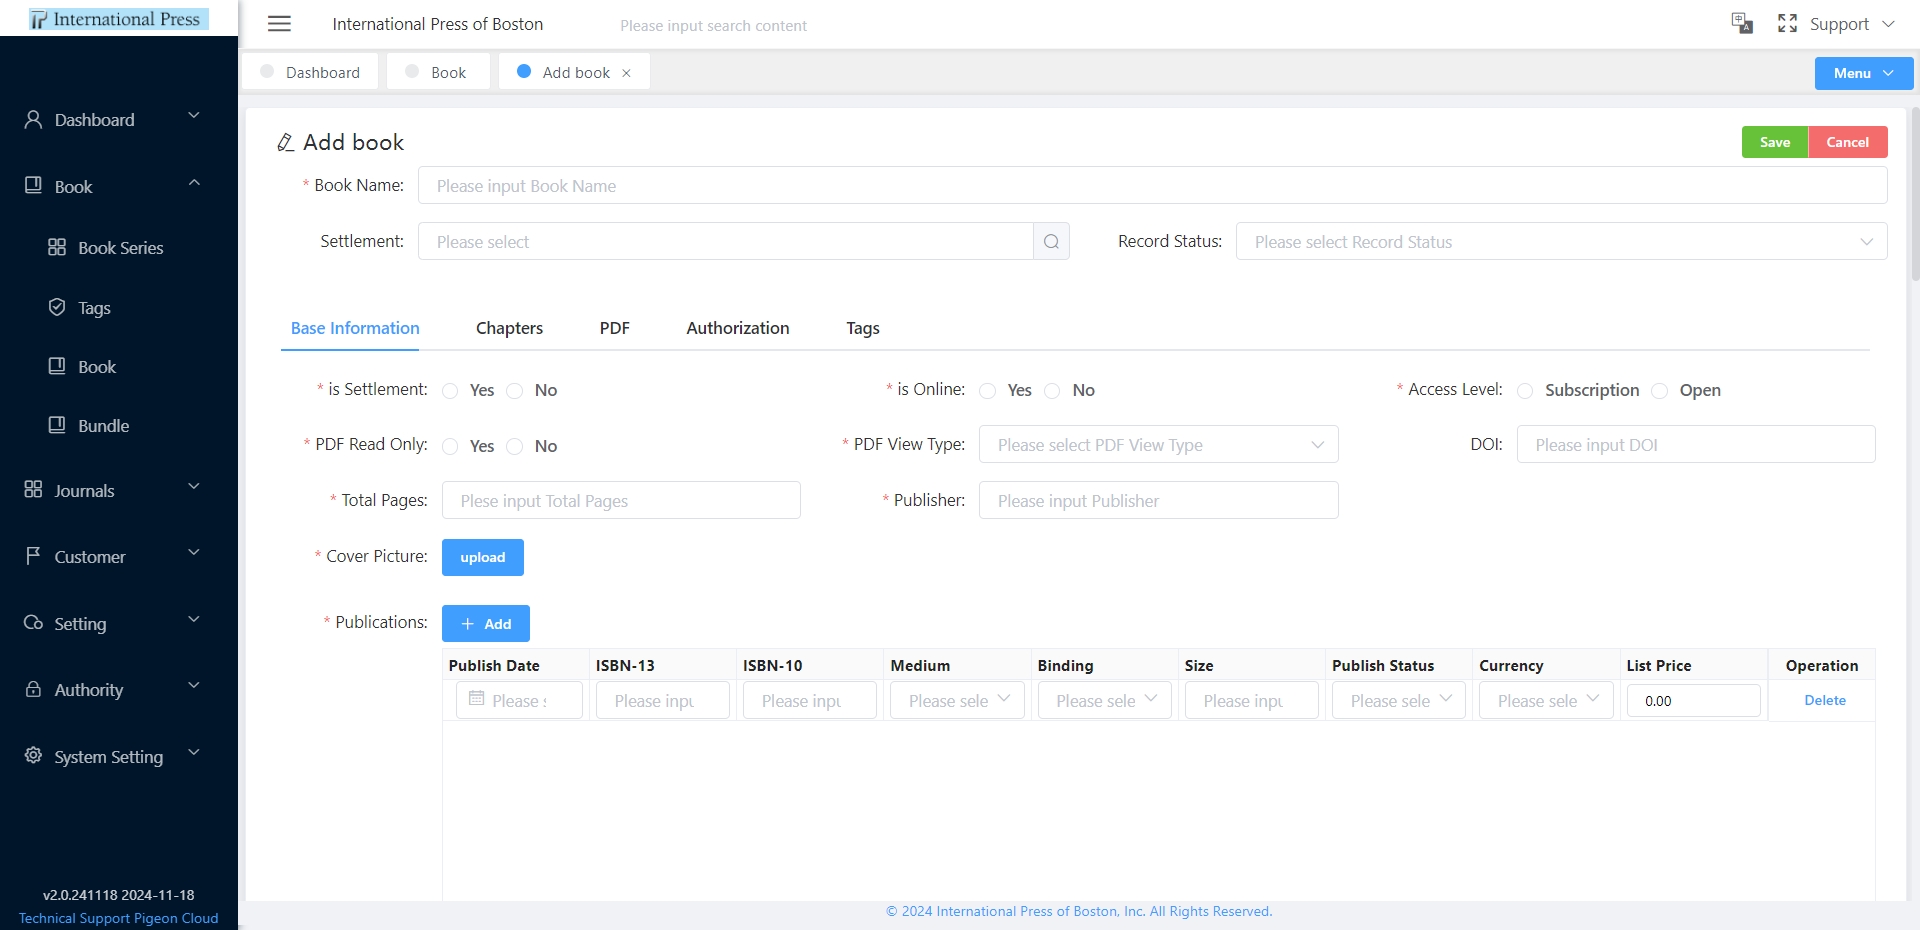
Add Book
Items marked with an asterisk (*) are required. Once filled out, click “Save” to successfully add a new book.
-
【Settlement】: The book management system allows for the assignment of books to collections. Once added, users can navigate between books within the collection on the front-end page via links, making it easy to view detailed information for each book.
-
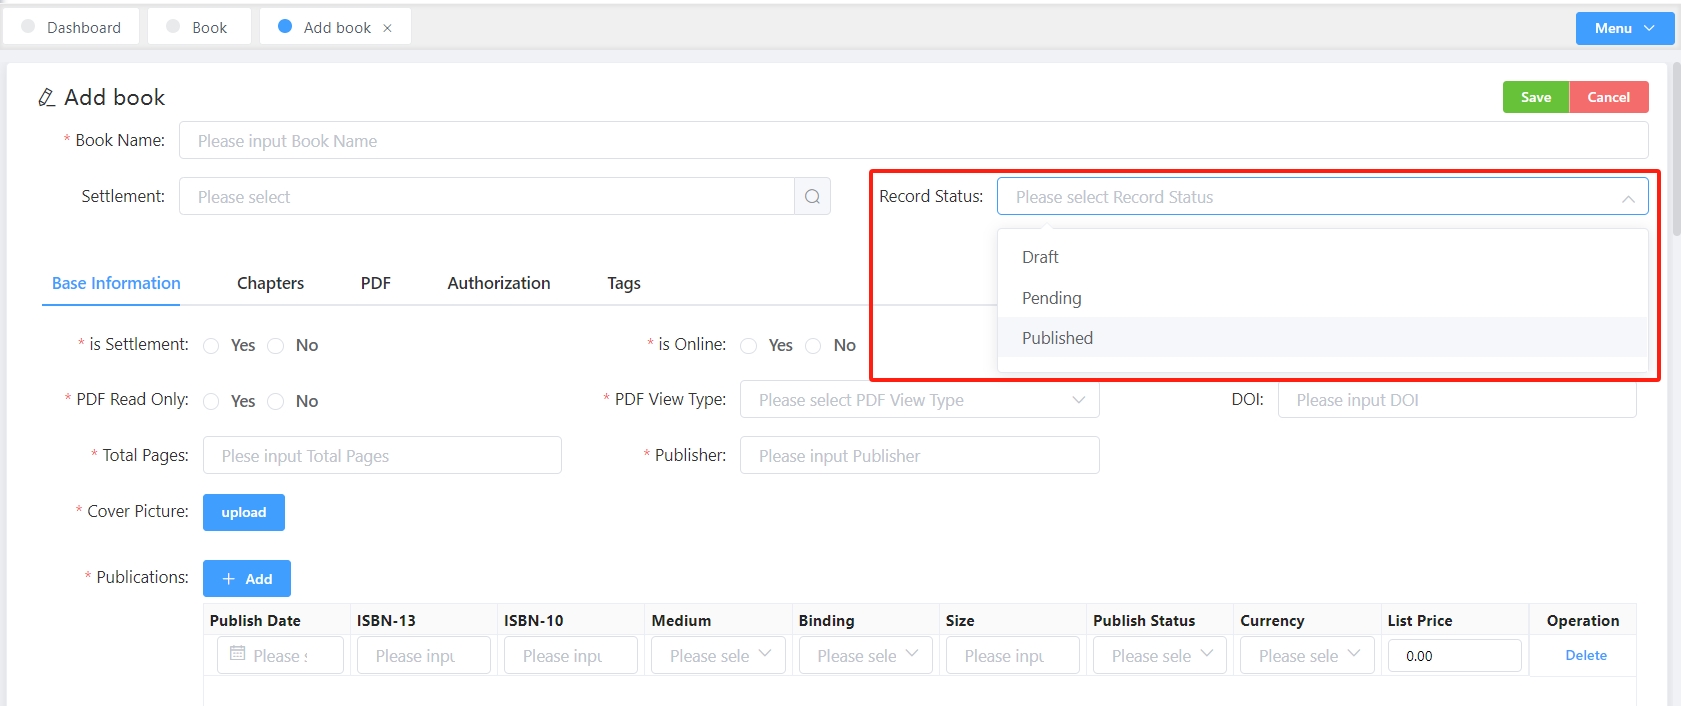
【Record Status】: The publication status of books can be managed through the record status. The system is configured such that only books with a status of "Published" will have their content displayed on the front-end page for readers to view.
When adding a new book, we need to fill in the content corresponding to each tab, which includes basic information, chapter information, PDF files, authorization information, and relevant tags.
Maintain basic information of books
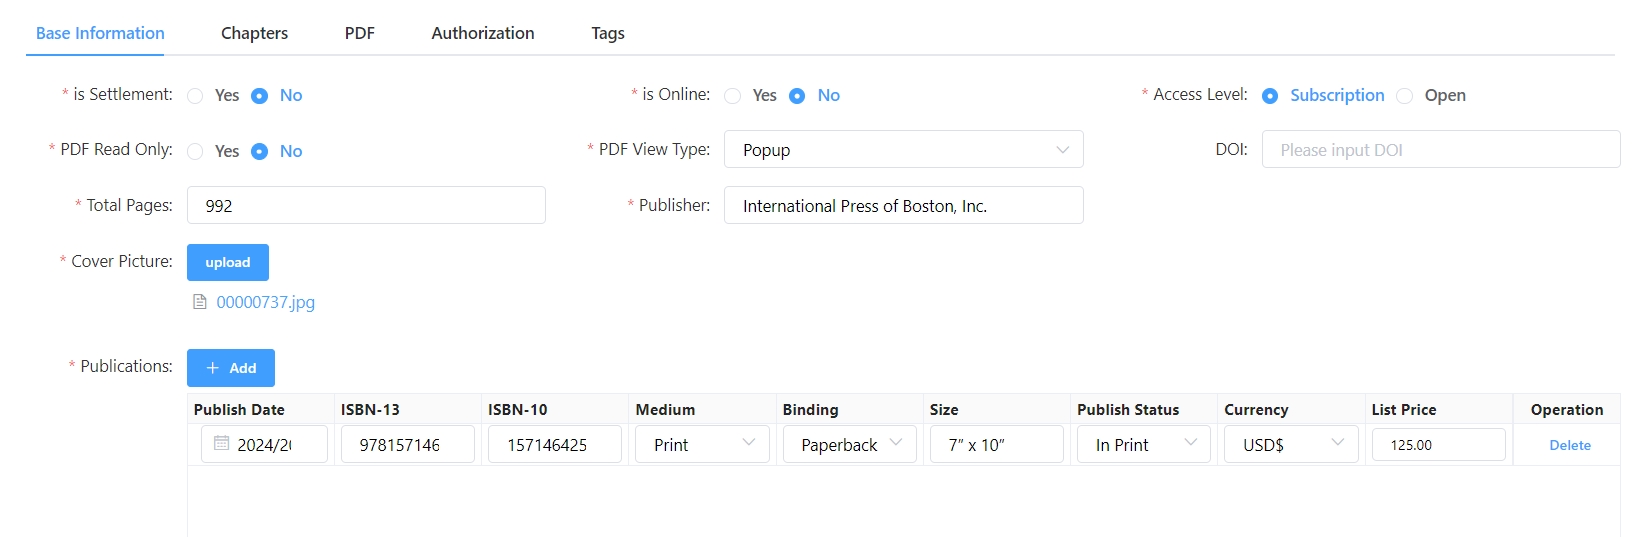
- 【Basic Information】: Maintain basic information such as book cover images, authors, publication information, introductions, prices, etc;
- 【Access Level】: If "Subscription" is selected, the front-end page will only allow authorized users to preview the full text of the book; unauthorized users will not be able to view the complete content.
If "Open" is selected, all users accessing the front-end will have unrestricted access to preview the full text of the book. - 【Book Cover Image】: At the 'Cover Picture' section, you can easily upload the book cover. Once uploaded successfully, the selected book cover image will be automatically displayed on the front-end of the website.
- 【Publication Information】: In the publication information form, fill in the key details such as the publication date, ISBN number, and sale price of the book to ensure the accuracy and completeness of the information.
- 【Authors/Editors Information】: In the author/editor information form, retain personal details of the author or editor, including name and profile, to enhance the professionalism and credibility of the book.

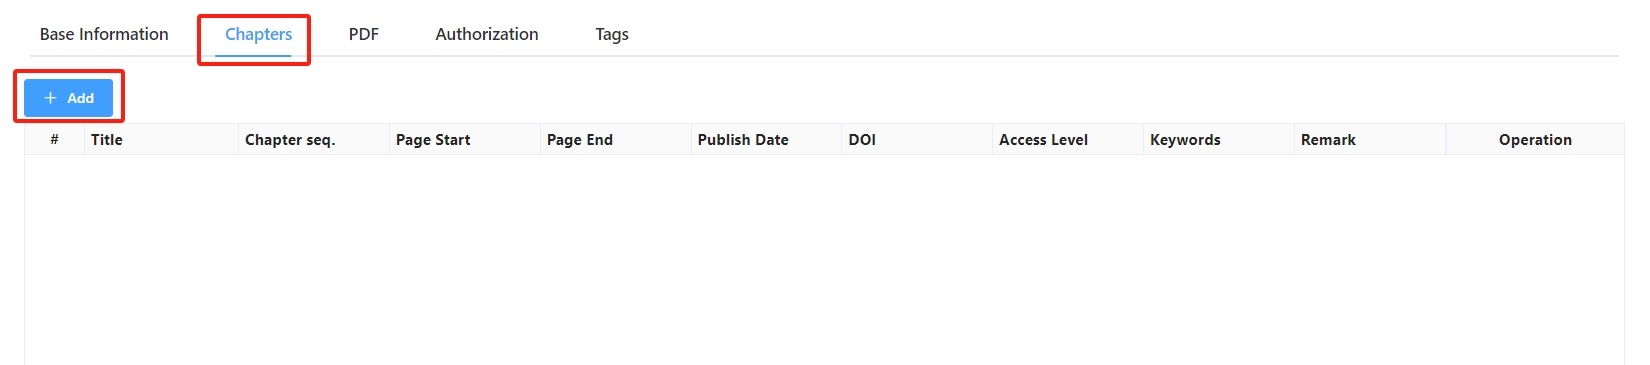
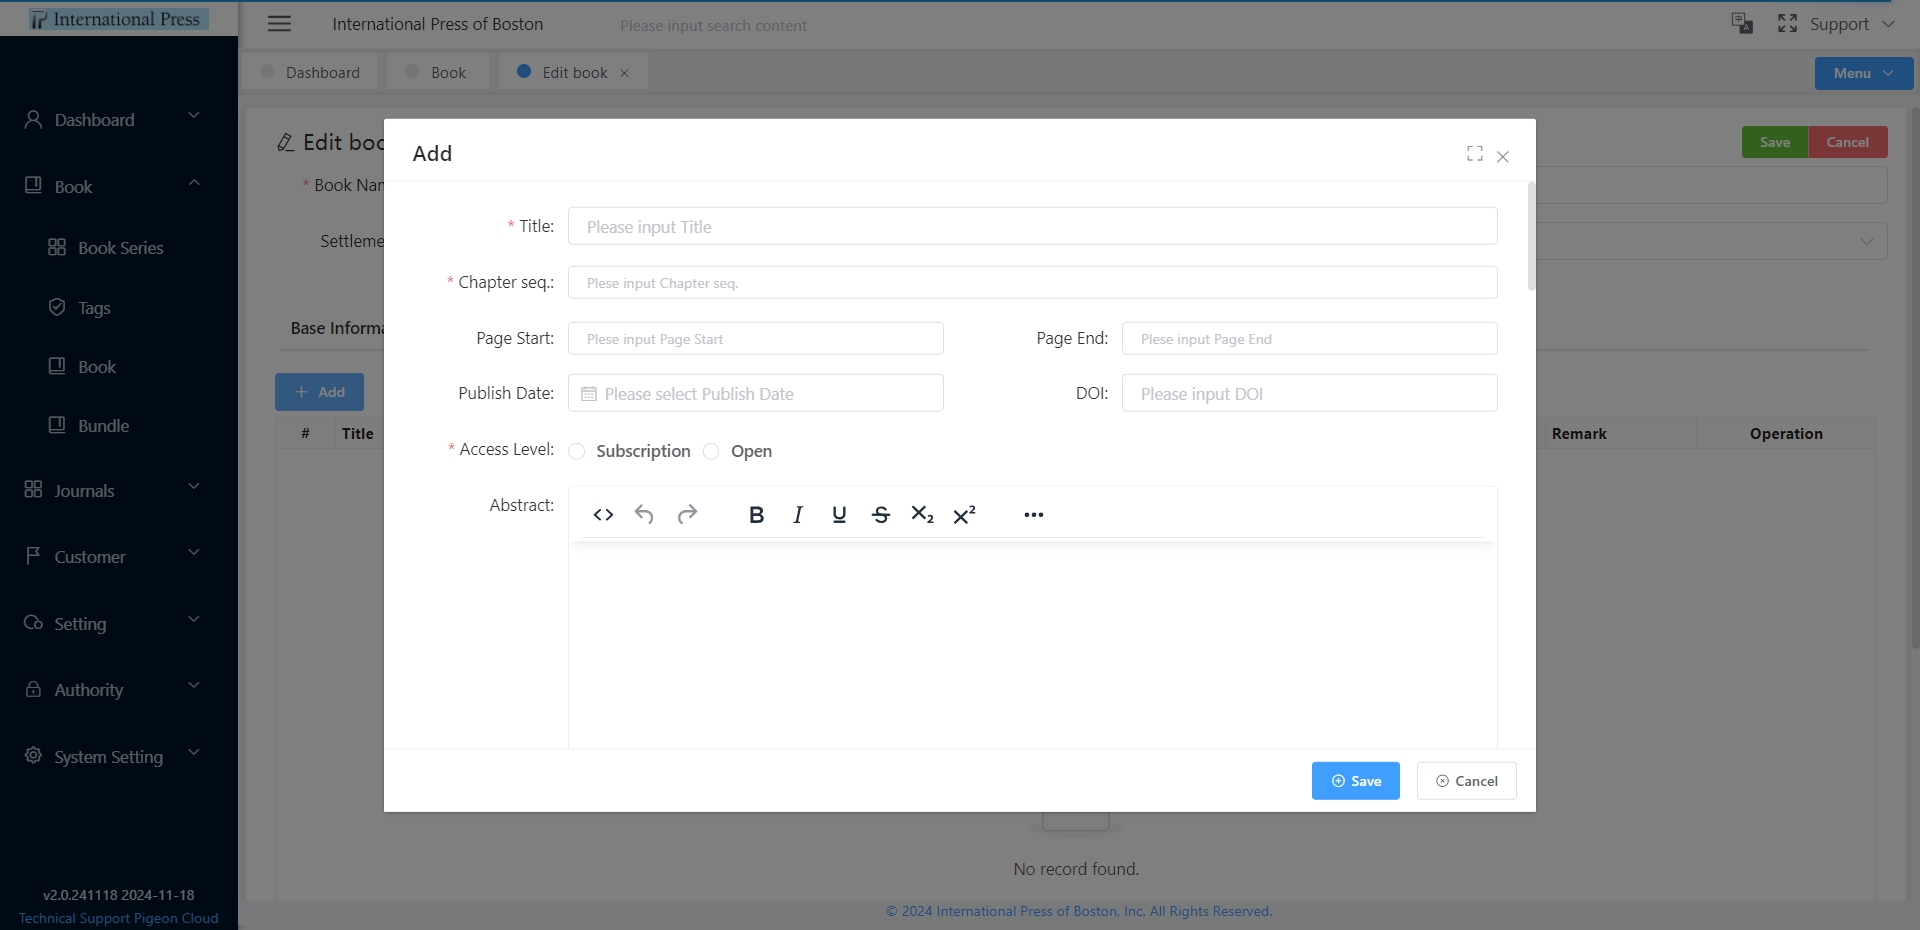
Maintain book chapter information
- Navigate to the Chapter Information tab to effortlessly manage your book's chapter details. Click the "Add" button to conveniently add new chapter information.
Maintain book PDF information
- Switch to the PDF management tab, maintain the table of contents PDF and content PDF, and ensure that these documents can be previewed when browsing books on the frontend.
Click the 'Add' button to easily upload a new PDF file.
Maintain book authorization information
- Access the "Authorization" tab to maintain the authorization details for the book. Click the 'Add' button to add authorized organization or personal information.

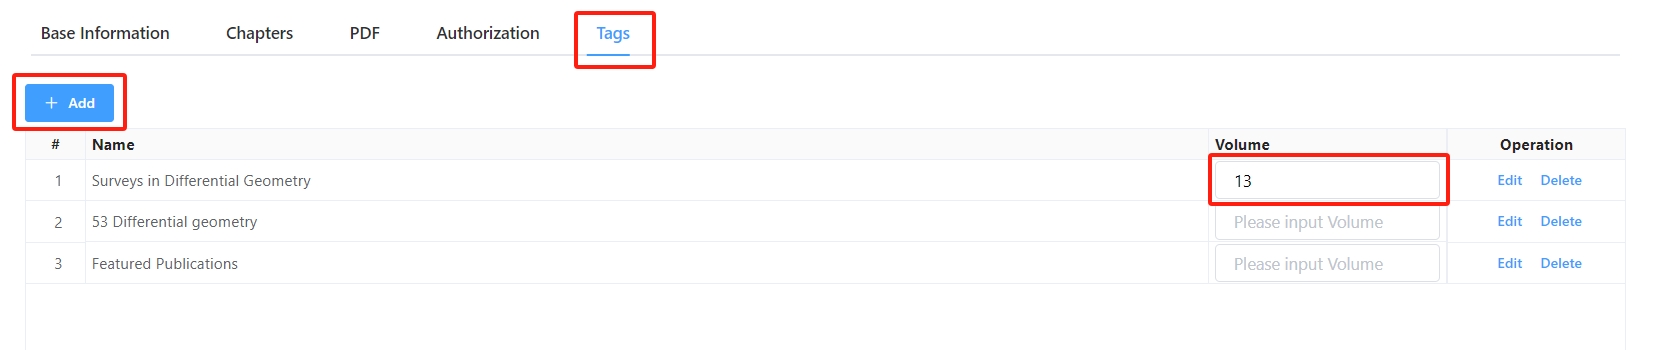
Maintain tags information for the book
- Switch to the "Tag" tab, manage book tags, and after publishing, users can quickly find the book under the corresponding tags in the front-end. If the book belongs to a series, please fill in the series number in the "Volume Number" column.
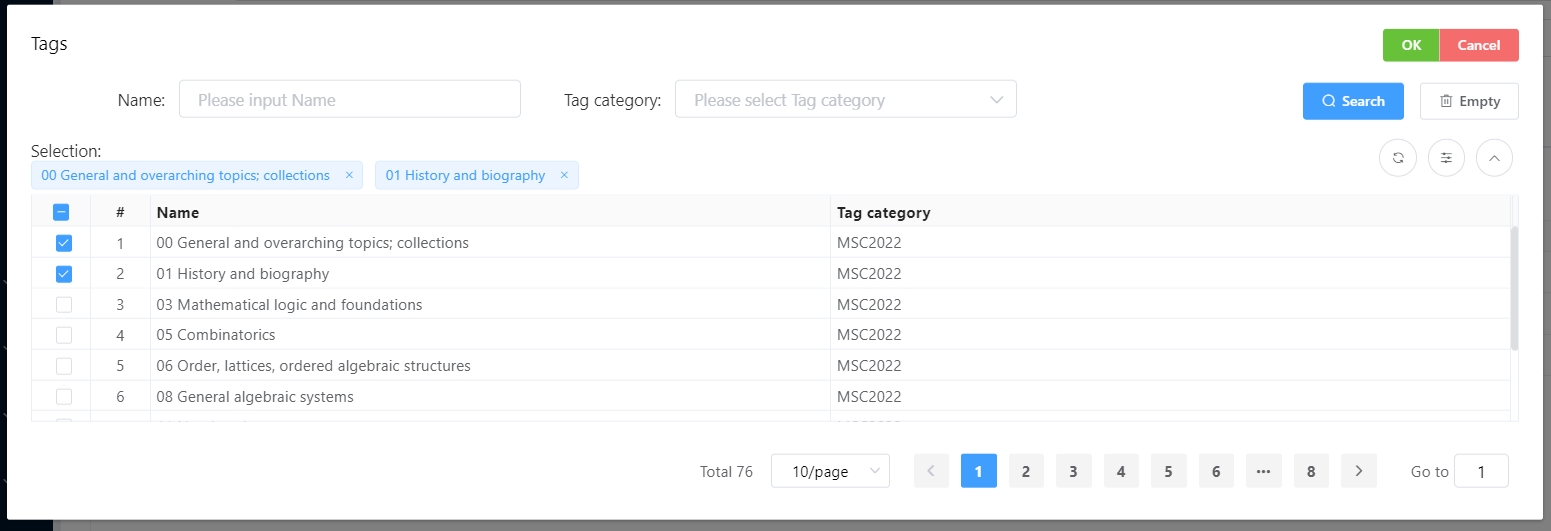
- Click the "Add" button, a tag selection box will pop up, check the tag you want to add, and click "OK" to successfully complete the tag addition.
Bundle Management
Bundle management involves the concept of an authorization package, where a single Bundle can contain multiple books, allowing for the simultaneous authorization of several books to the same customer (or individual), akin to a bundled sale in a supermarket, where a set is sold at once. The Bundles here are customizable, including the name of the Bundle and the combination of books it contains.
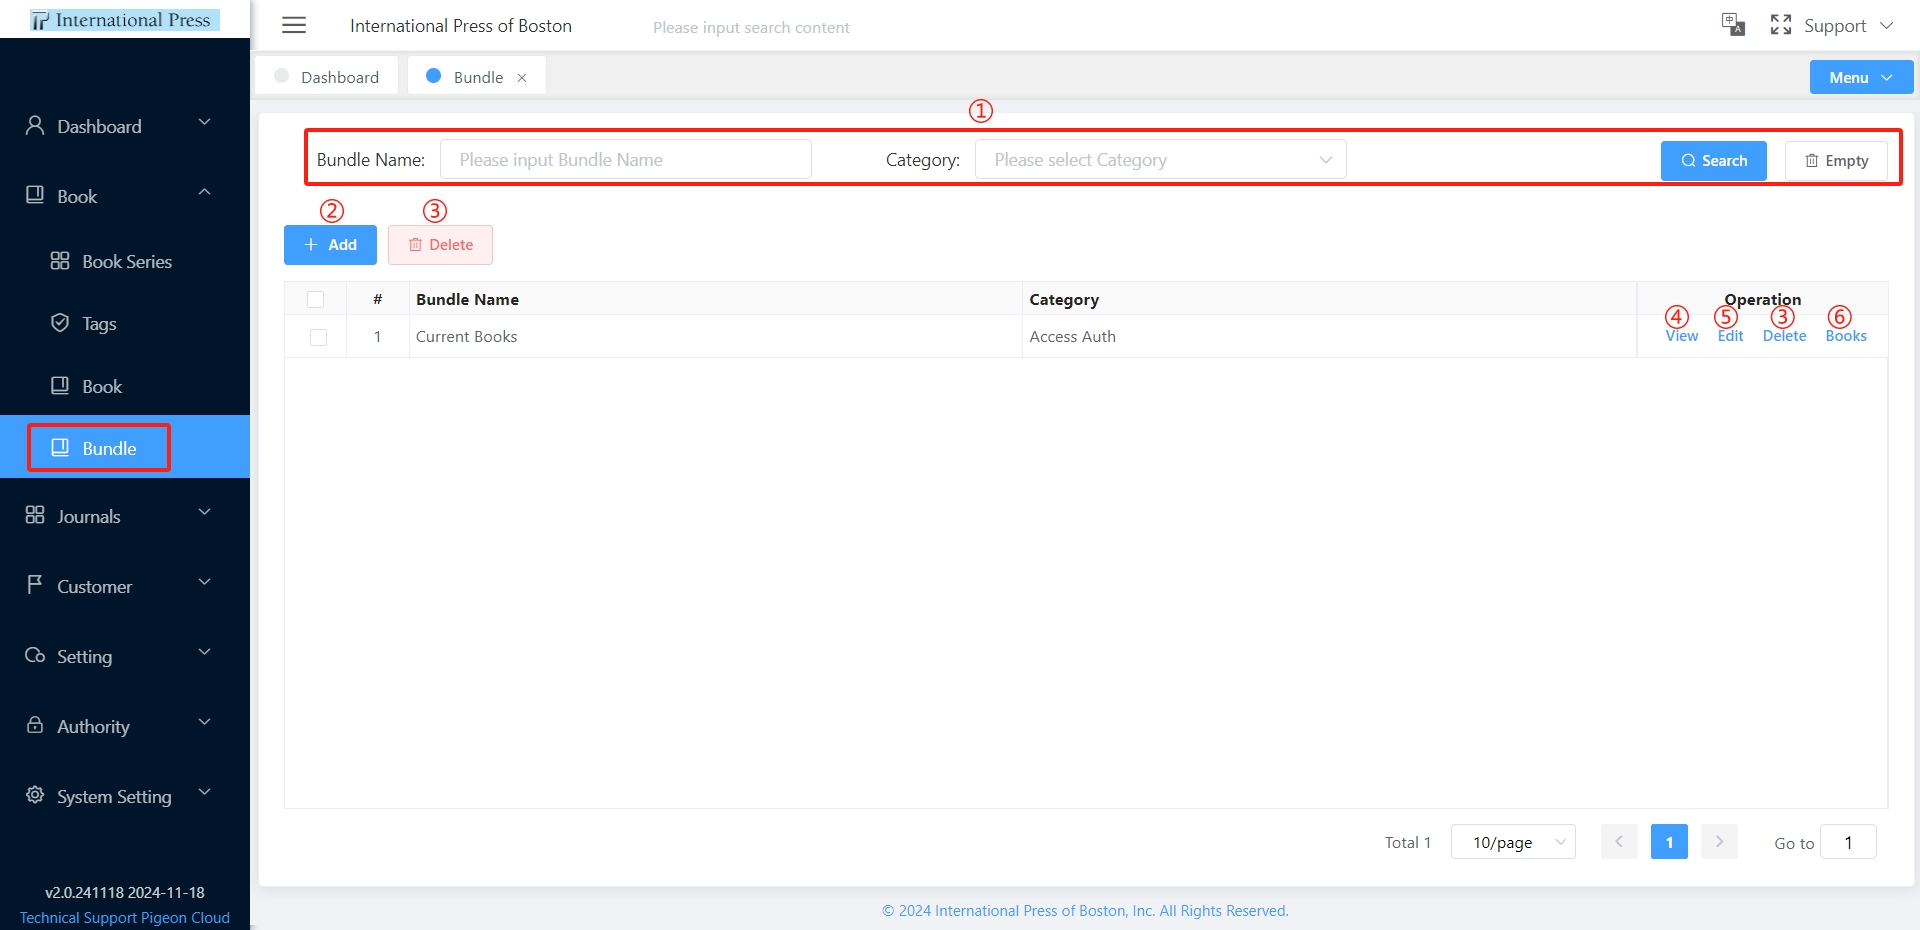
① Enter the filtering criteria in the Bundle list and click the 'Search' button to filter out the relevant Bundles and display the corresponding quantity in the list.
② Click the 'Add' button to create a new Bundle, which can then be selected for authorization maintenance in the management portal.
③ Select a row in the Bundle list and click the 'Delete' button for individual removal, or check multiple Bundles and use the 'Delete' button at the top of the list for bulk deletion. After deletion, these Bundles will no longer be visible in the list and cannot be chosen during authorization in the management portal.
④ Choose a row in the Bundle list and click the 'View' button to quickly review the detailed information of the selected Bundle.
⑤ To modify a Bundle, select the corresponding row and click the 'Edit' button for real-time data modification and update.
⑥ In the Bundle list, select a row and click the 'Books' button to view and manage the details of the books within the Bundle.
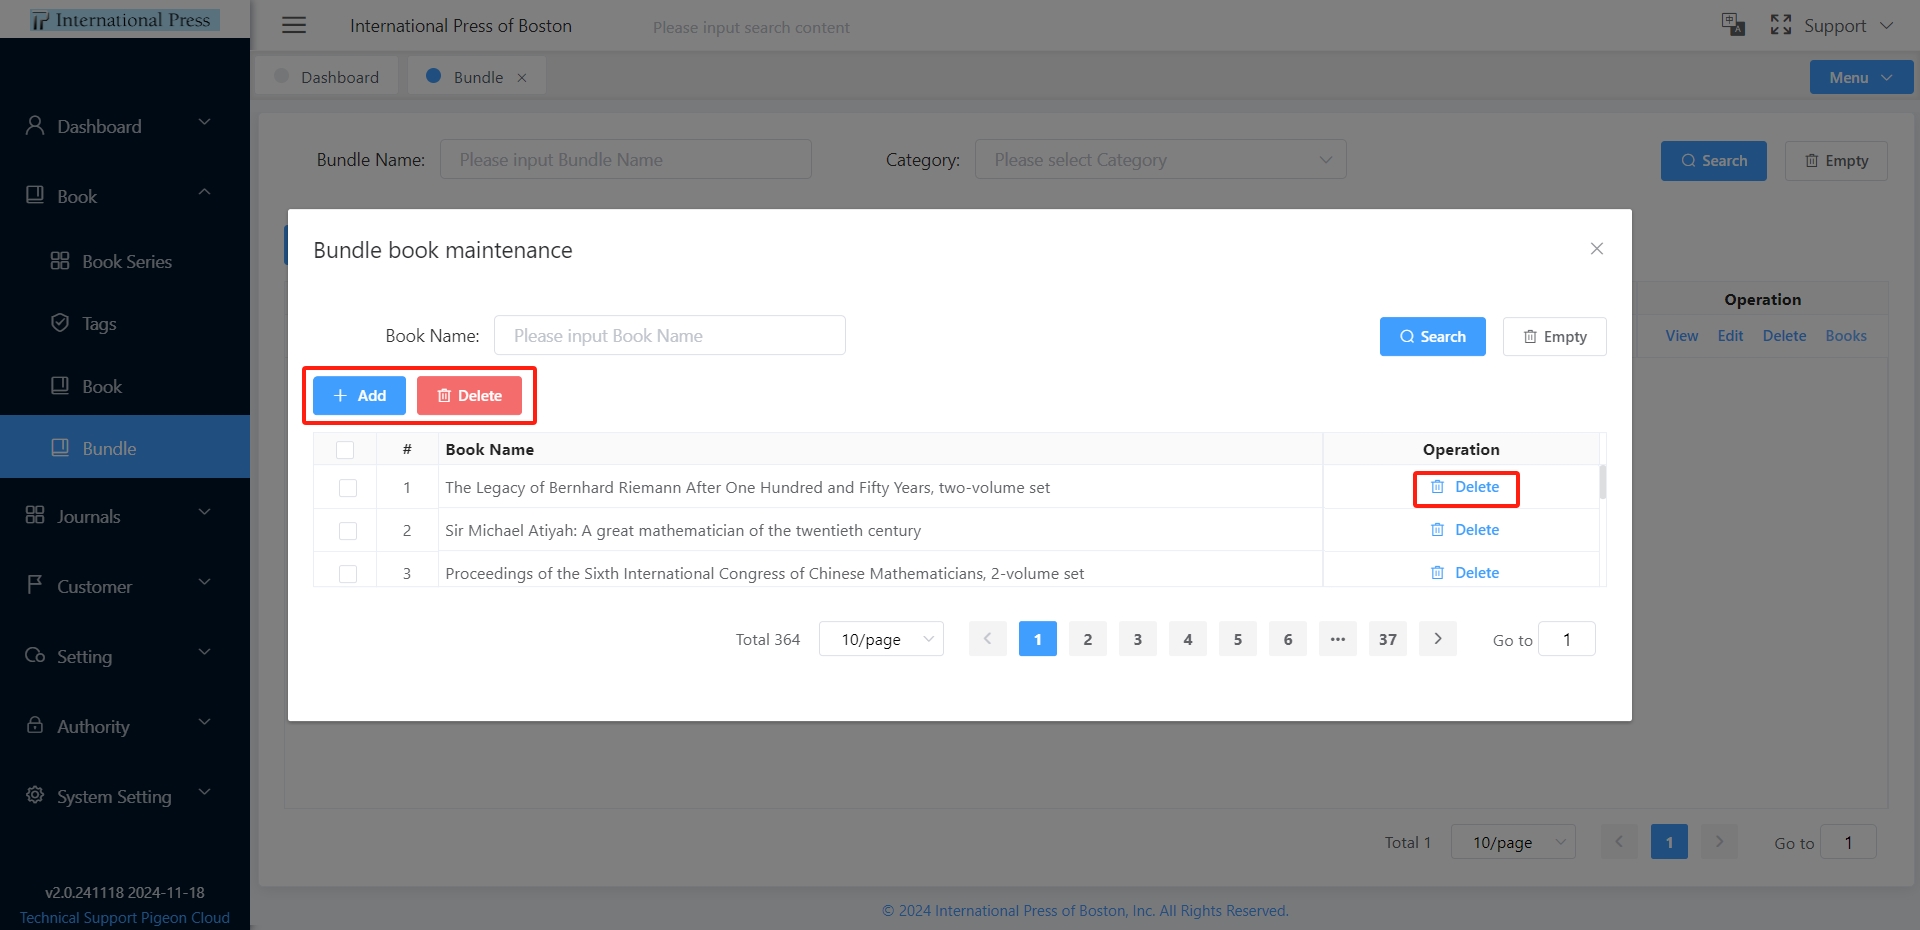 In the book maintenance popup, select a row and click the 'Delete' button to remove a single book, or check multiple books and use the 'Delete' button at the top of the list for bulk deletion. This action will remove the books from the Bundle.
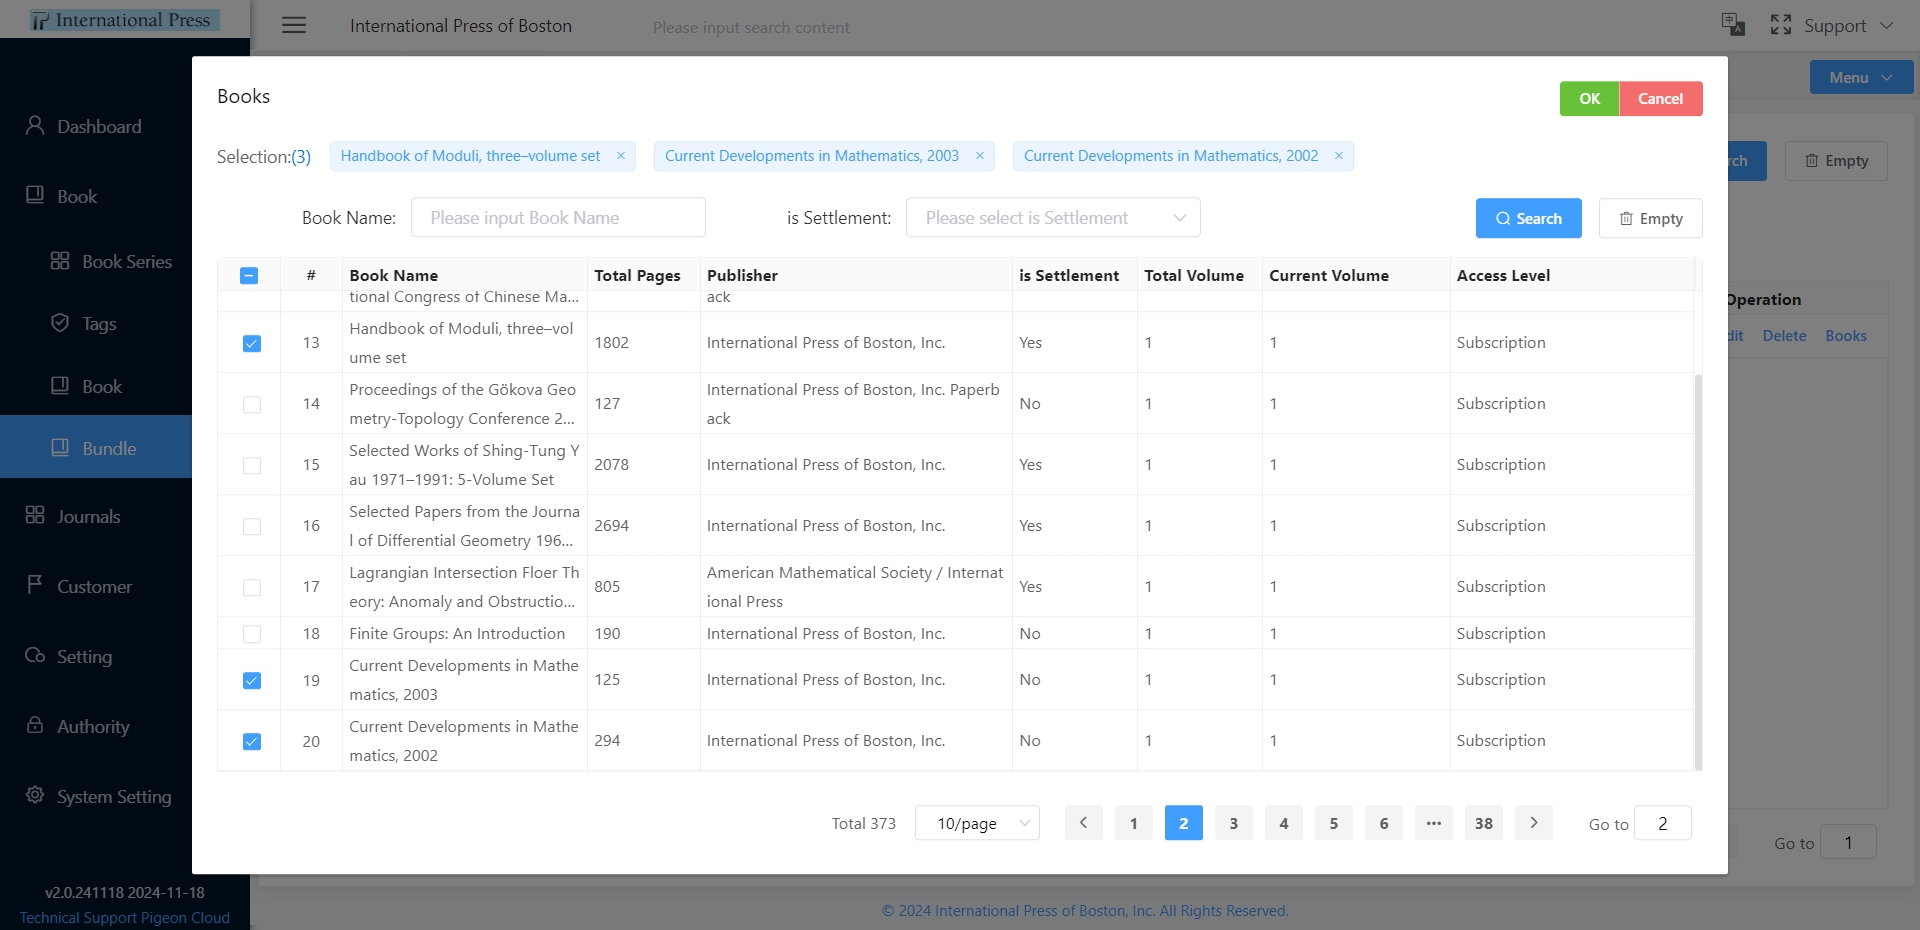 Click the 'Add' button to open the book list popup, check the books you want to add to the Bundle, and click 'OK' to complete the addition. After adding, the "package" can be selected during authorization maintenance in the management portal, allowing for the purchase of all books within the package at once.