Role Management
In the role definition interface, we can define various system roles, and each role's permission menu is differentiated through configuration. This allows us to assign different role menus to different individuals, thereby achieving differentiated management and collaboration.

① Enter the role list, input filtering conditions and click on the "Search" button to filter out roles that meet your criteria. To reset, simply click on the "Empty" button to remove all search conditions with one click.
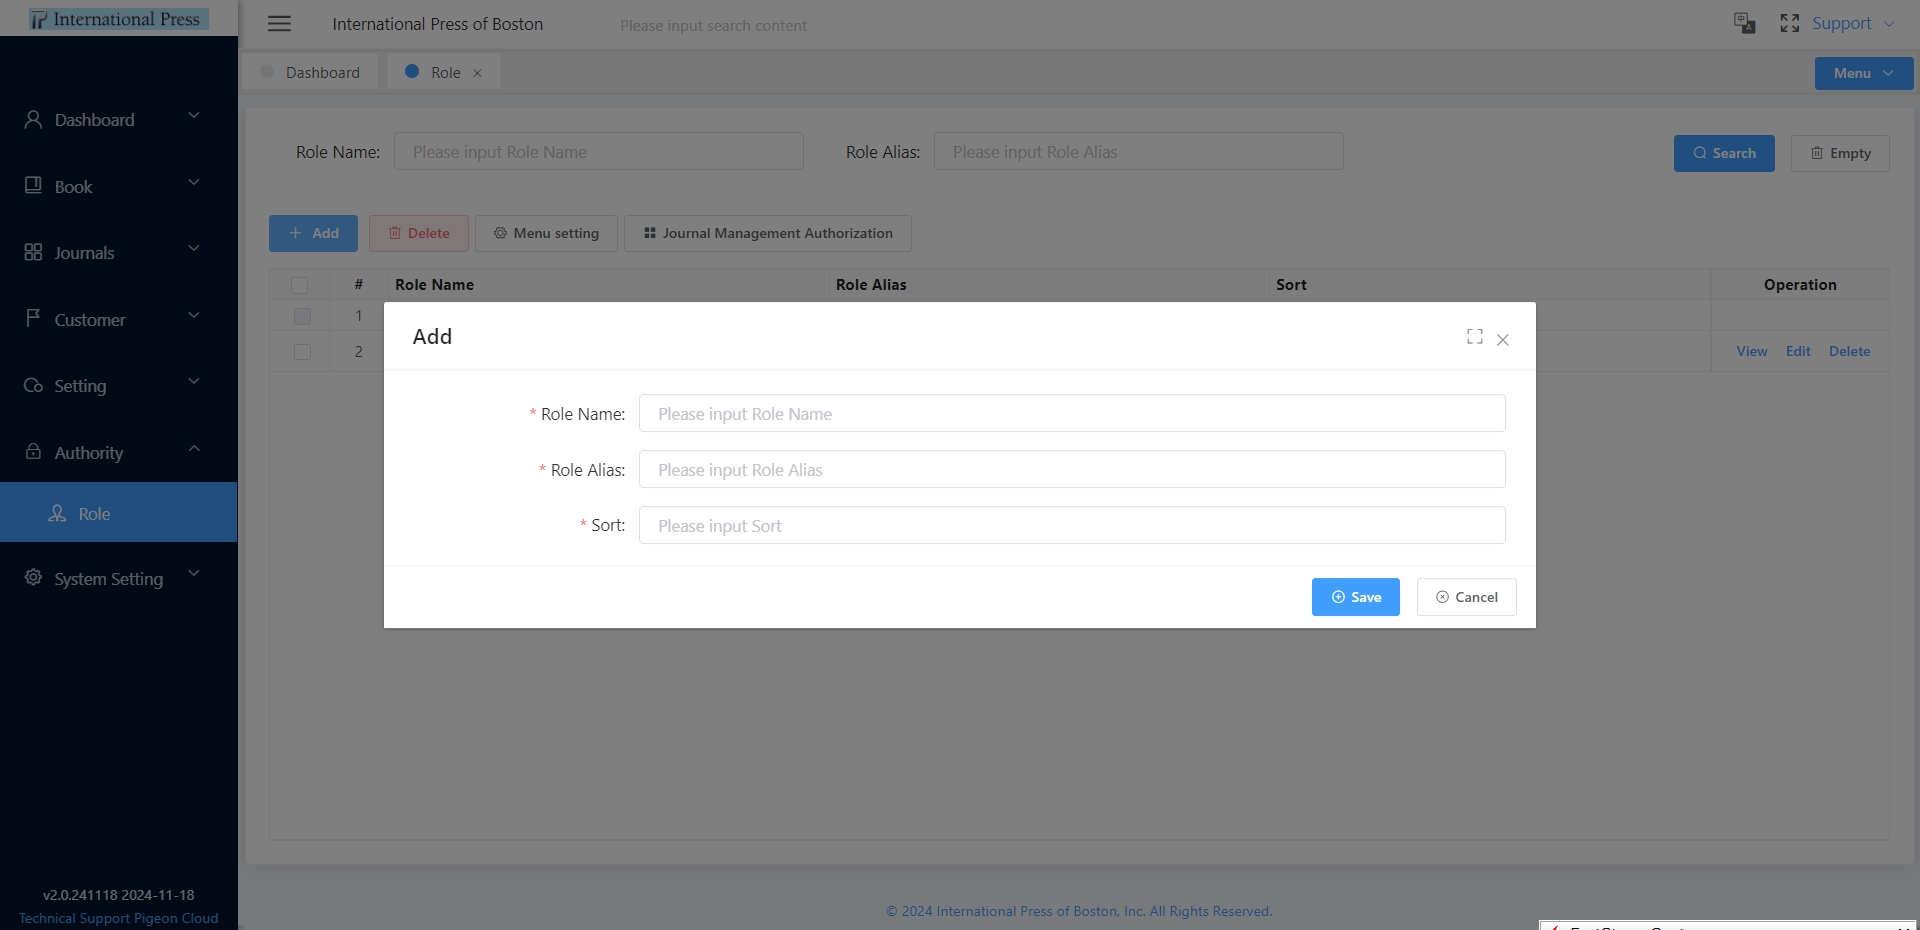
② If there are no suitable roles available, you can click on the "Add" button to create a new role for use. Once added successfully, allocate role permissions to users in the "User" module.
 ③ You can select multiple roles and perform batch operations using the "Delete" button at the top of the list. After deletion, these roles will no longer be displayed in the list or selectable when assigning roles in user management.
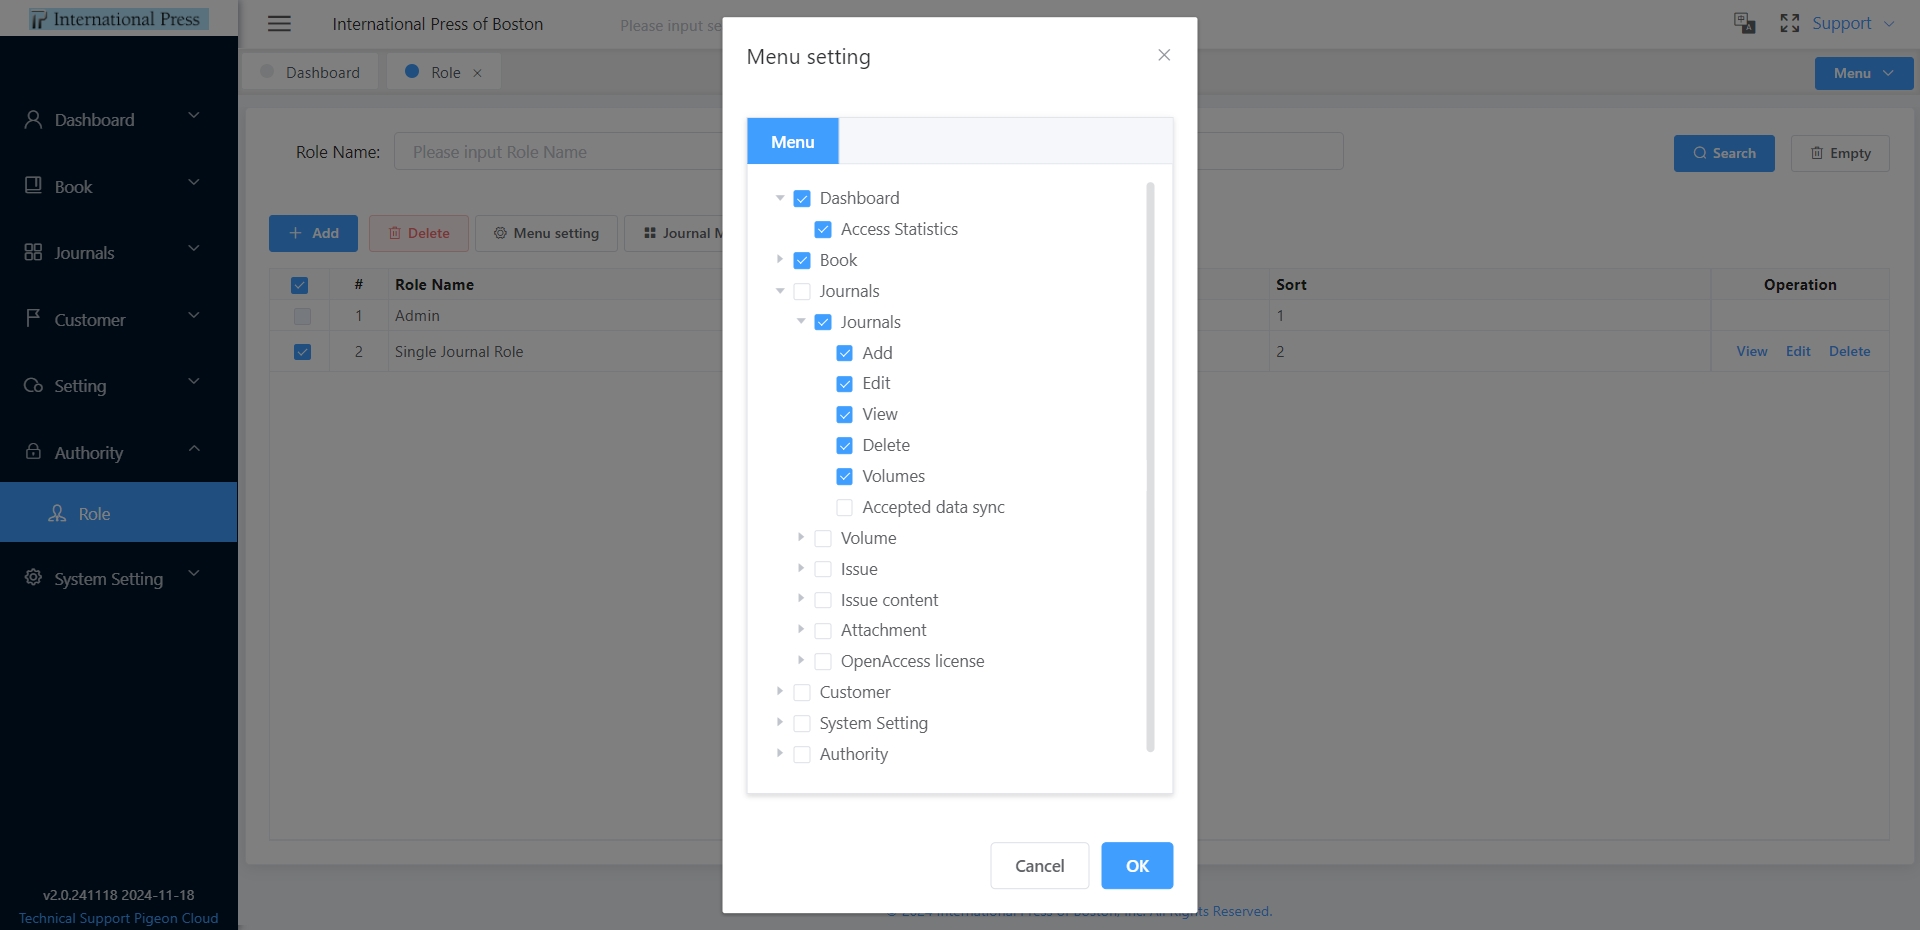
④ Select a role in the "Role" module and click on the "Menu Setting" button to configure the permissions for related interface menus and buttons.
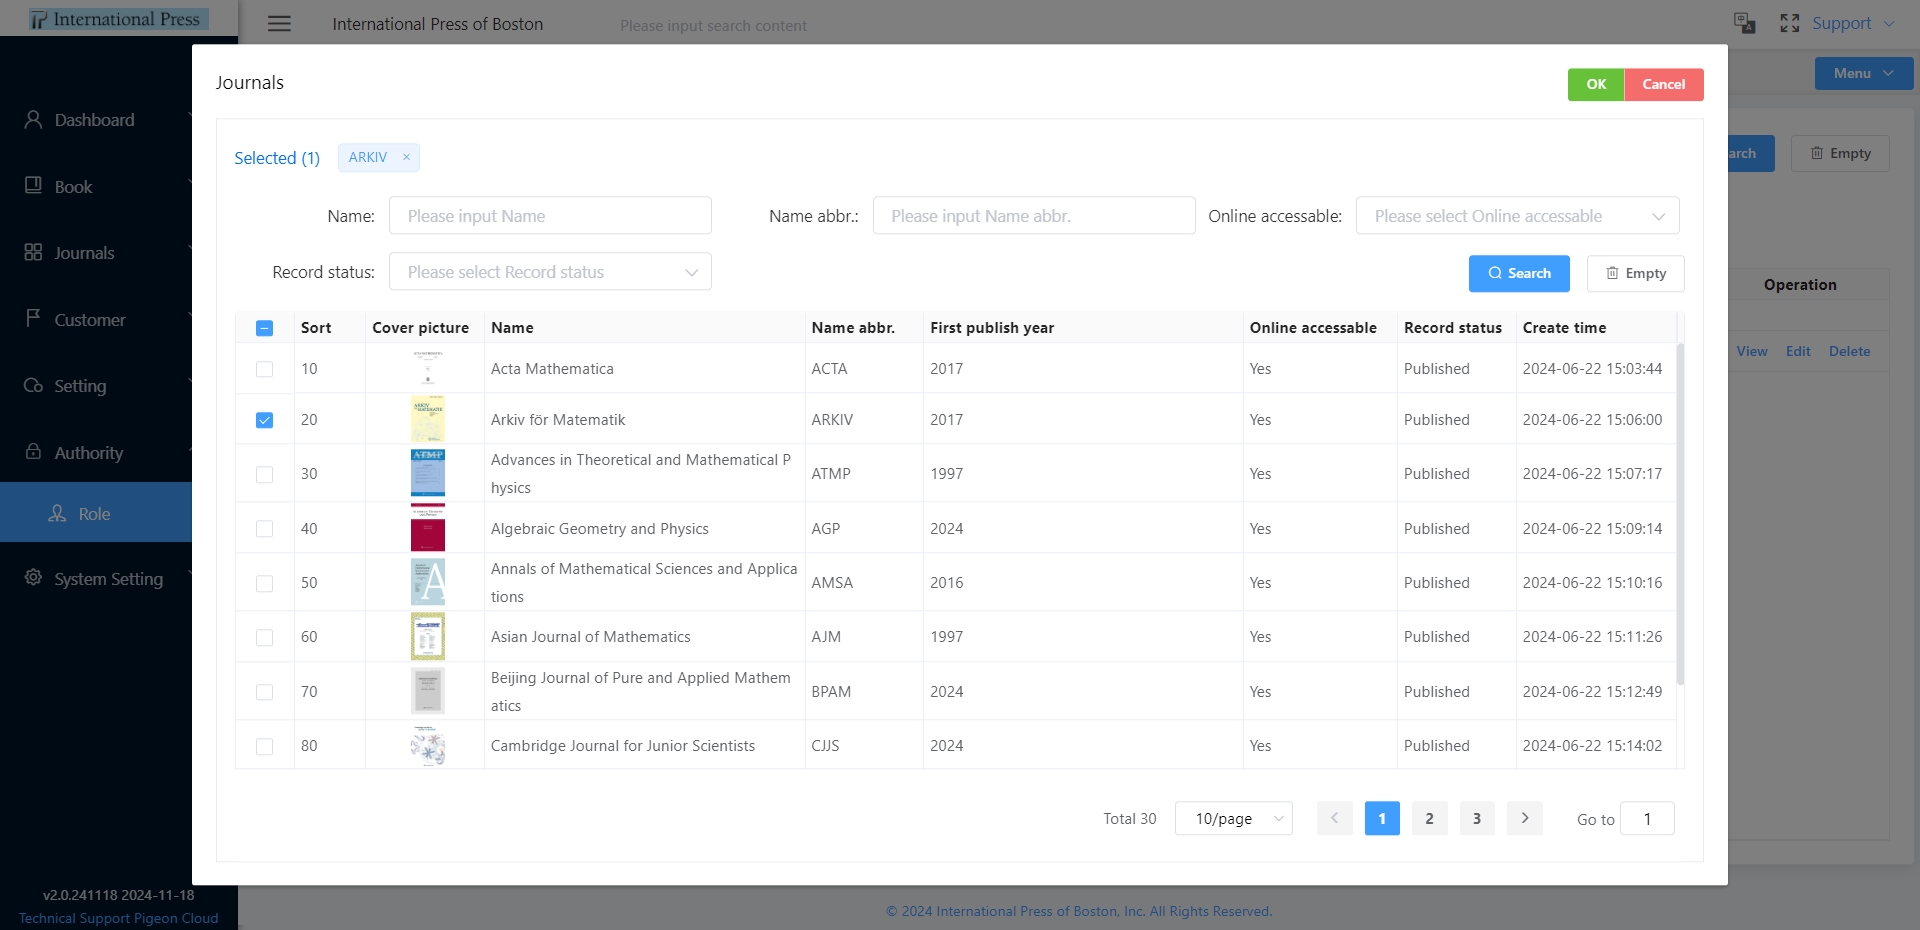
 ⑤ Choose a role in the "Role" module and click on the "Journal Management Authorization" button to set up journal-related permissions.
 ⑥ Quickly view detailed information about a role by selecting a specific row in the role list and clicking on the "View" button.
⑦ For roles that require modification, click on the "Edit" button to make changes.
⑧ In the role list, click on the "Delete" button to delete it individually.