Journals Management
Journals
After logging into the backend management page, administrators can perform journal management operations under the journal directory.
 Here is the content with circle numbers:
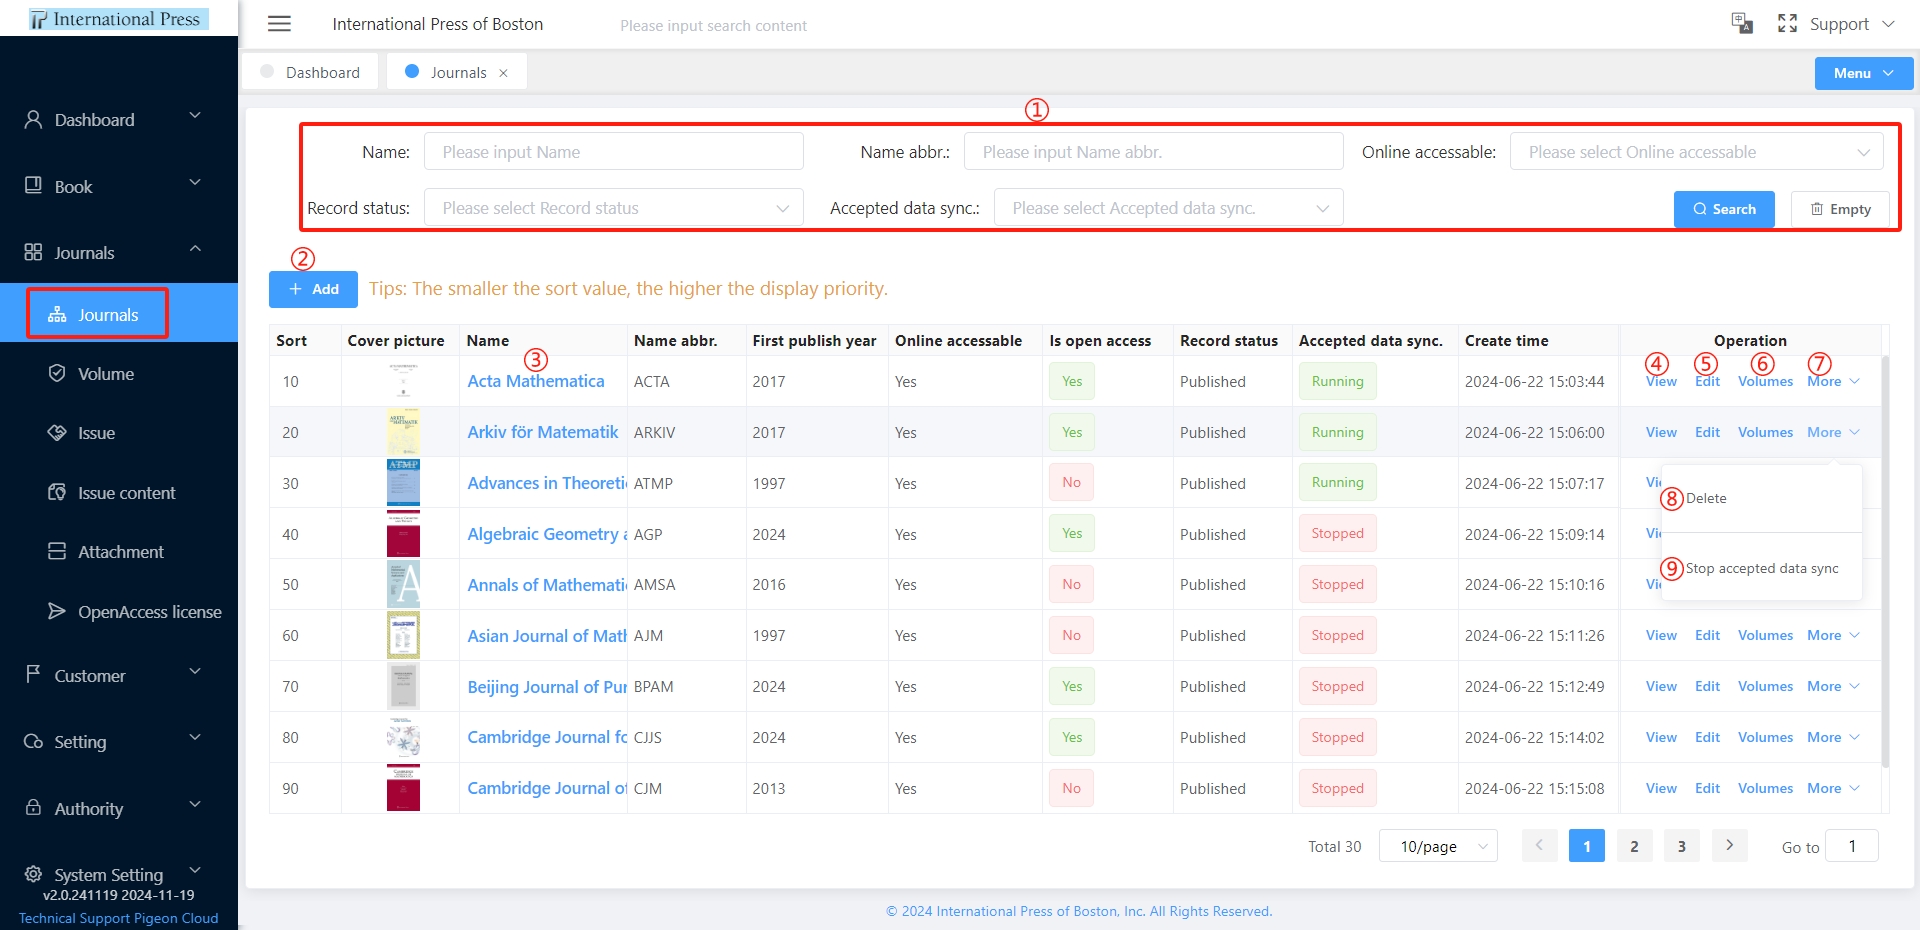
① Utilize the journal filtering feature, enter keywords, and click on the "Search" button to quickly find the desired content; to reset the filters, click the "Empty" button to remove all search criteria in one go.
Here is the content with circle numbers:
① Utilize the journal filtering feature, enter keywords, and click on the "Search" button to quickly find the desired content; to reset the filters, click the "Empty" button to remove all search criteria in one go.
② Click the "Add" button to immediately navigate to the page for adding a new journal.
③ Click directly on the journal name in the list to view the detailed information of the journal instantly.
④ Select the "View" button in the journal row to quickly browse the detailed information of the journal.
⑤ Click the "Edit" button in the journal row to modify the journal's information.
⑥ Choose the "Volumes" button in the journal row to view all issue data for the journal.
⑦ Hover over the "More" button to expand additional operation options.
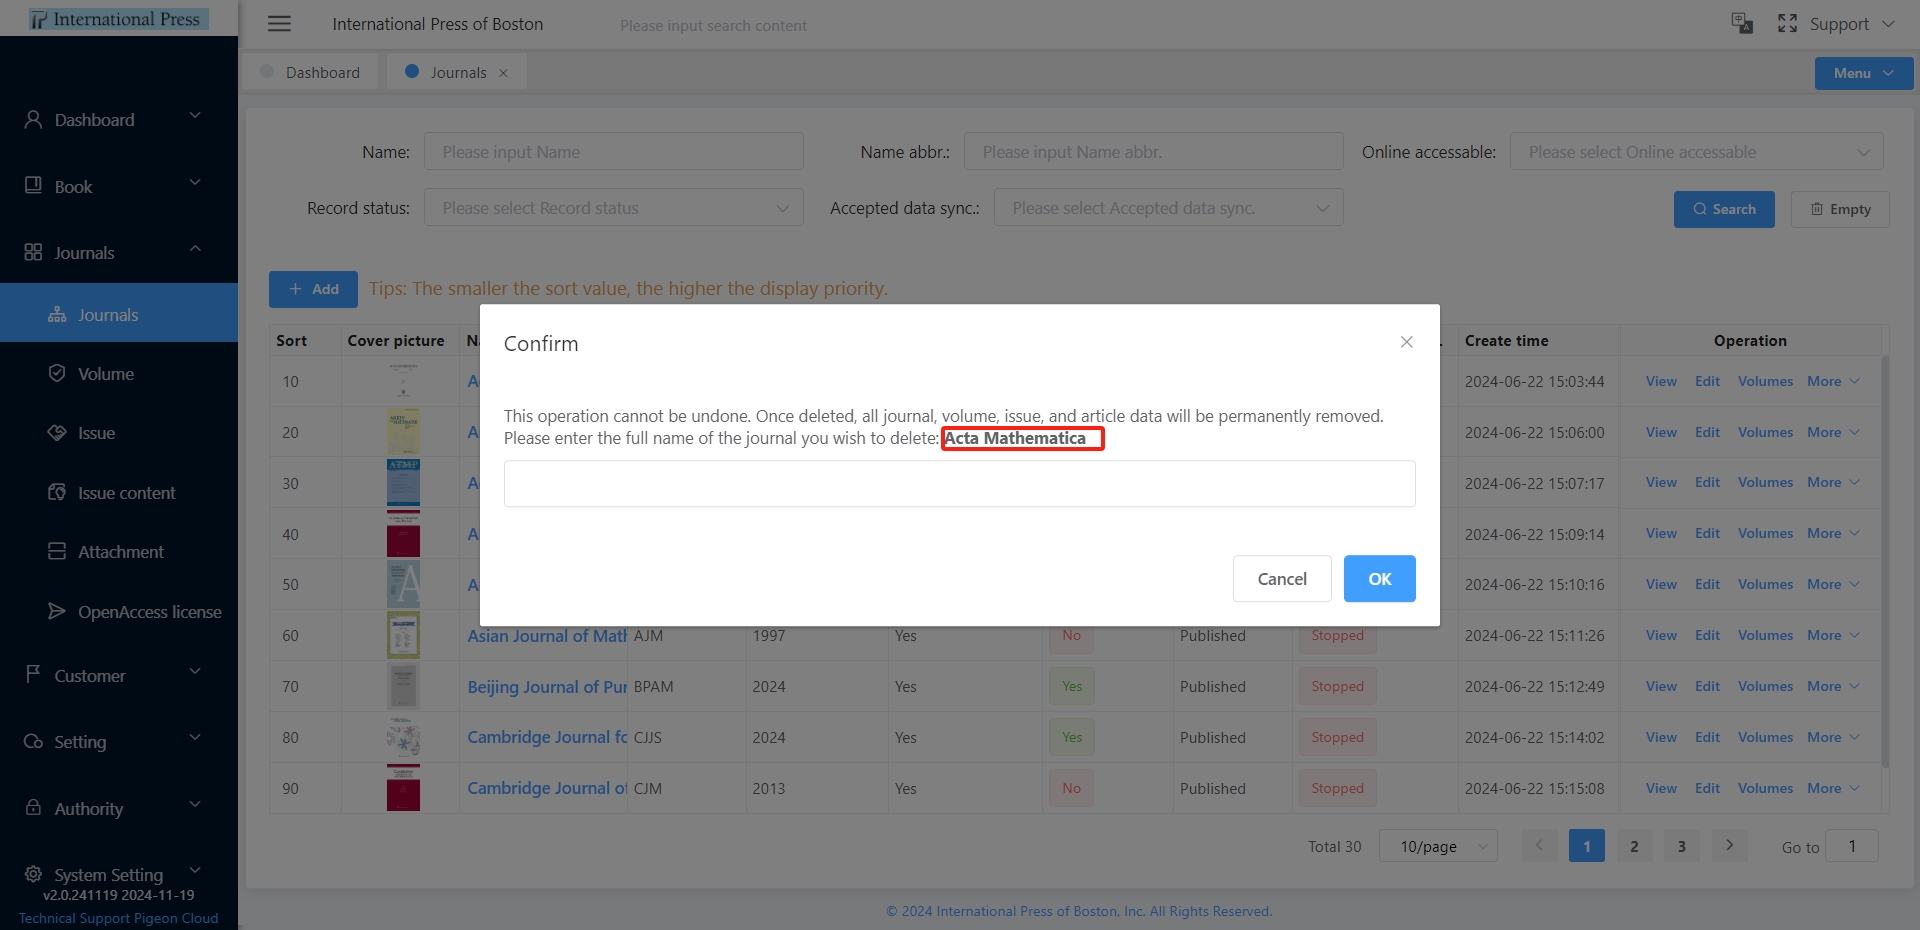
⑧ Click the "Delete" button to remove the journal record.
To prevent accidental deletion of journals, it is necessary to output the full name of the journal before deleting it.
 ⑨ Click on "Stop accepted data sync" to pause the synchronization of the accepted list, which can be restarted at any time.
Click on "Start accepted data sync" to initiate the synchronization of the accepted list, with the journal's accepted list data being sourced from Editflow.
⑨ Click on "Stop accepted data sync" to pause the synchronization of the accepted list, which can be restarted at any time.
Click on "Start accepted data sync" to initiate the synchronization of the accepted list, with the journal's accepted list data being sourced from Editflow.
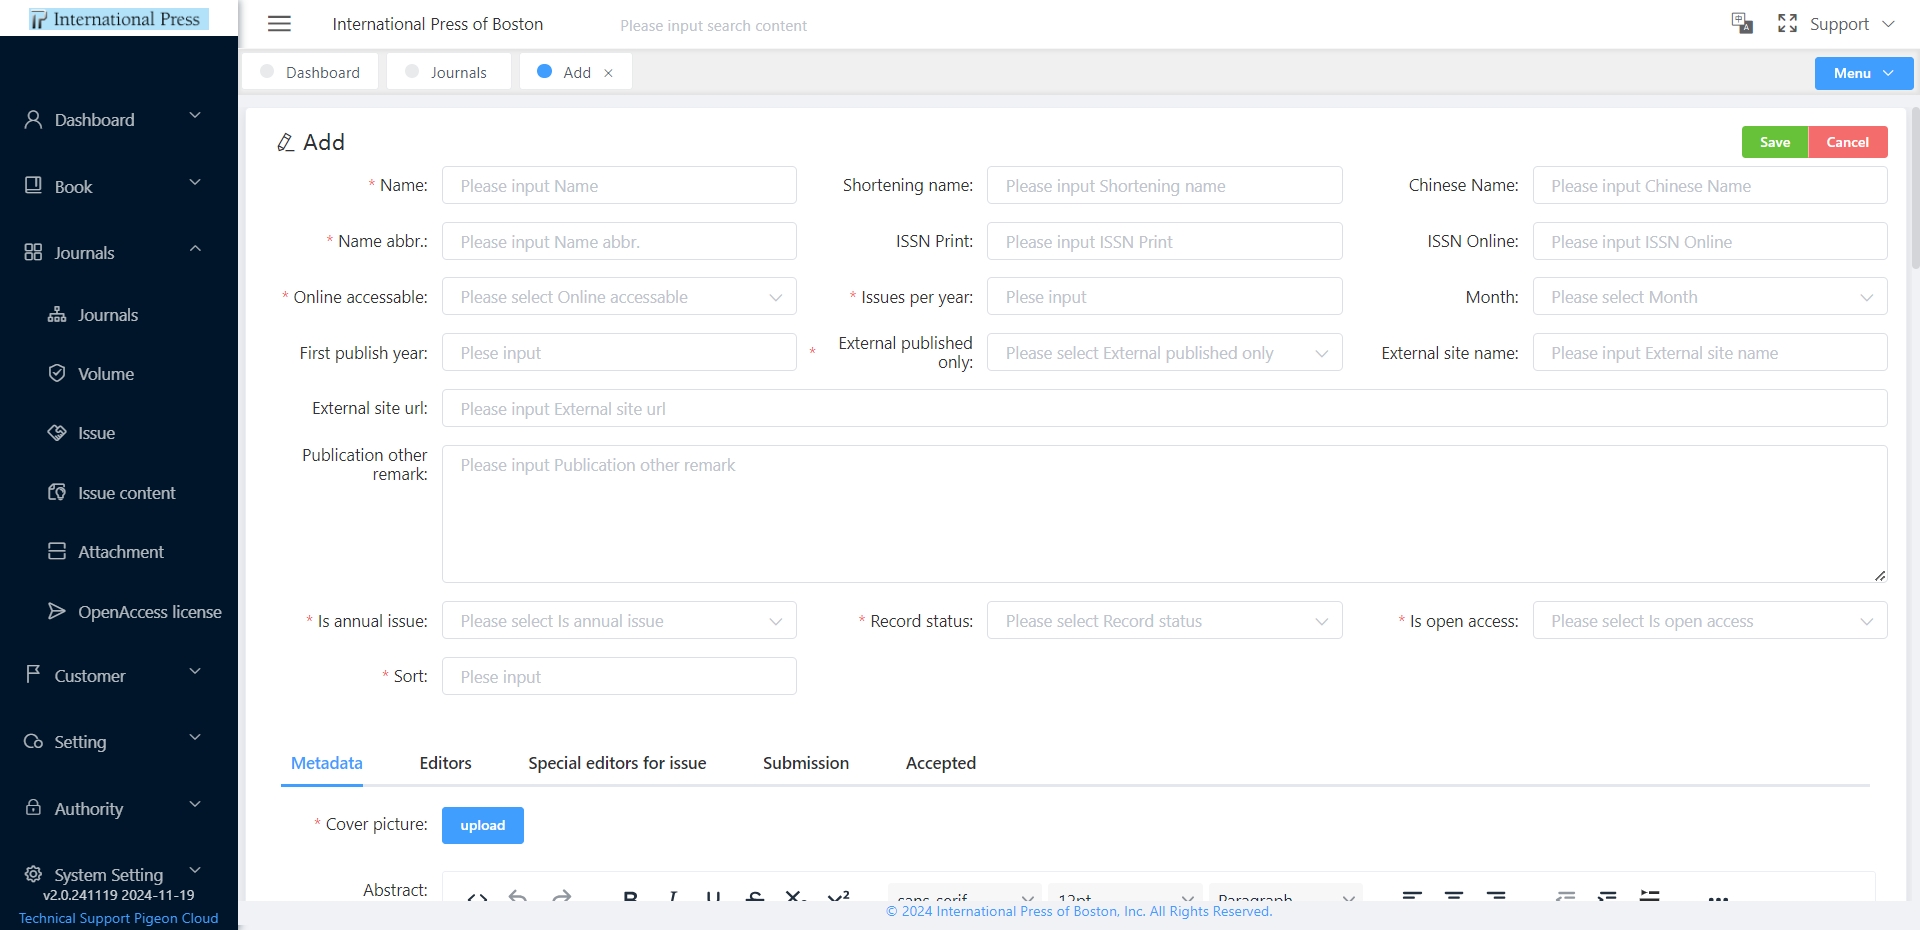
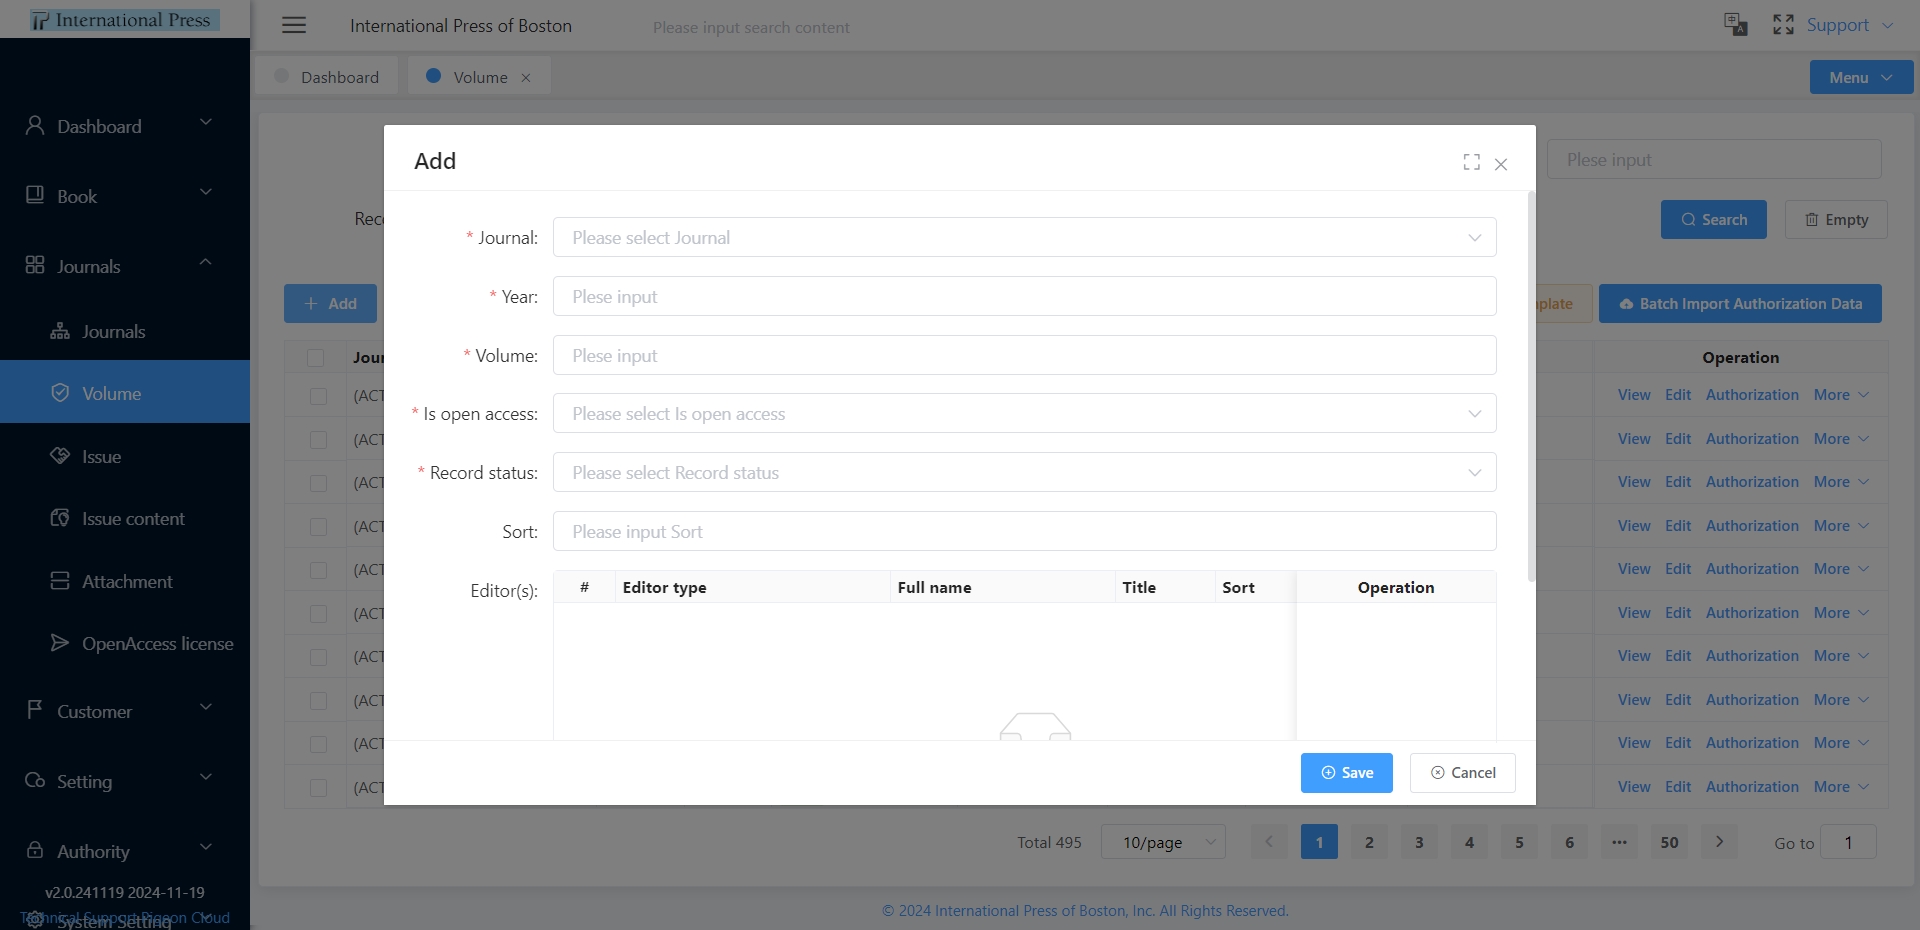
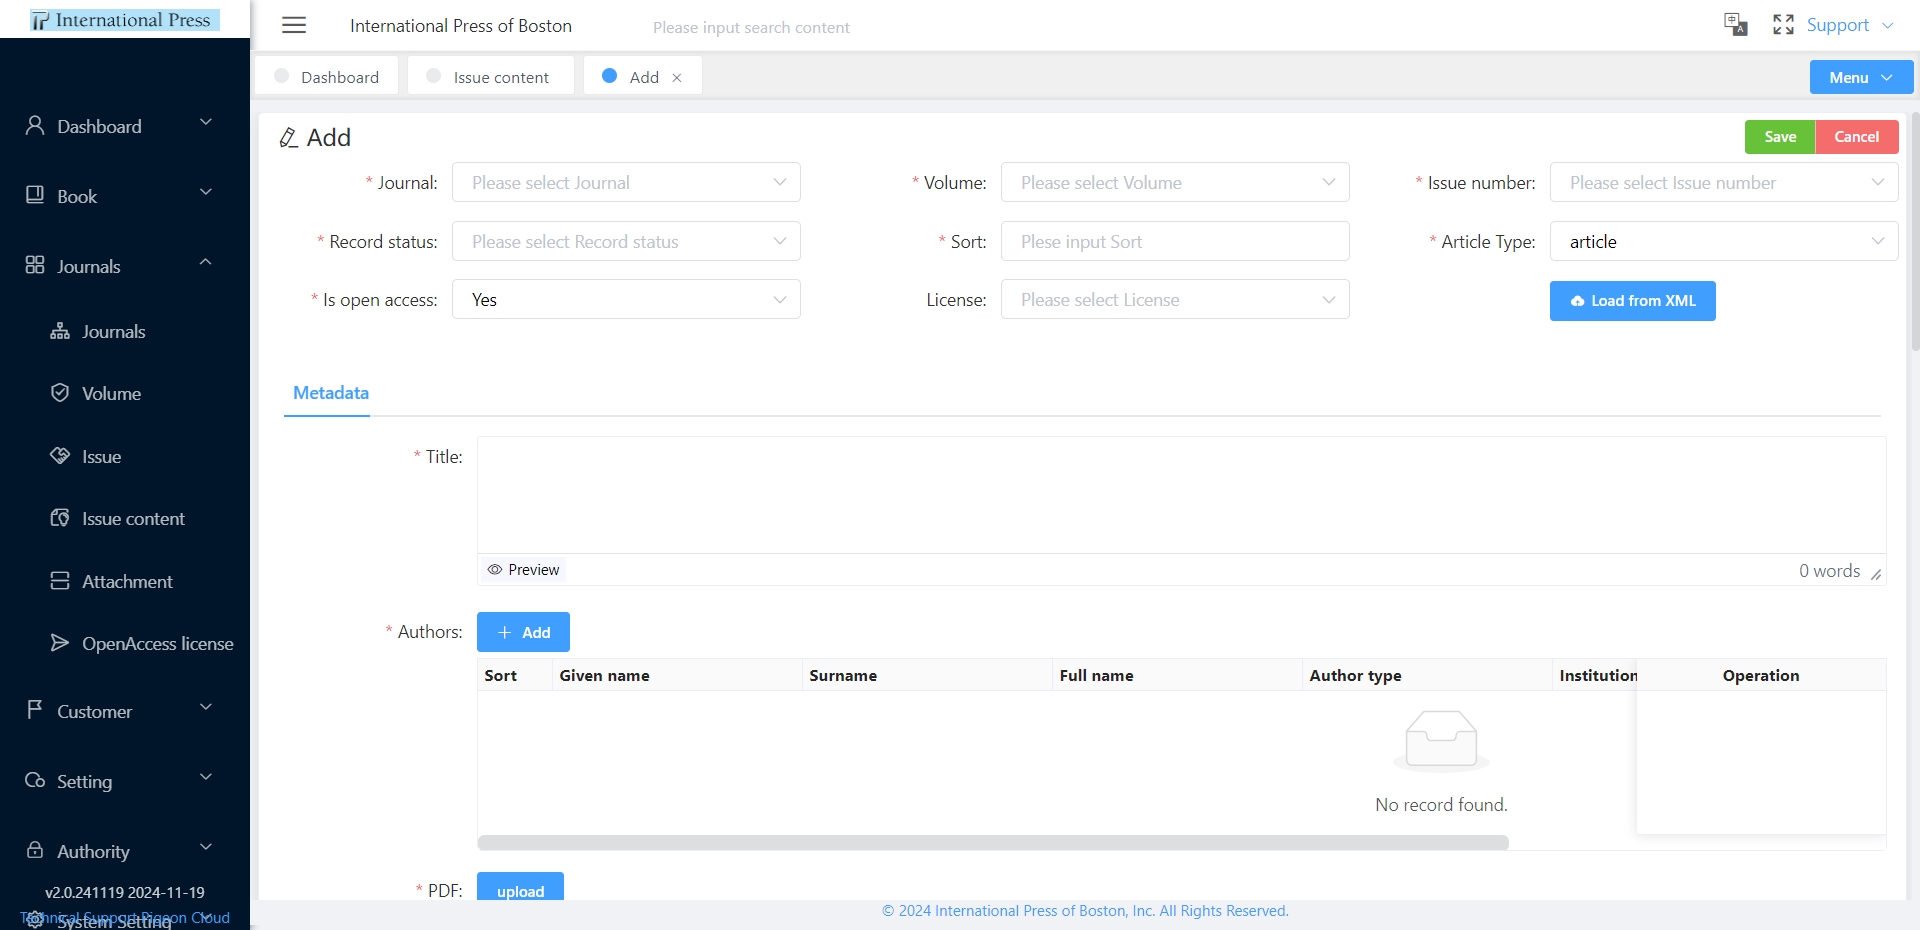
Add Journal
When creating a journal, we need to fill in the journal's information to complete the initialization process. This process requires filling in a significant amount of content, so it is advisable to prepare according to the form content in advance. If you cannot complete the form in one go, you can save it as a draft. Please note that after filling out the form, be sure to click the save button in the upper right corner; otherwise, your entries will be lost when you close the page. For mandatory fields(The items marked with an asterisk (*) are required fields.), you can initially fill in placeholders and complete them later once you have confirmed the details.
 【Record State descriptions】:
- Draft State: This journal is currently in draft mode and is not visible to readers. Access to view this journal is restricted.
- Pending State: The journal is awaiting approval and is not yet accessible for viewing. Readers cannot see this journal at this time.
- Published State: This journal has been published and is now available for readers to view. Enjoy exploring the journal's content.
【Is open access】: Select 'Yes' to confirm that this journal is an open access publication, guaranteeing global readers unrestricted access to scholarly research.
When creating a new journal, we need to fill in the content corresponding to each tab, encompassing Metadata, Editors,Special editors for issue, Submission, and Accepted.
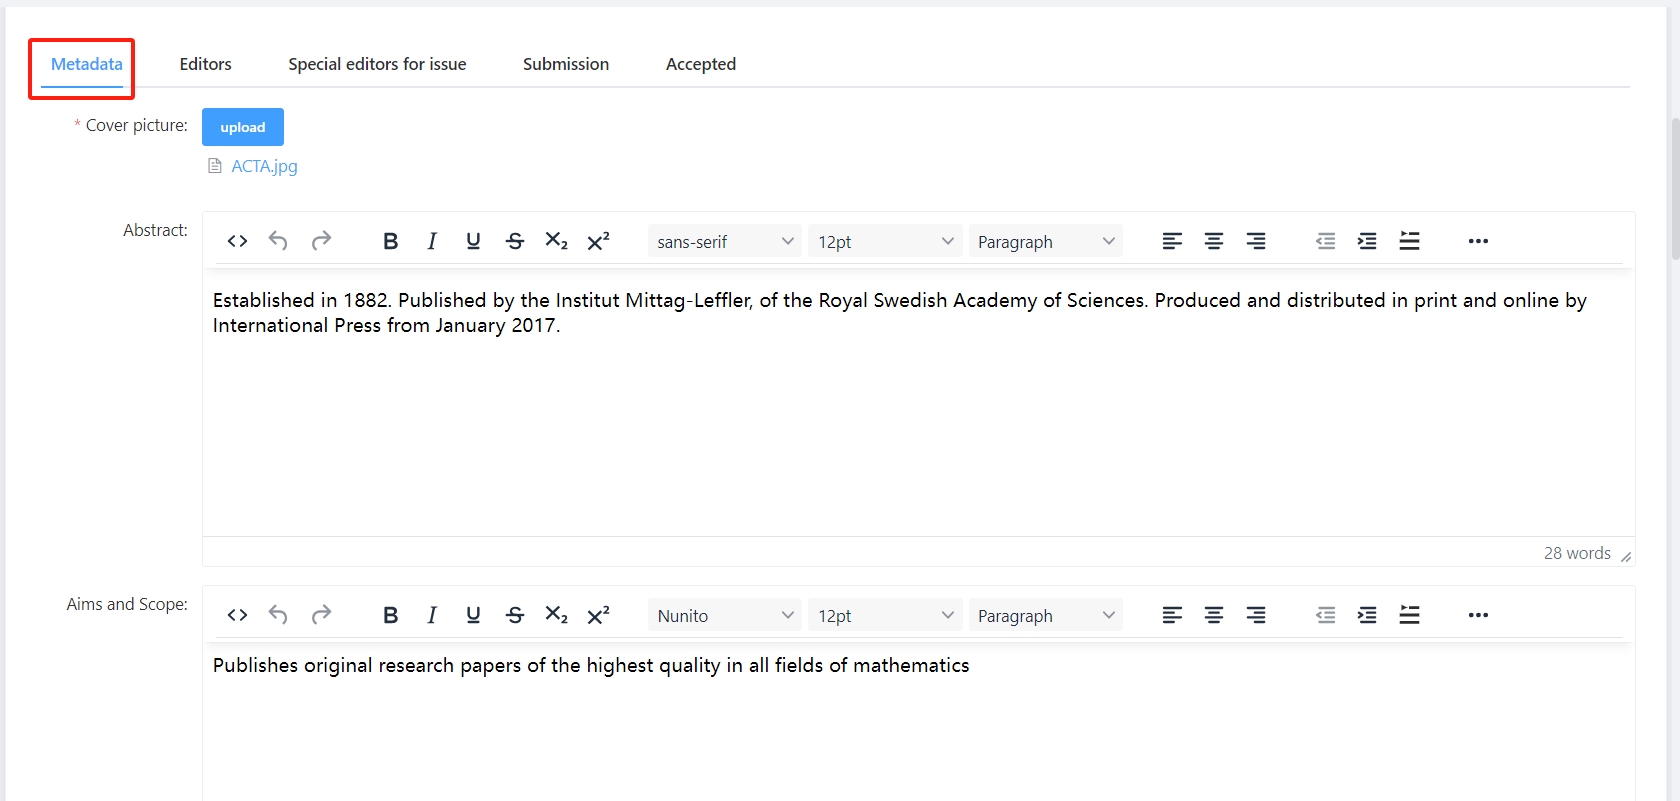
Metadata
- In the Metadata tab, you need to upload the journal's Cover picture and fill in information such as Abstract, Aims and Scope, Introduction, Indexed By, Reviewed By, Sponsorship, and Special Notices, etc.
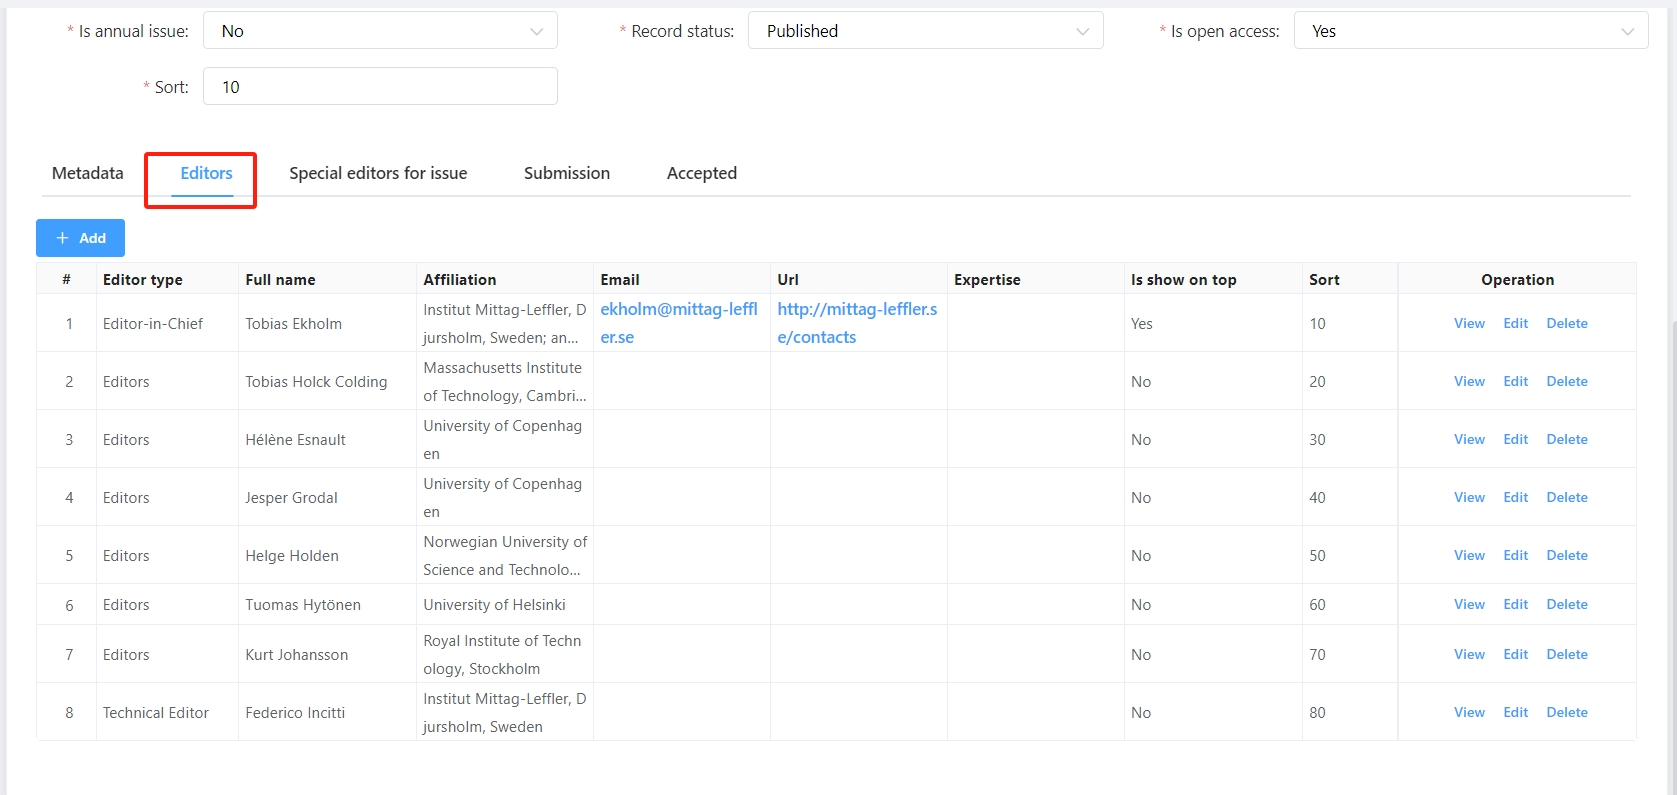
Editors
- In the Editors tab, maintain the personal information of the editor, including name, profile, etc., to enhance the professionalism and credibility of the journal.
Special editors for issue
- Within the 'Special Editors for Issue' tab, carefully update the personal details of each editor, such as their name and professional profile, to bolster the journal's expertise and credibility.

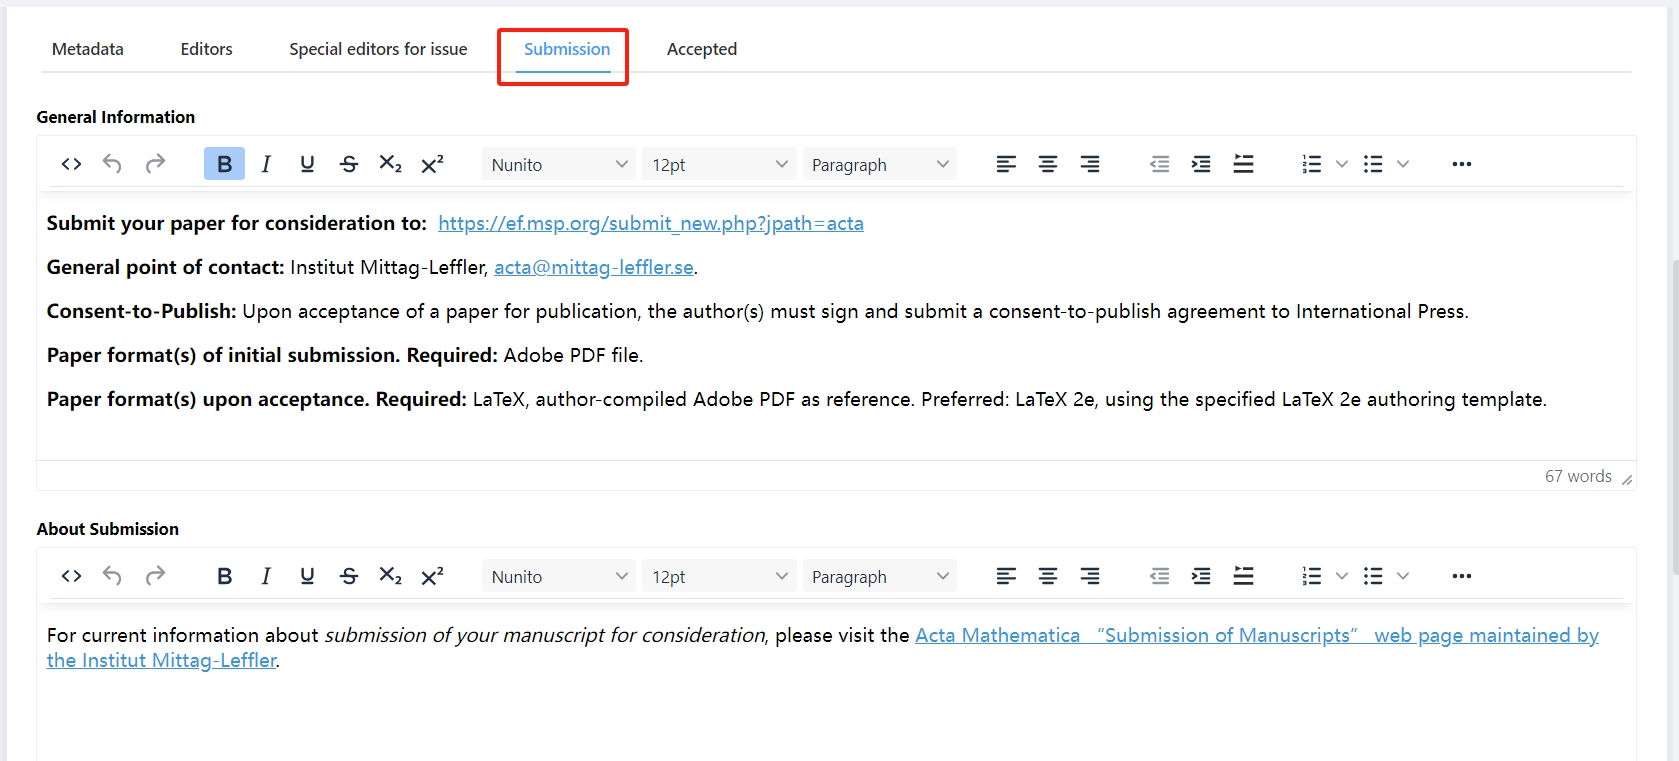
Submission
- Under the 'Submission' tab, fill in the 'General Information', 'About Submission', and 'Selection and Acceptance' in detail to guide the author through the submission process smoothly.
Accepted
-
In the 'Accepted' tab, add detailed information for 'Closed Issues Awaiting Publication' and' Accepted Papers Currently Awaiting Publication' to manage and track the status of published content.
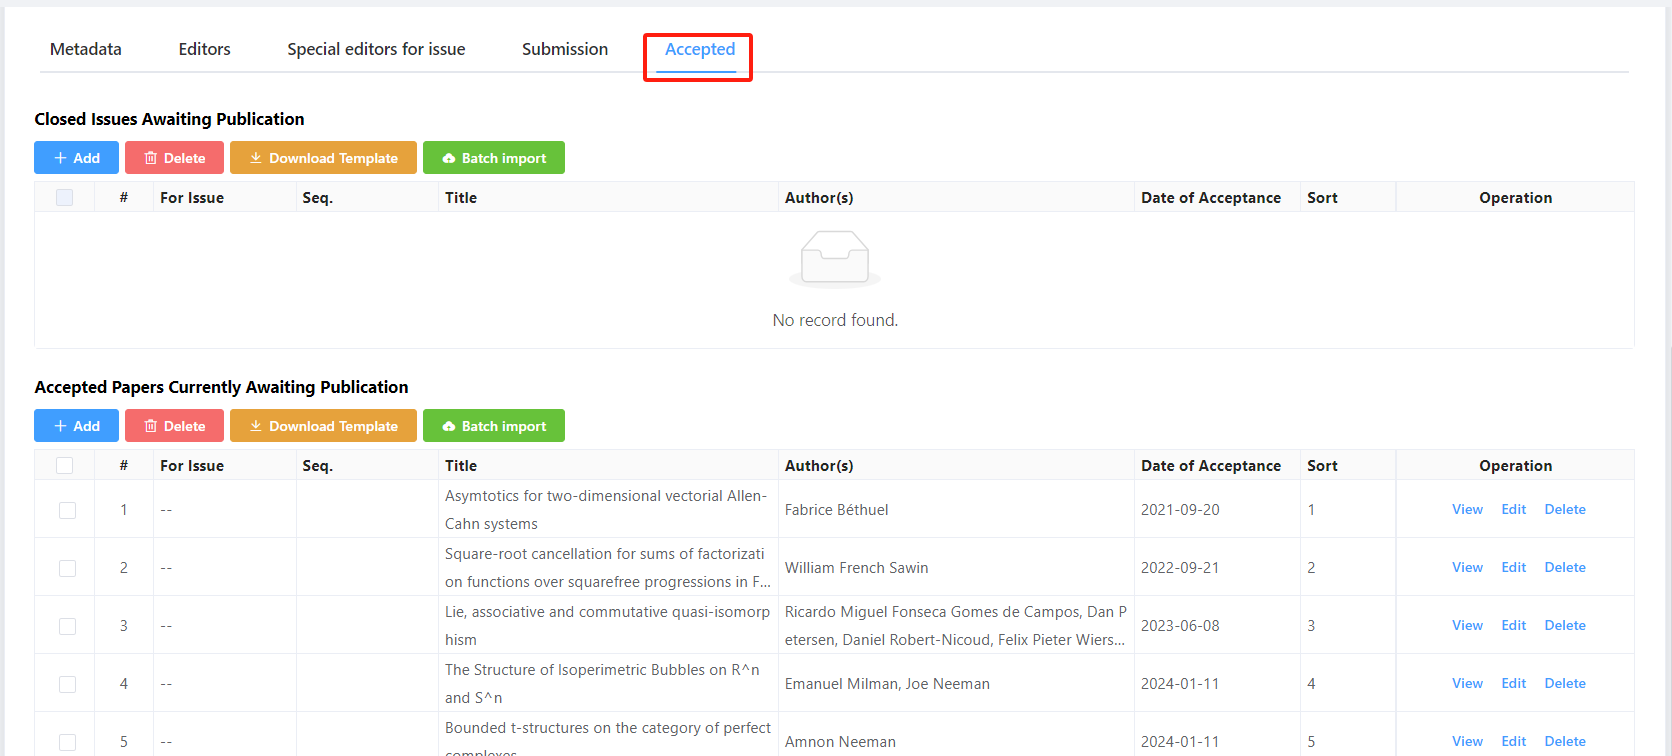
- Add Individual Data: To add a single entry, simply click the [Add] button to start entering your information.
- Batch Data Upload:
- Download Template: If you need to fill in data for 'Closed Issues Awaiting Publication' or 'Accepted Papers Currently Awaiting Publication', start by clicking the [Download Template] to get the Excel template for batch upload.
- Fill Out Template: Follow the instructions within the template to enter your details for each item.
- Upload Data: Once you have completed the template, click the [Batch Import] button to upload your data file.
By following these steps, you can efficiently manage and update pending publications, ensuring accuracy and timely updates of your content.
View journal details
On the journal details page, you can easily review the information filled out when the journal was created. Navigate through different tabs to explore the following sections:
- Metadata: View the basic information and related metadata of the journal.
- Editorial Team: Learn about the editorial members and their contact details.
- Special Issue Editorial Team: See the editors responsible for special issues and their roles.
- Submission Guidelines: Get detailed instructions on how to submit papers to this journal.
- Accepted Papers: Review the list of accepted papers and their statuses.
- Authorization Information: Here, you can check the list of journal Volumes and their authorization status.
 How to View Volume Authorization Details
- Navigate to the Authorization tab, where you will find a list of all journal Volumes.
- In the Volume list, locate the Volume for which you want to view authorization details.
- Click the "View" button next to the selected Volume to access the detailed authorization information page. By following these steps, you can swiftly obtain Volume authorization details, ensuring transparency and efficiency in journal management.
Volume
 ① Quick Volume Filtering: Utilize the journal Volume filtering feature by entering keywords and clicking the "Search" button. The system will promptly display the desired content. To reset the search criteria, click the "Empty" button to remove all filters in one go.
② Add a New Volume: Click the "Add New" button to easily add a new Volume to the journal.
 ③ Bulk Delete Volumes: Select multiple Volumes and use the "Delete" button at the top of the list to delete them all at once.
④ Perform Bulk Authorization:
- Download Authorization Template: Before proceeding with bulk authorization, click the "Download Authorization Template" to obtain the template for bulk authorization.
- Fill Out and Upload: After completing the template as instructed, click the "Batch Import Authorization Data" to finish the bulk authorization process. Once authorized, you can view the results on the journal information page.
⑤ View Issue Details: Click directly on the Issue Count within the journal Volume list to immediately see all Issues under that Volume.
⑥ Browse Volume Details: Select the "View" button in the Volume row to quickly review detailed information about the Volume.
⑦ Edit Journal Volume Information: Click the "Edit" button in the Volume row to modify the related information of the Volume.
⑧ Authorization Management: Choose the "Authorization" button in the Volume row to perform authorization for that Volume.
⑨ More Action Options: Hover over the "More" button to expand additional action options.
⑩ Delete Volume Record: Click the "Delete" button to easily remove the record of the Volume.
By following these steps, you can efficiently manage journal Volumes, ensuring accurate information and a smooth, convenient operation.
Authorization
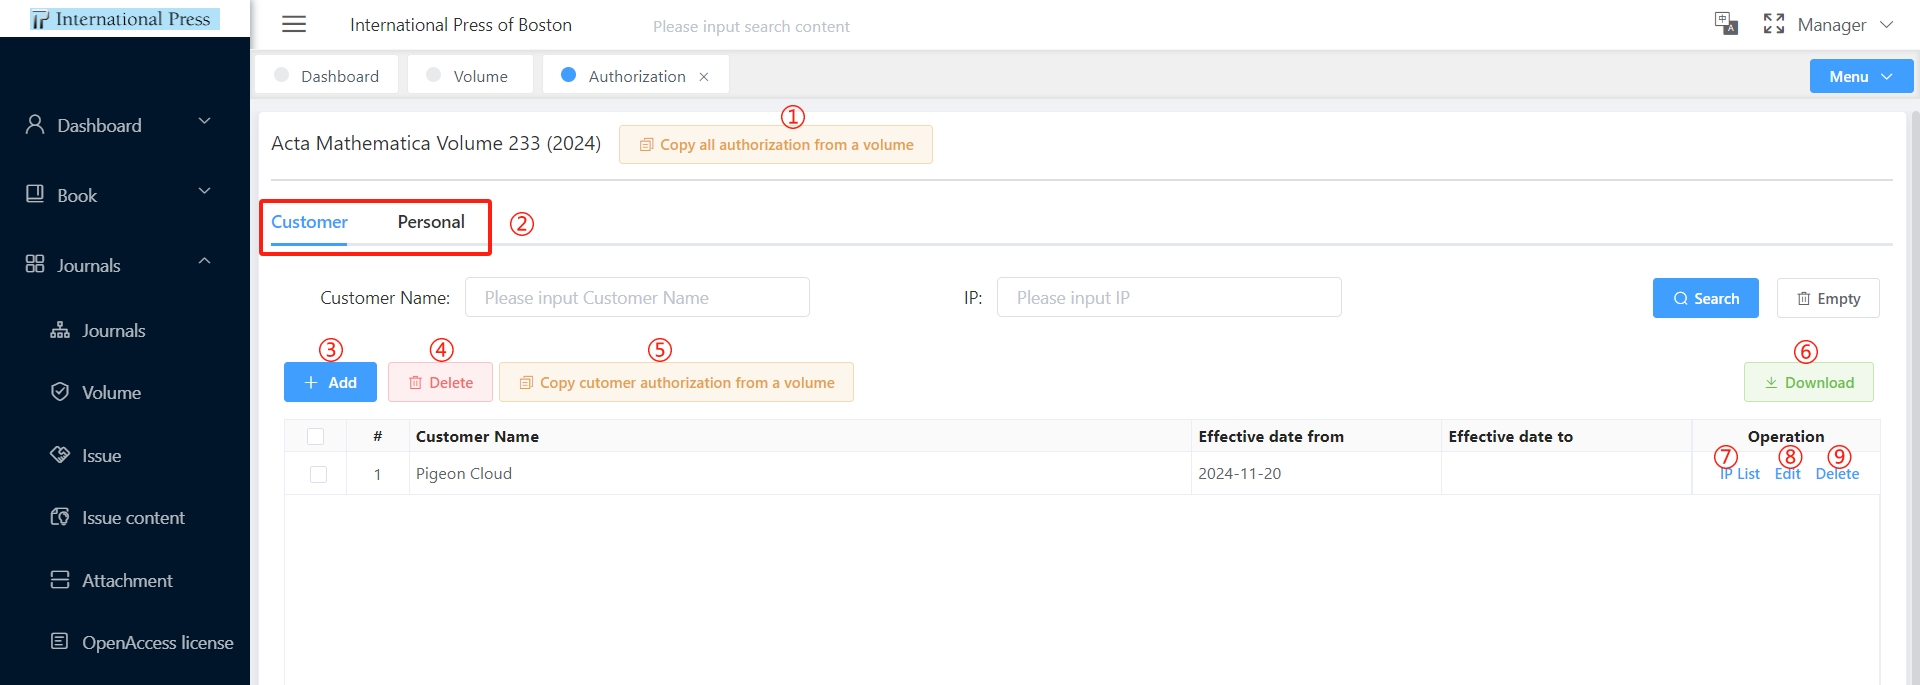 ① Quickly Copy Authorization Details: Click on "Copy All Authorization from a Volume" to swiftly replicate customer and individual authorization details from another volume.
② Manage Authorizations: Navigate through different tabs to handle customer and personal authorizations separately.
③ Add Authorization Organization: Press the "Add" button to set up an authorization organization, fill in the authorization period, and effortlessly complete the authorization addition process.
④ Bulk Delete Authorizations: Select multiple authorized customers and use the "Delete" button at the top of the list to remove the selected authorizations in one go.
⑤ Copy Book Customer Authorization: Click on "Copy Customer Authorization from a Volume" to quickly duplicate customer authorization details from another book.
⑥ Download Authorization Information: Click "Download" to export the authorized customer information to an Excel file.
⑦ View IP Information: Click the "IP List" button within the data row to easily review the authorized IP address information.
⑧ Edit Customer Authorization: Click the "Edit" button in the data row to modify customer authorization details.
⑨ Remove Single Customer Authorization: Choose an authorized customer and click the "Delete" button to individually remove the customer's authorization.
By following these steps, you can efficiently manage journal authorizations, ensuring a convenient and accurate authorization process.
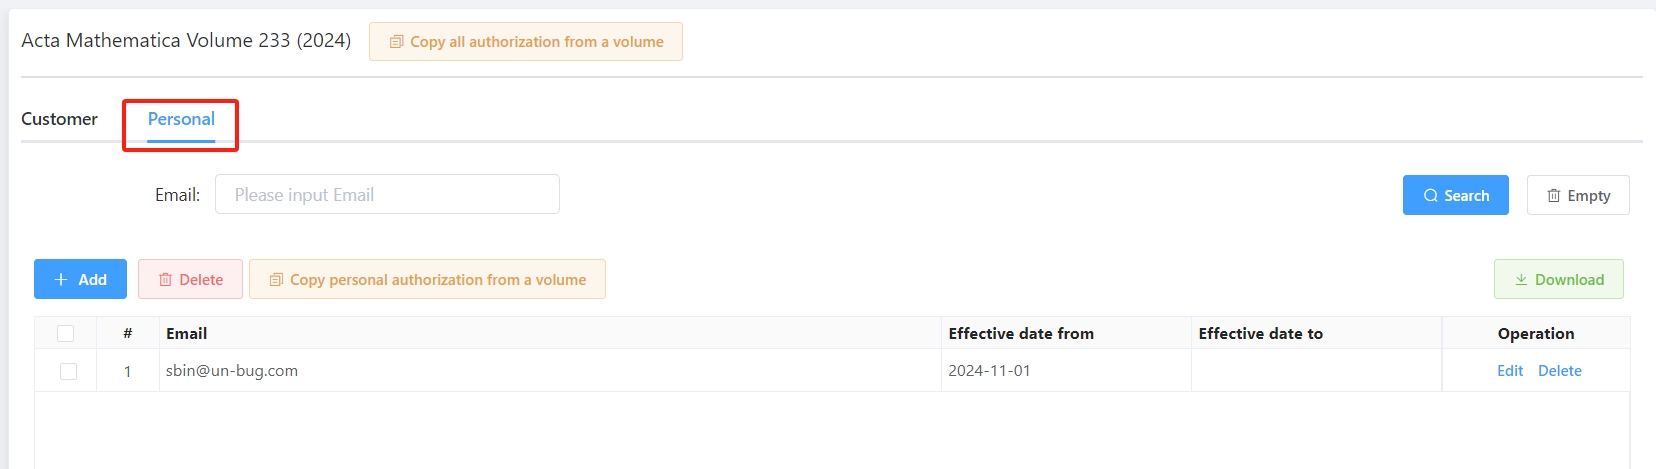 The individual user authorization management volume function is highly consistent with the customer authorization module label and can be operated according to the customer module function.
Issue
 ① Utilize the journal issue filtering feature, enter keywords, and click the "Search" button to quickly locate the desired content; to reset the conditions, click "Empty" to remove all search settings in one go.
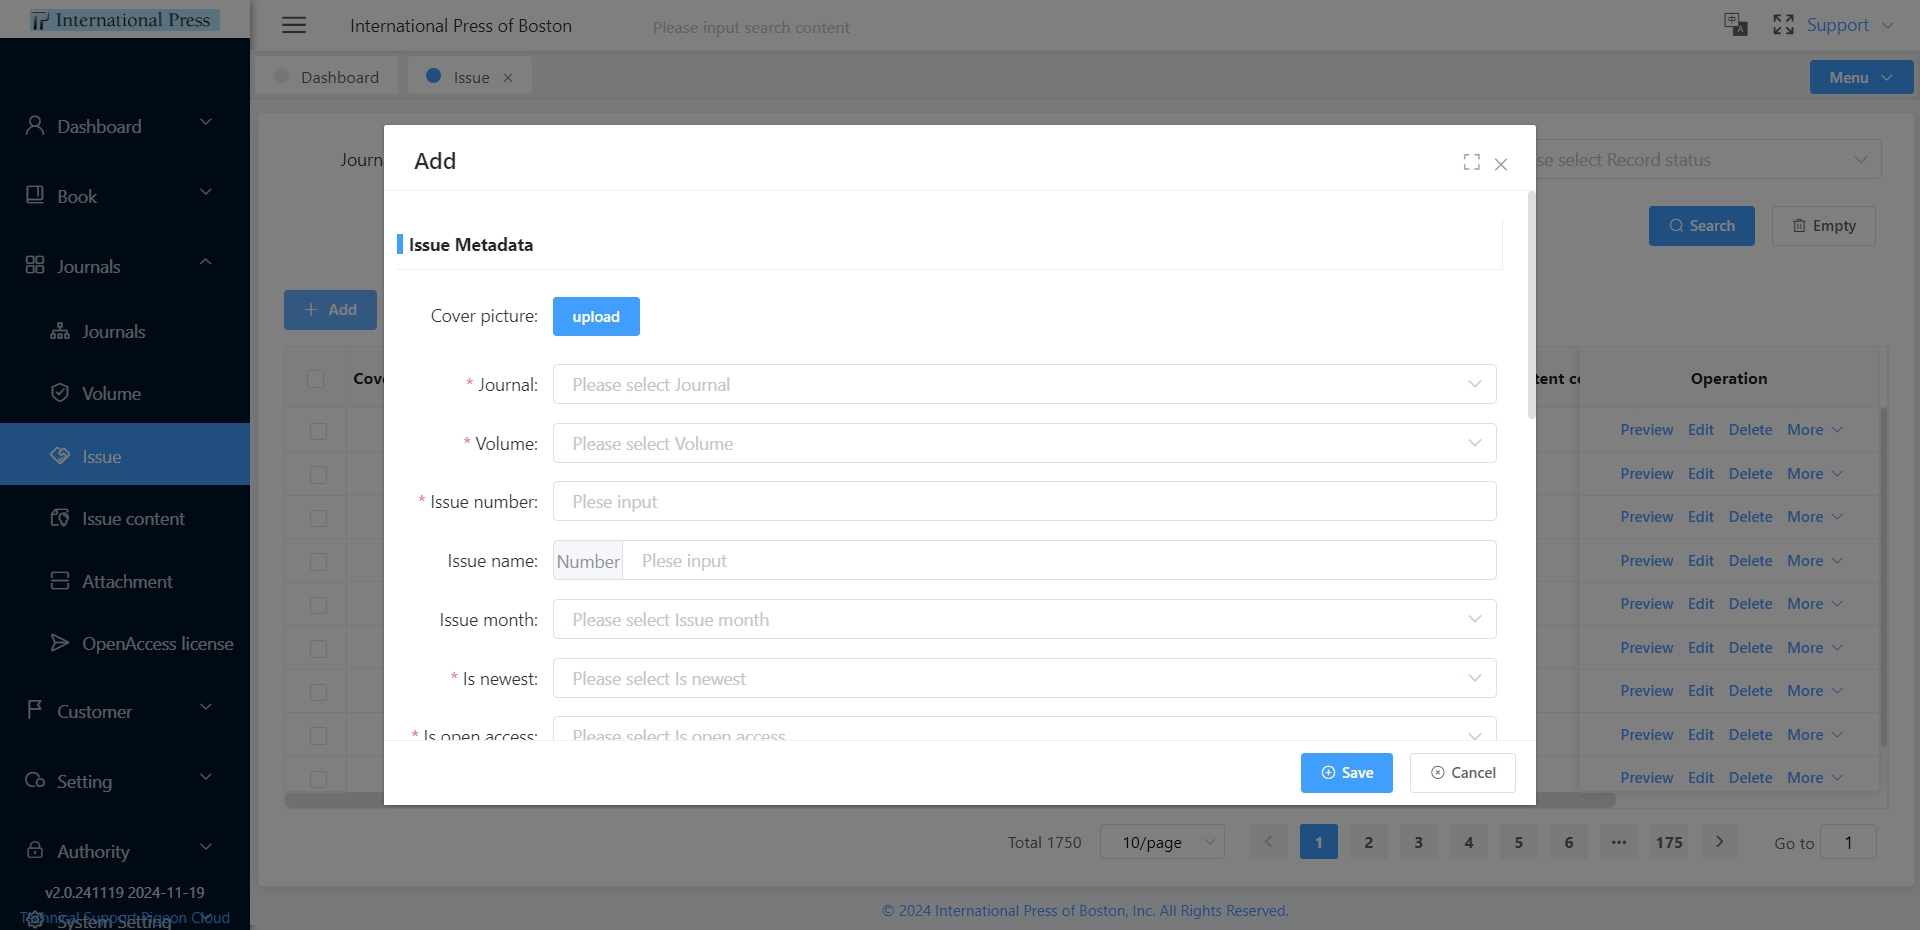
② Click the "Add" button to add a new journal issue.
 ③ Select multiple issues and use the "Delete" button at the top of the list for a one-click deletion operation.
④ Click directly on the issue name in the journal issue list to view detailed information about that issue.
⑤ Click on the content count in the journal issue list to immediately view all articles under that issue.
⑥ Choose the "Preview" button in the issue row to quickly view the list of articles in that issue on the frontend.
⑦ Click the "Edit" button in the issue row to modify the journal issue information.
⑧ Click the "Delete" button to remove the issue record.
⑨ Hover over the "More" button to expand additional operation options.
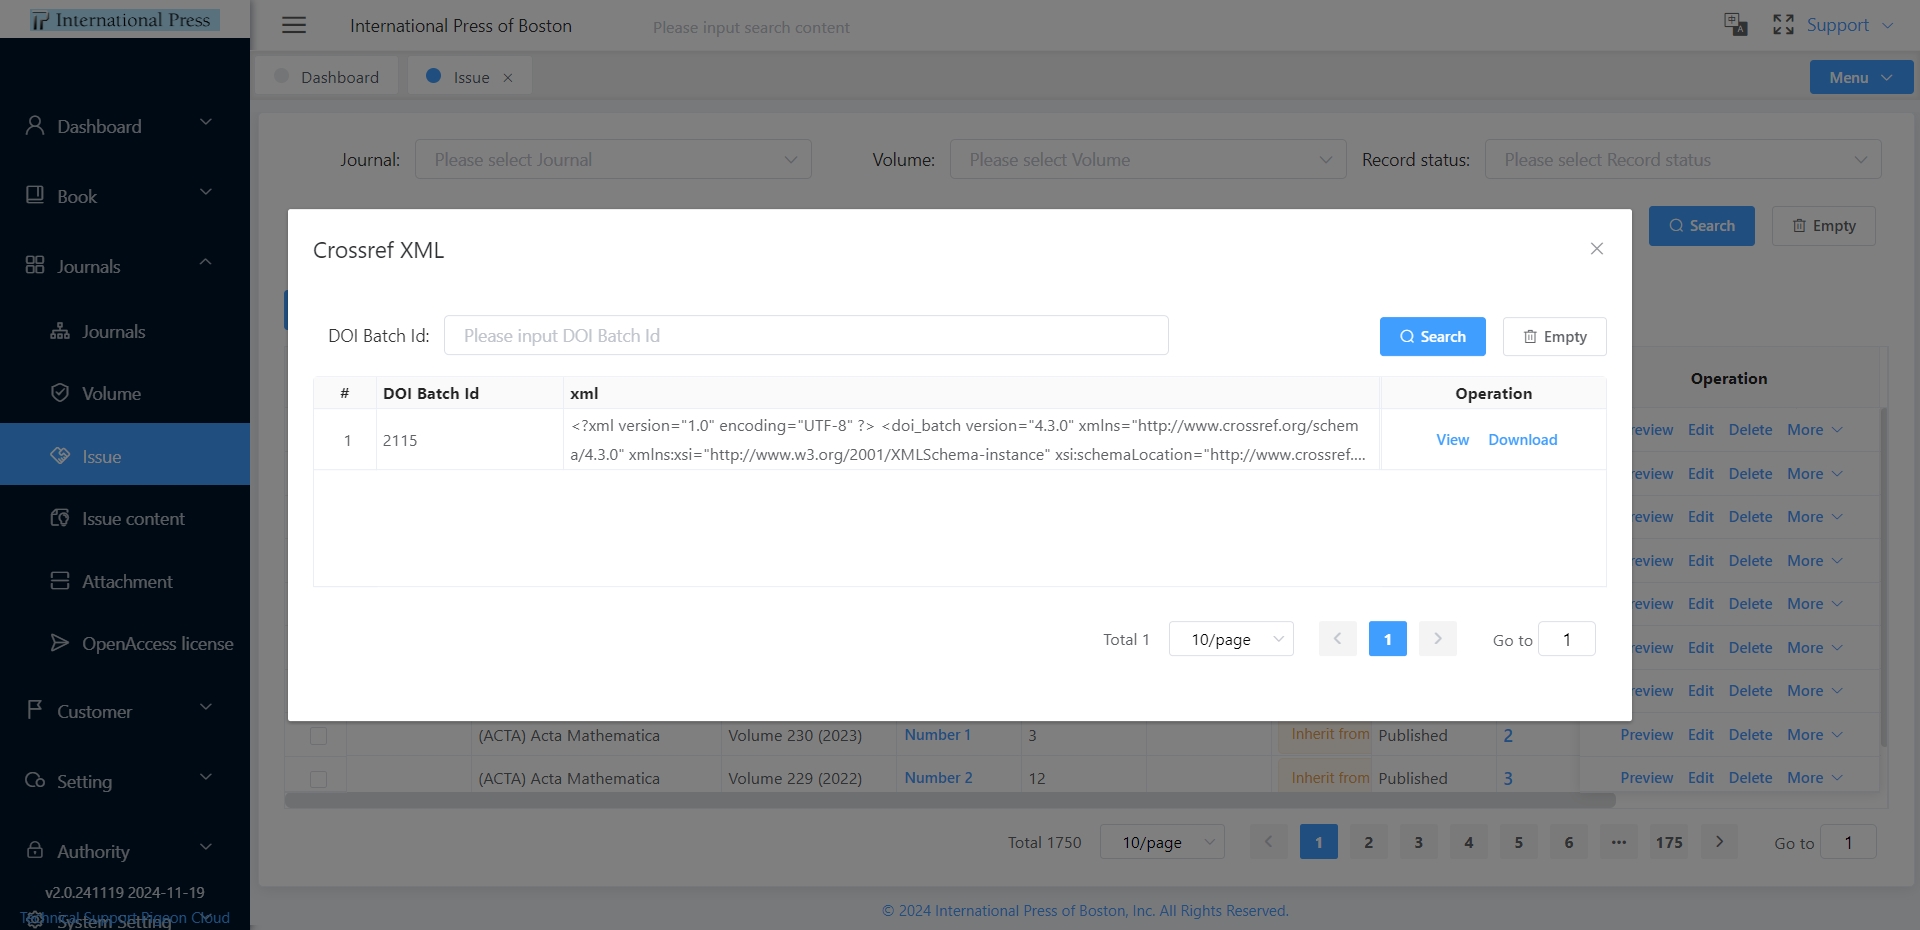
⑩ Click the "Upload to Crossref" button to generate DOI documents through the issue.
⑪ Click the "View Crossref History" button to review the history of generated DOI documents.
 ⑫ Click "Upload Index File" to upload ZIP merged files from Oberwolfach, CNKI, and Zentralblatt MATH.
⑬ Click "View Index File History" to view the history of uploaded documents.
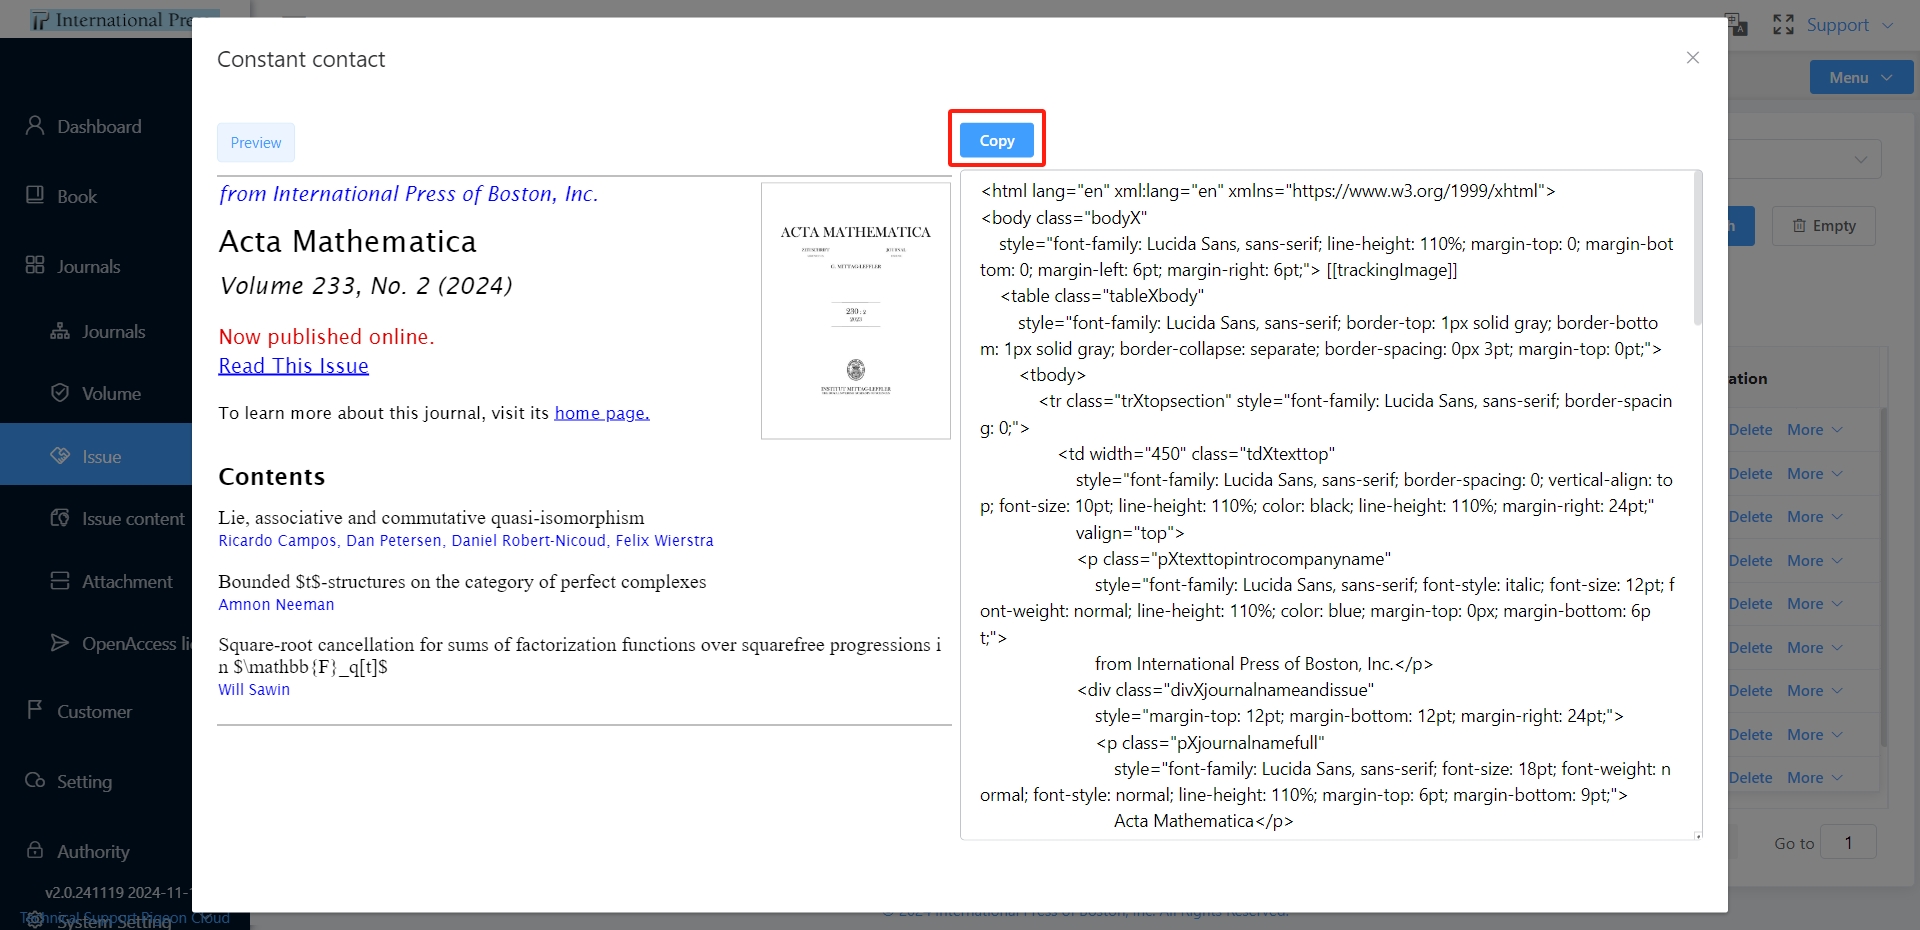
⑭ Click on "Constant Contact" to view the content of the generated email here, and copy and paste it into the Constant Contact interface.
 ⑮ Click the "Send Email to Author(s)" button to send emails to all authors of published articles under that issue.
Issue Content
The most frequent task in our daily work should be the management of issue content (Issue Content), where we need to enter the content of the issues in detail.
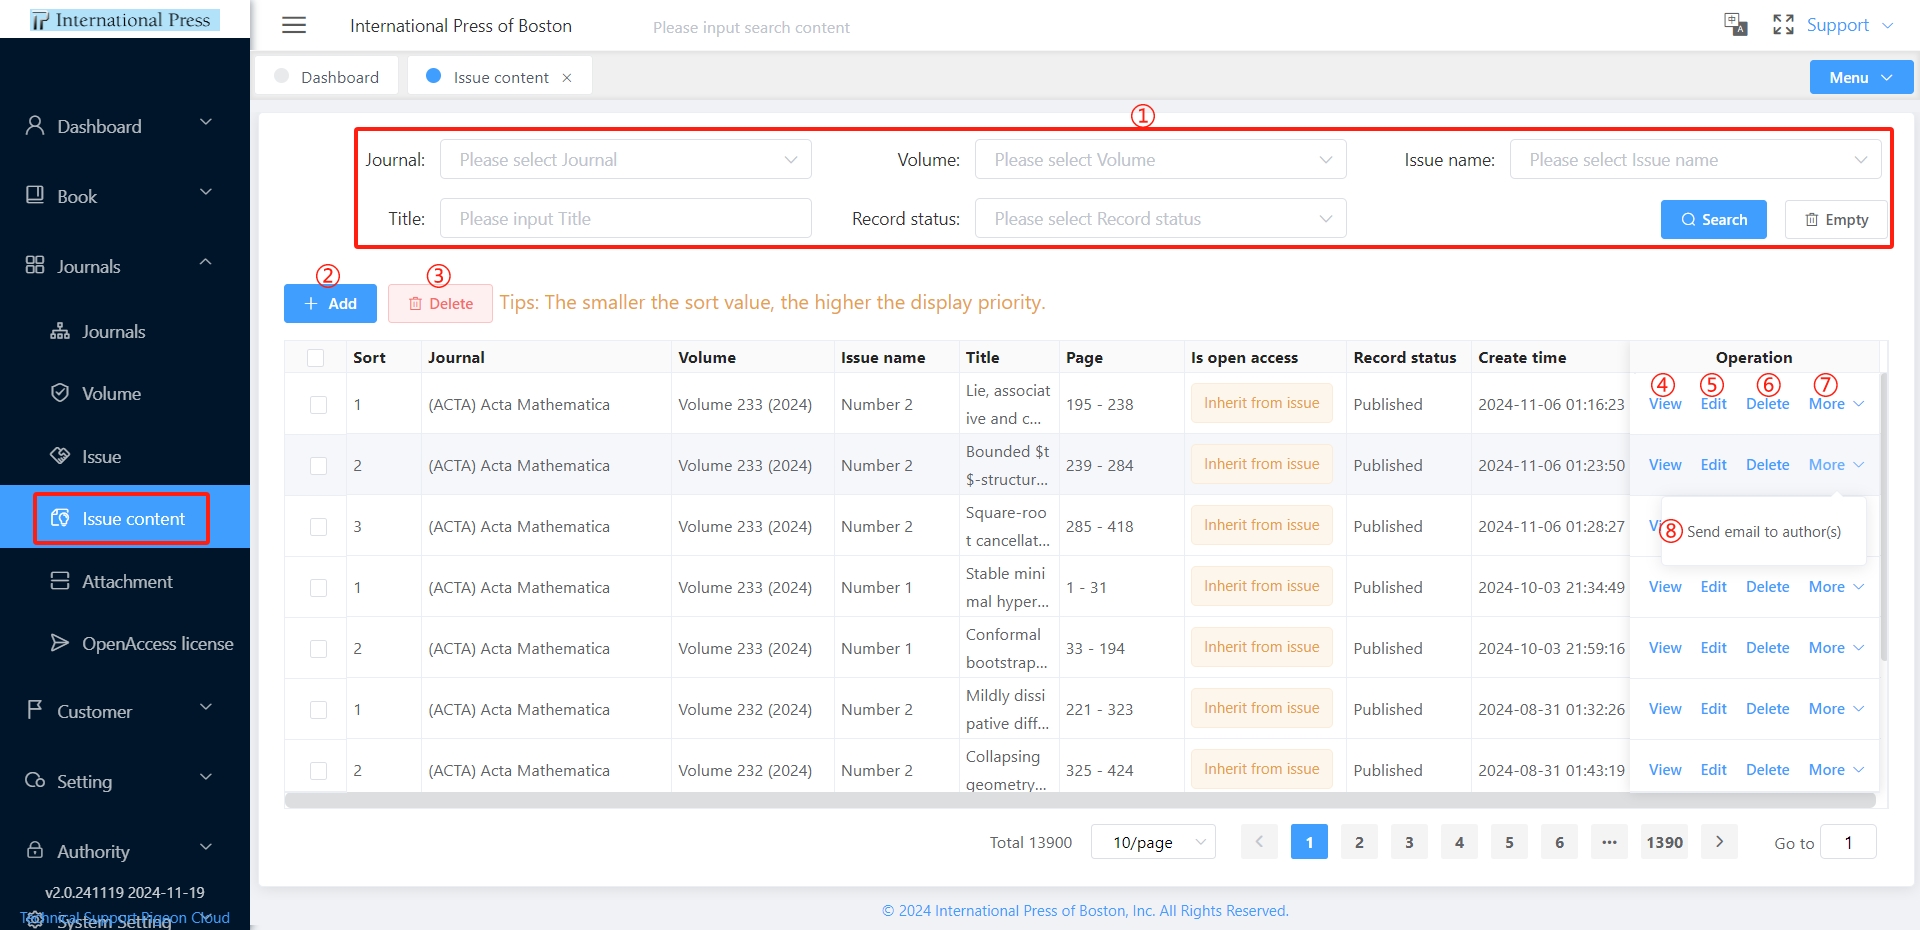 ① Utilize the article filtering feature by entering keywords and clicking "Search" to swiftly locate the desired content; to reset your search, press the "Empty" button to erase all search criteria in one go.
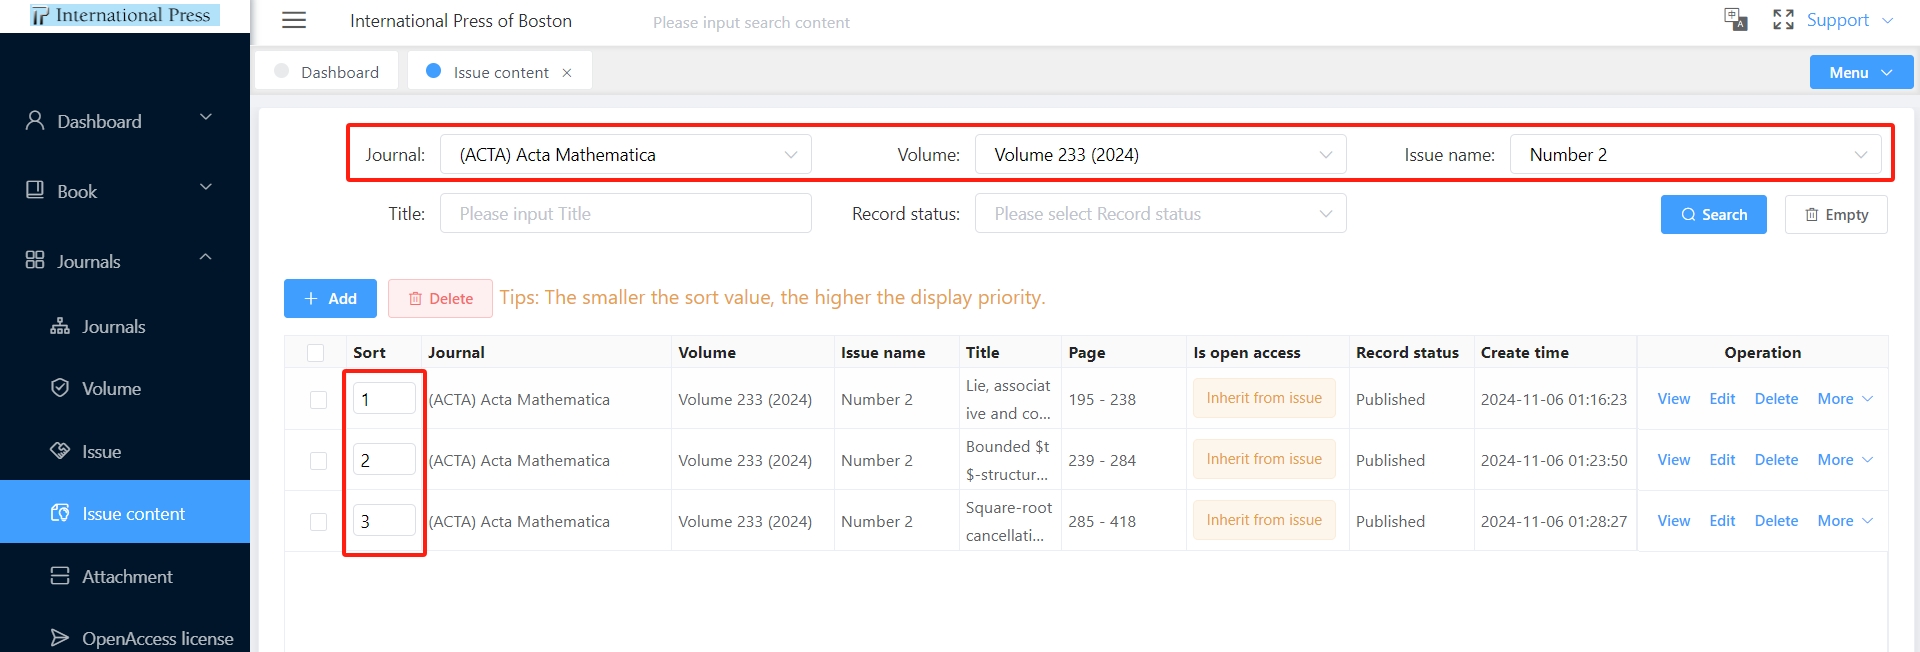
- After filtering the journal volume and issue, you can sort the list by dragging and dropping, or adjust the sorting order using the settings option.
② Click the "Add" button to effortlessly insert a new journal entry.
③ Select multiple articles and employ the "Delete" button at the top of the list for a single-click mass deletion.
④ Click the "View" button within the article list to instantly view detailed information about the selected article.
⑤ Click the "Edit" button on the article row to update the article's details.
⑥ Click the "Delete" button to remove the article entry.
⑦ Hover over the "More" button to reveal additional action options.
⑧ Click "Send Email to Author(s)" to dispatch an email to all authors linked to the article.
Publish an article
Enter the article details. Please be aware that fields marked with an asterisk (*) are mandatory. Complete the information and click “Save” to successfully submit the article.
 【Record State descriptions】:
- In Draft and Pending states, the article is not accessible for reading.
- In Published and Online First states, the article is viewable and readable by the audience.
【Sort】: We can sort the content using the "Sort" field, with smaller numbers appearing earlier. It is recommended to use two-digit numbers like 10, 20, 30 as sequence numbers, allowing for future insertion of new chapters with available sort numbers.
【License】: If it is open access, you may choose an appropriate open license agreement.
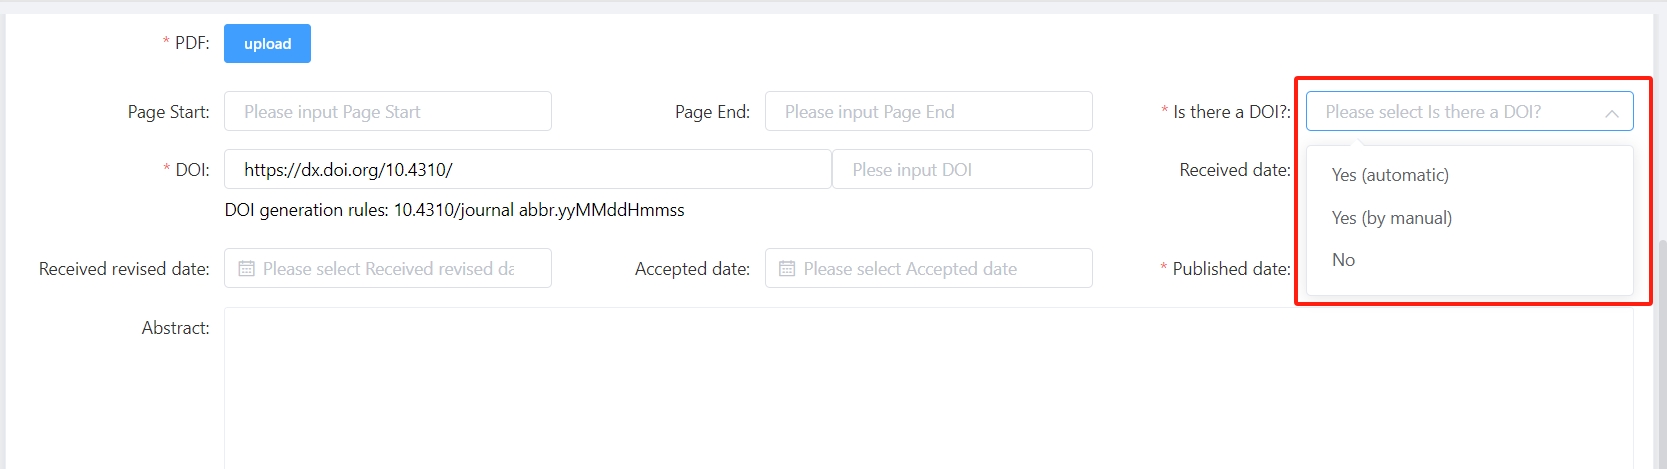
【Is there a DOI?】: The "DOI" field on the page is optional; if not provided, select "No". When you choose "Yes" for the "DOI" field, if left blank, a DOI will be generated; if filled in, the provided value will be used. If the default value is currently used and you wish to modify it later, that is also permitted.
Attachment
When publish an article or filling in the "Information & Ordering" section, if there are attachments involved, you can upload the files in the attachment module to generate a new URL. After that, copy the URL and paste it into the remarks text box on the page where you are creating the article or ordering information for utilization.
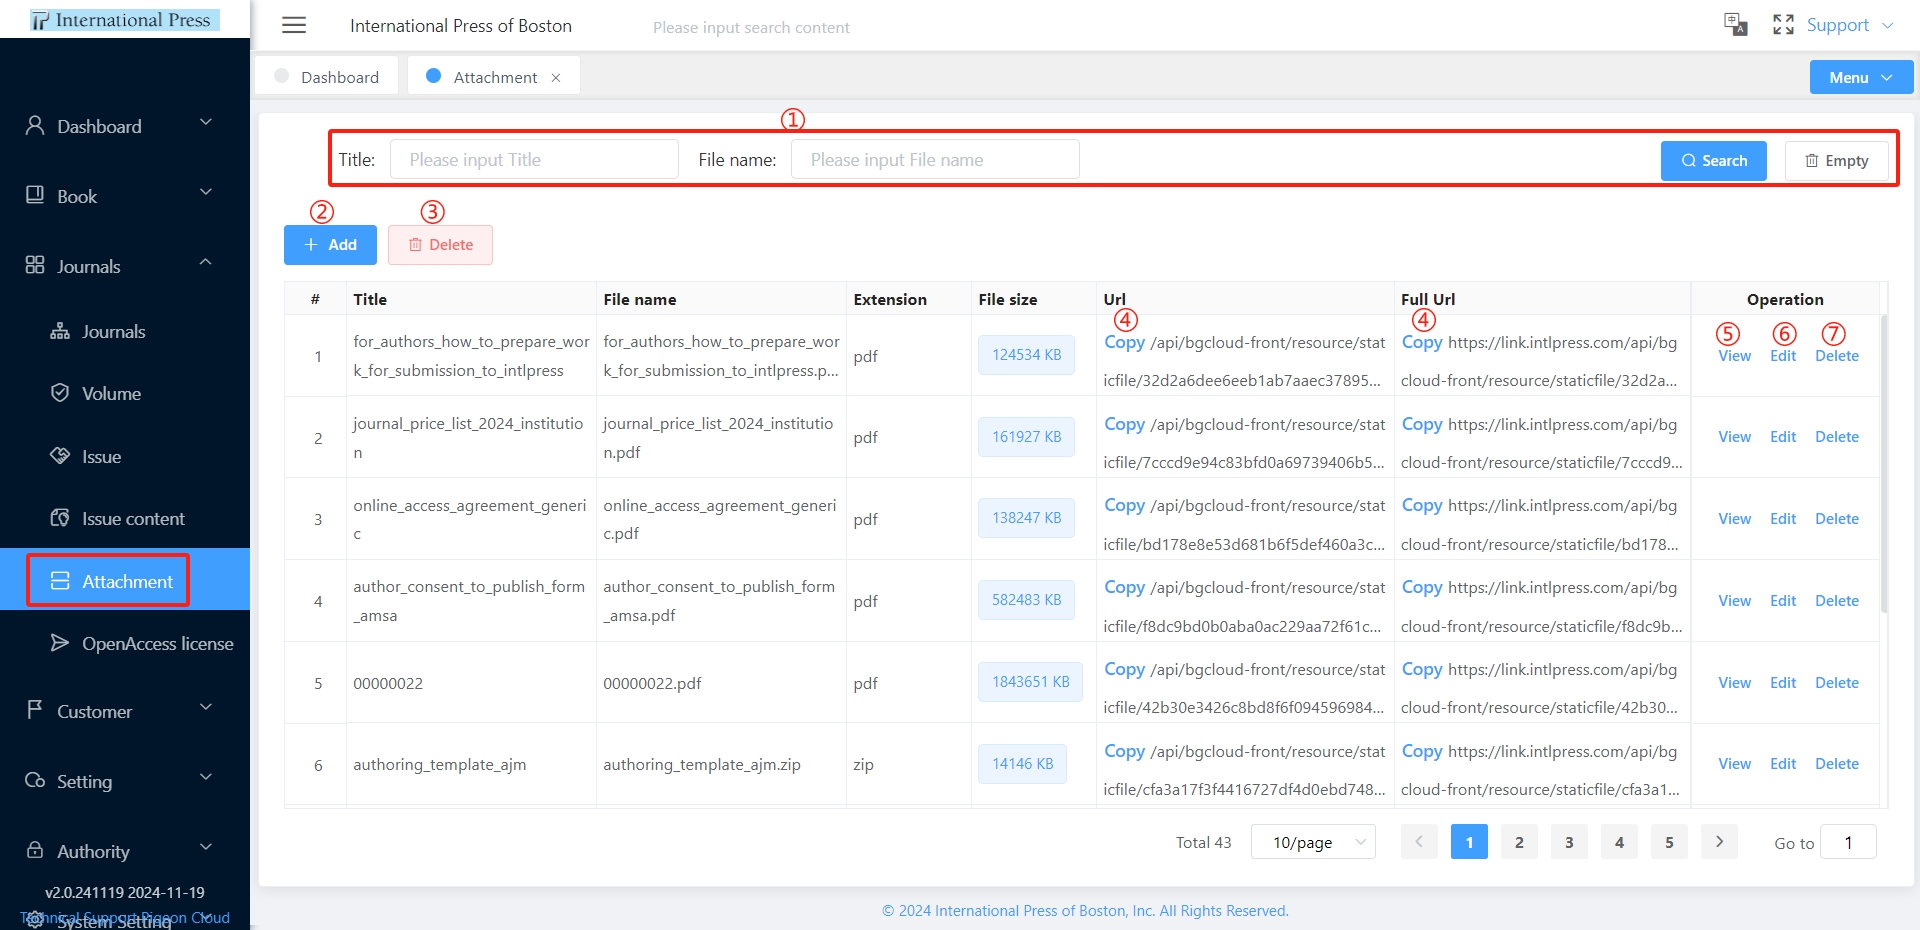 ① Utilize the attachment filtering feature, enter keywords and click "Search" to quickly locate the desired attachment; if you need to reset the settings, click the "Empty" button to wipe out all search criteria in one go.
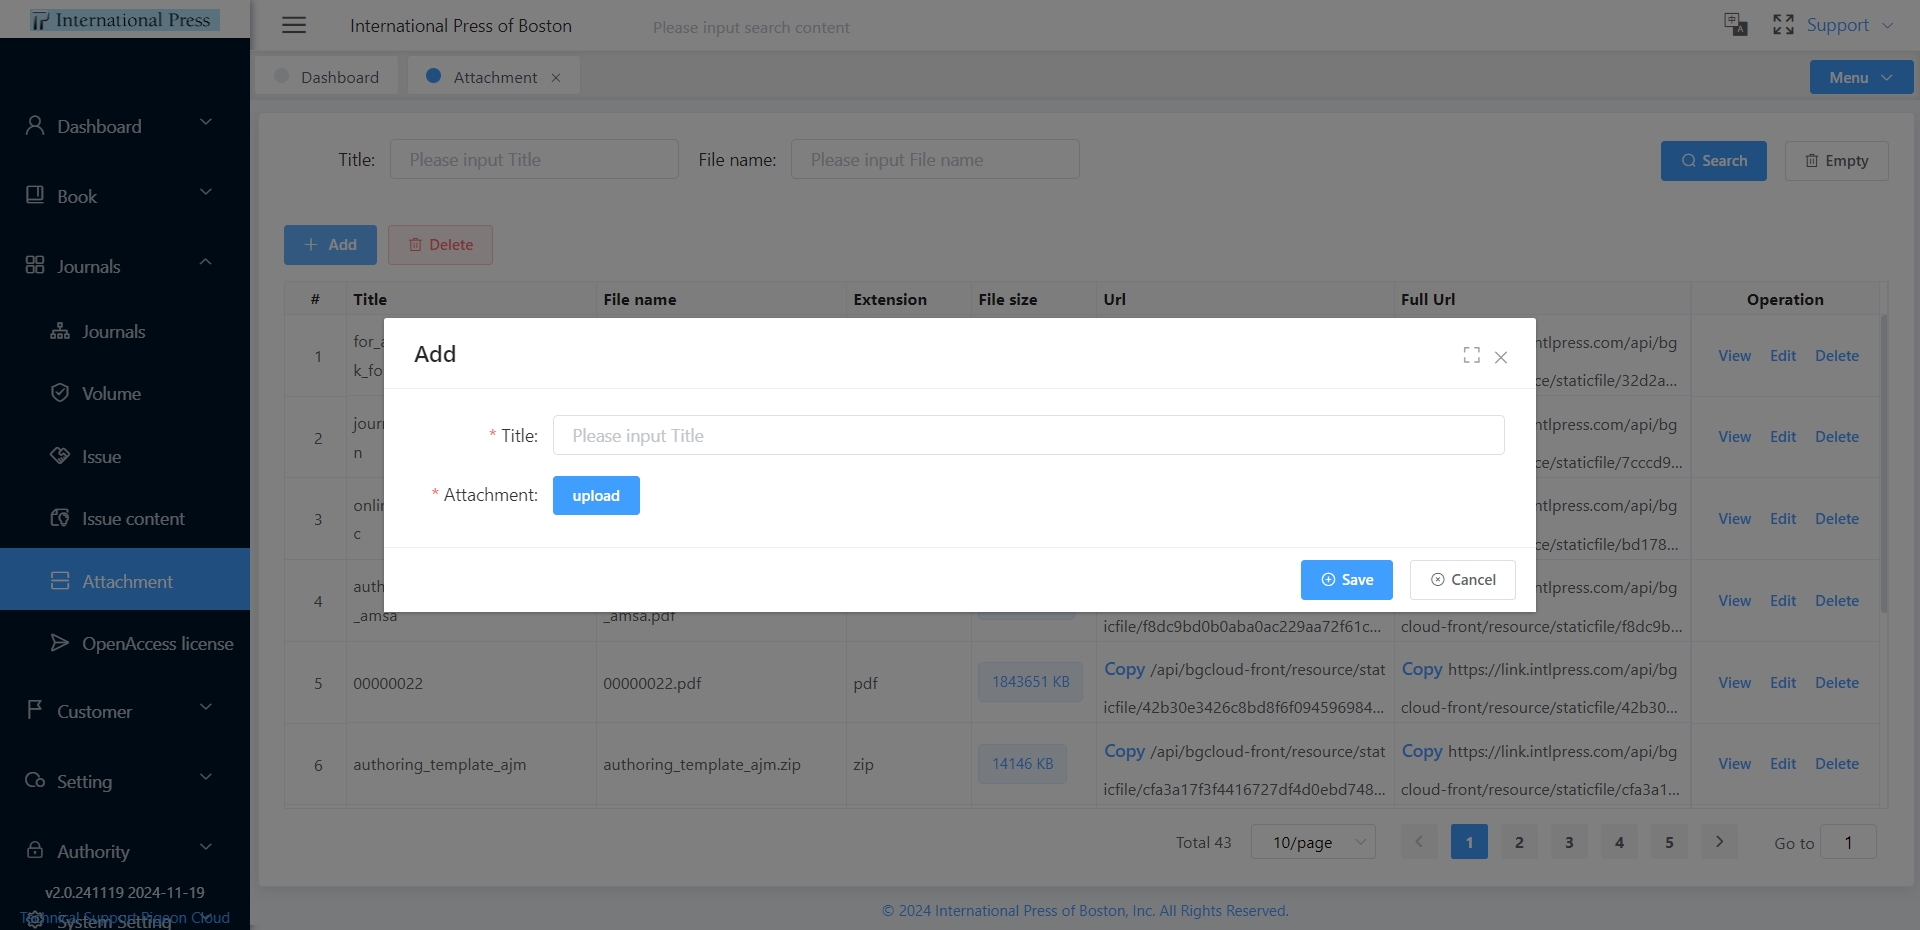
② Click the "Add" button to easily upload a new attachment.
 ③ Select multiple attachments and use the "Delete" function at the top of the list to delete them all at once.
④ Click "Copy" to quickly obtain the URL link for the attachment.
⑤ Click the "View" button in the attachment list to immediately see the detailed information of the attachment.
⑥ Click the "Edit" button in the attachment row to update the attachment information.
⑦ Click the "Delete" button to remove the selected attachment record.
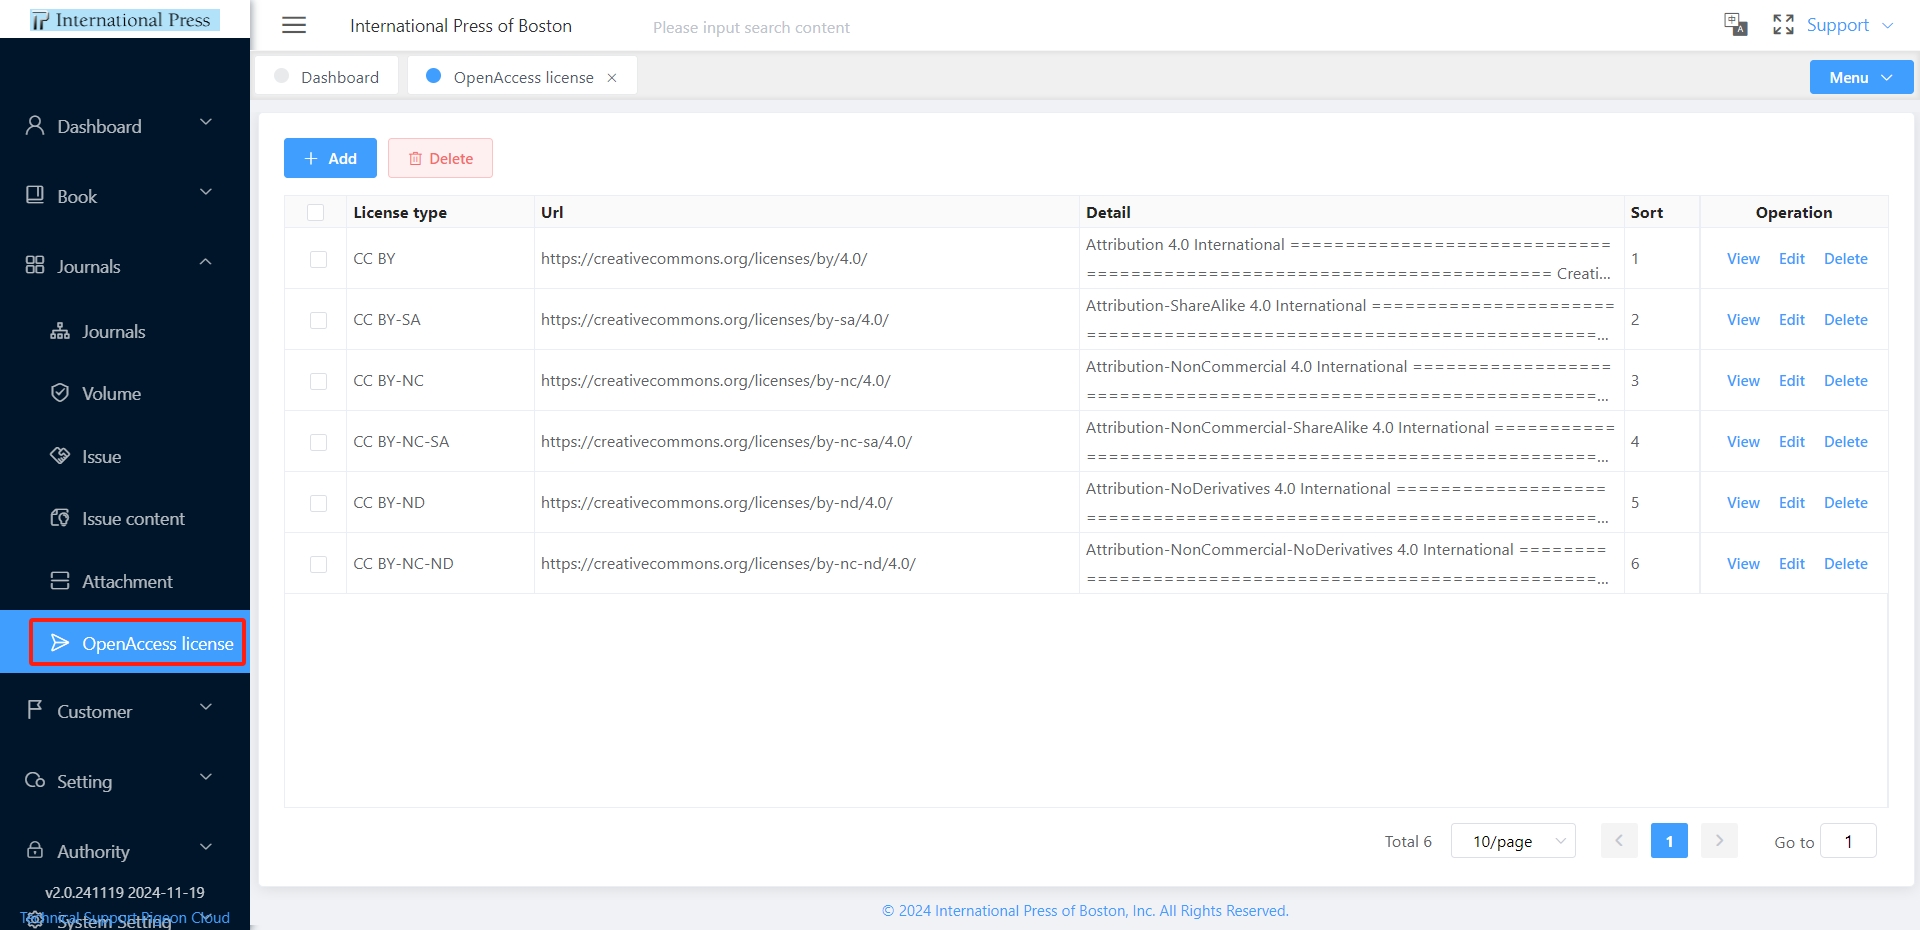
Open Access License
On the article publication page, if the article is open access, be sure to select the appropriate open access agreement. Within the "Open Access License" module, you have the ability to perform actions such as adding, removing, editing, and searching to effectively manage the open access protocols.