Customer Management
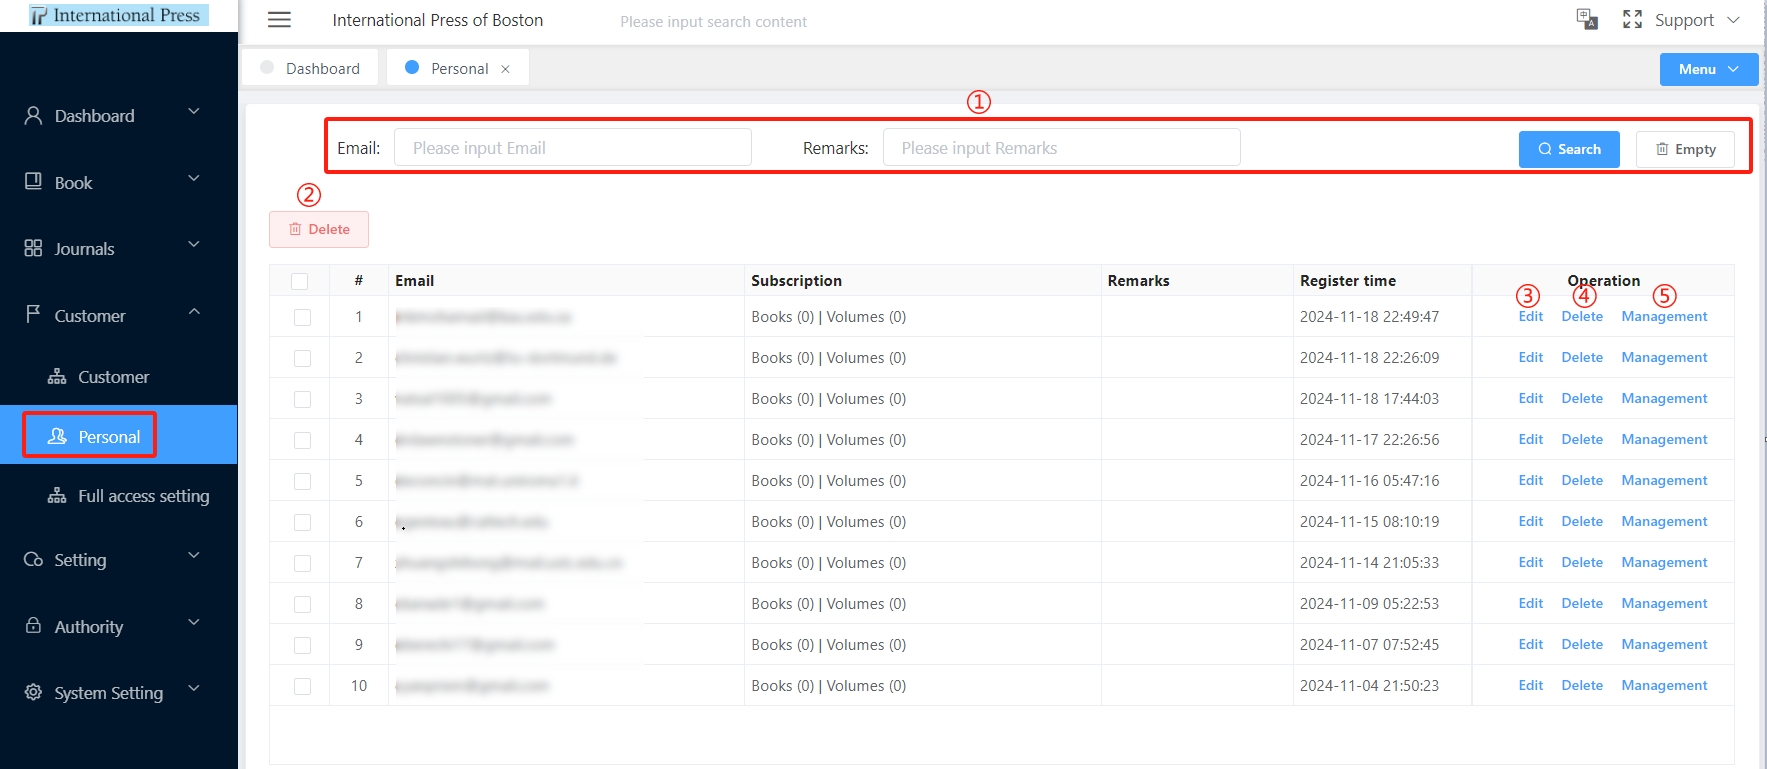
Customer
For corporate client authorization, we implement an organizational-wide authorization mechanism. This system is designed for institutions with a specific range of IP addresses, where we grant centralized authorization to that IP range. Readers within the organization do not need to apply for individual authorization. Simply accessing the website from within the designated IP address range grants them direct access to the authorized e-books and journal reading services.
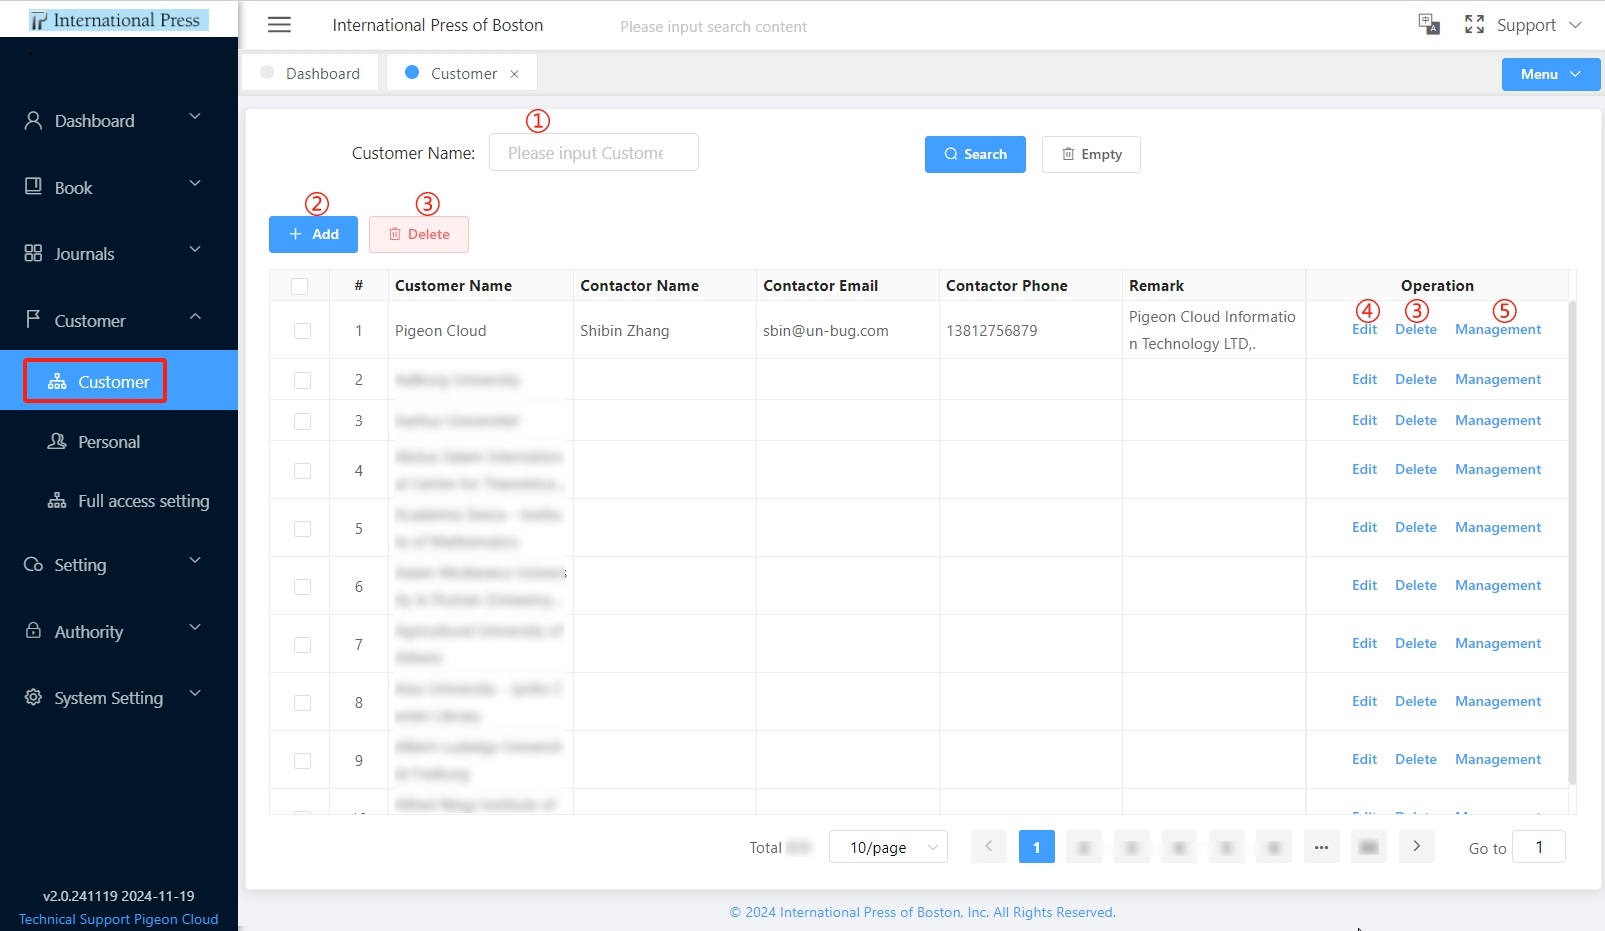
① After completing the filtering conditions in the customer list and clicking the "Search" button, you can quickly filter out the target data. If you need to reset the filtering conditions, please click the "Empty" button to clear all set conditions at once.
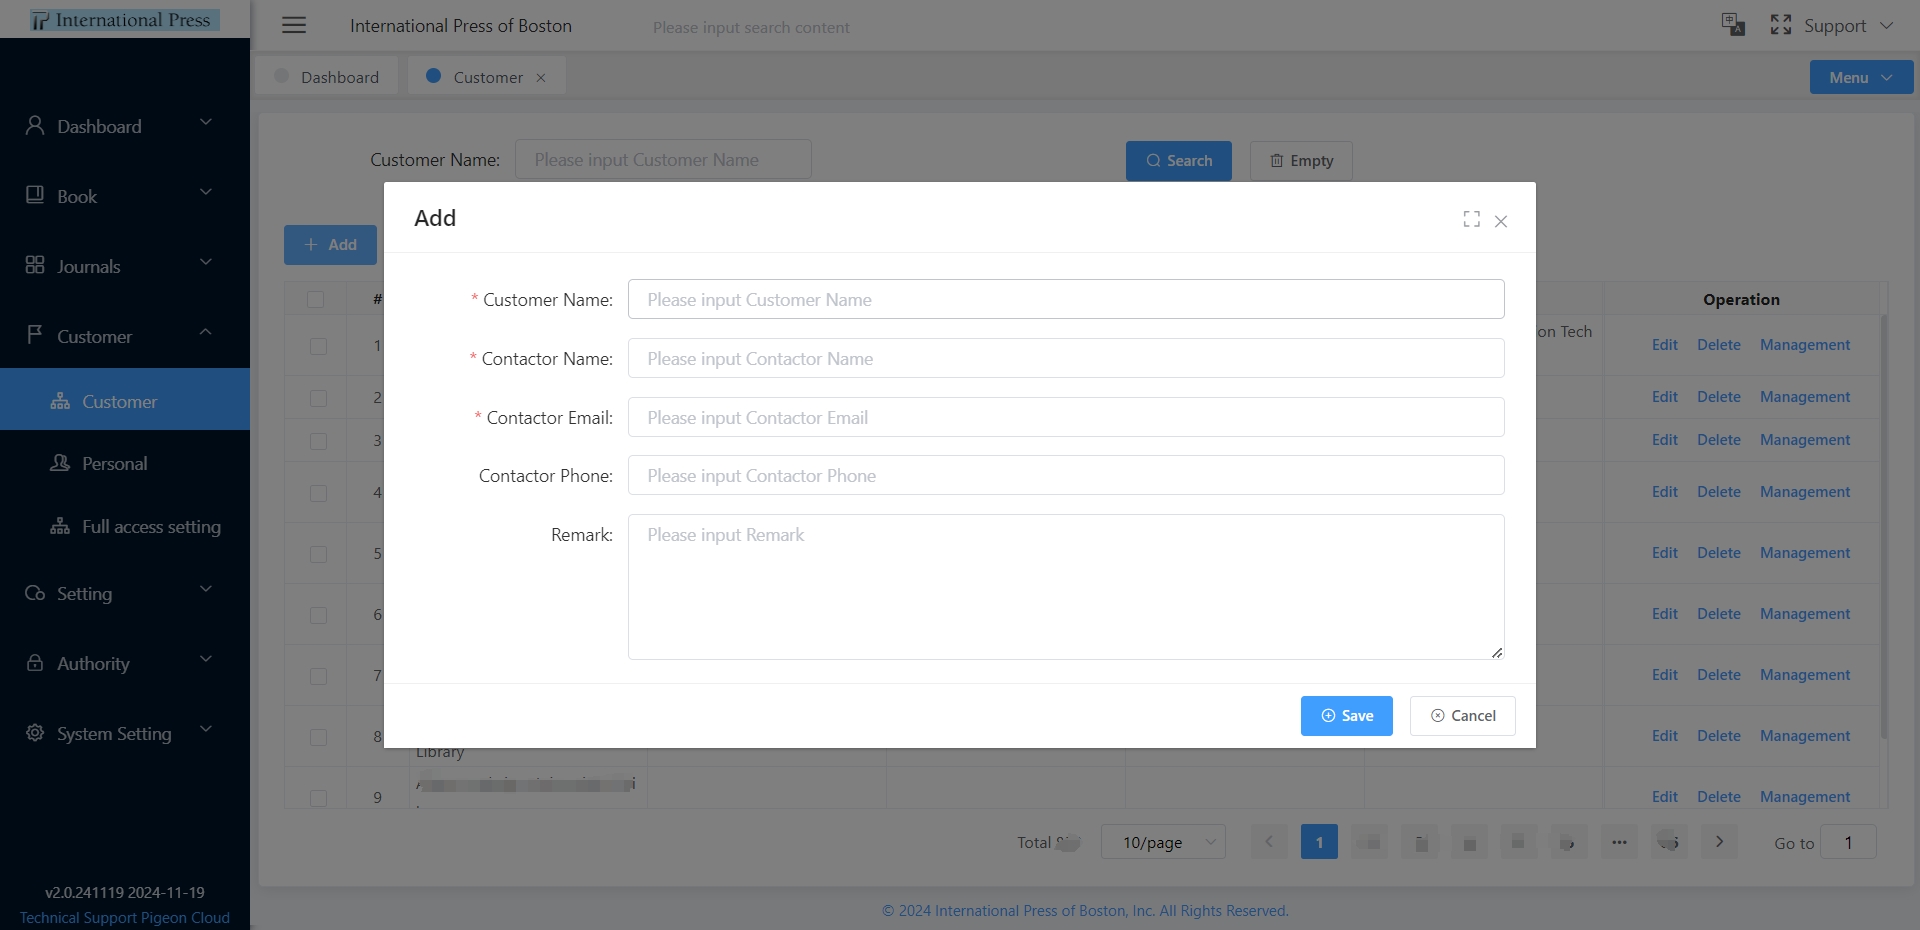
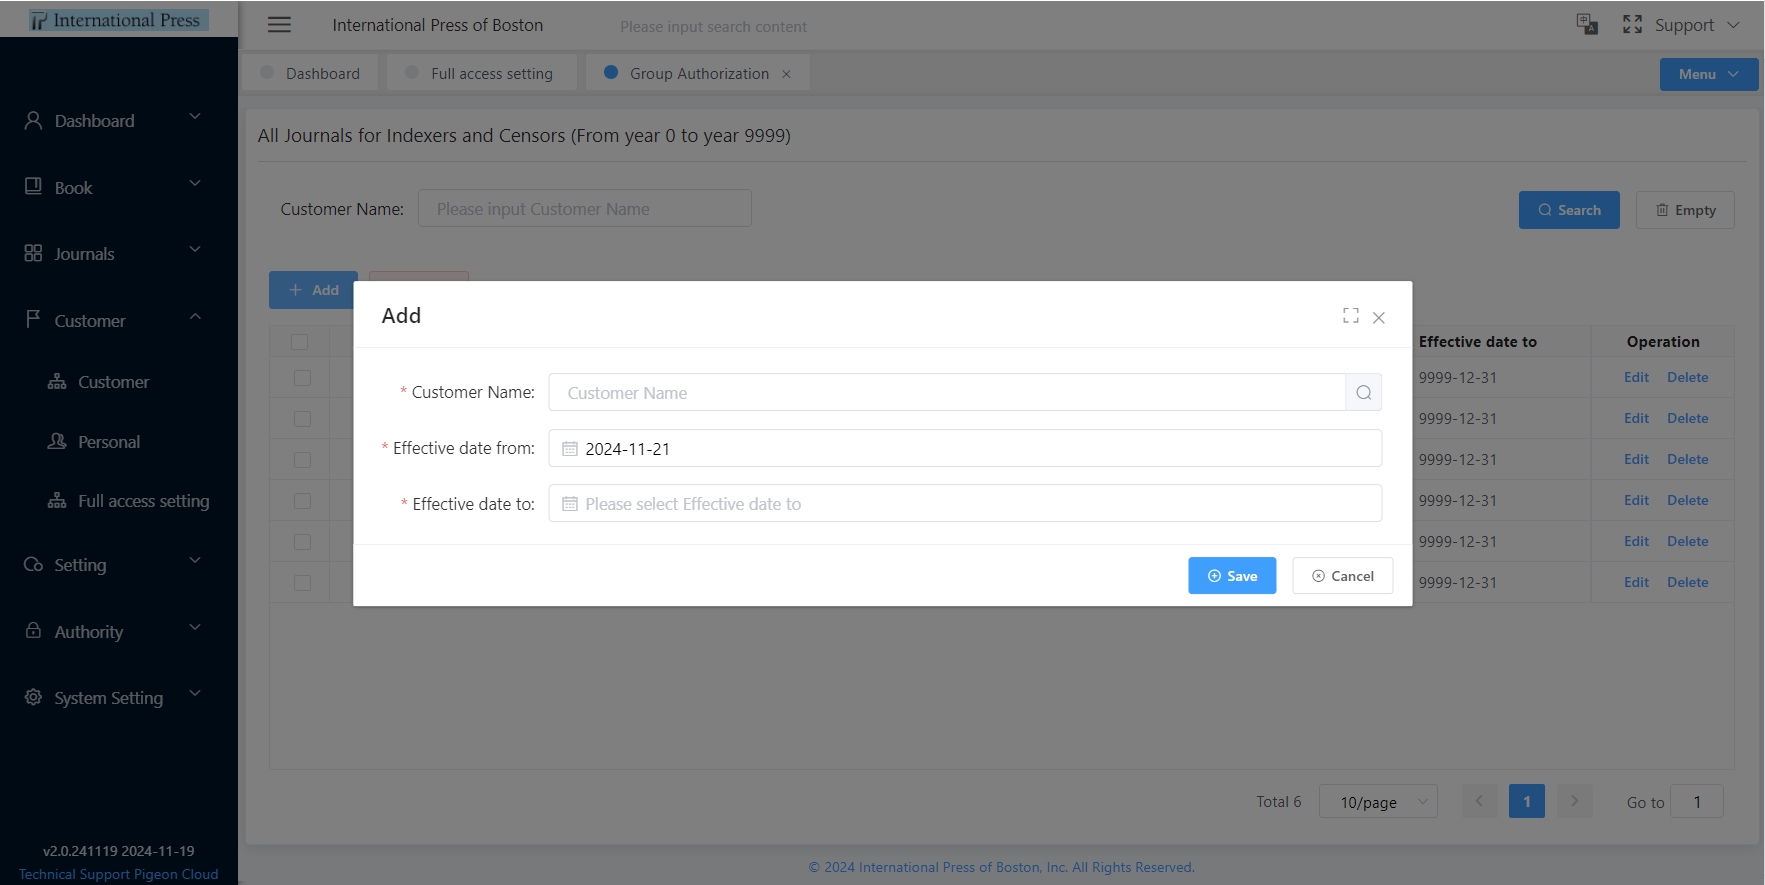
② Clicking the "Add" button will pop up the following dialog box. The items marked with * are required fields. After entering the corresponding field information, just click "Save" to add successfully.
③ Select a row and click the "Delete" button in the operation column to delete it individually; you can also select multiple customers, click the "Delete" button above the list, and delete them in bulk.
④ Once deleted, the customer will be removed from this list. For data that requires modification, click the "Edit" button to modify the information.
⑤ Click the "Management" button to enter the organization's IP authorization management interface for relevant authorization settings.
On the customer management page, you can maintain the IP segment corresponding to the customer and authorize single books, bundle books, and journals. At the same time, the system provides a function to view account access records, which details the access time, book name, Article Title. Journal Title, Volume num, as well as viewing and downloading operations performed by the account.
Management of Available IP Ranges
Maintain and manage IP addresses in the "IP Address" tab.
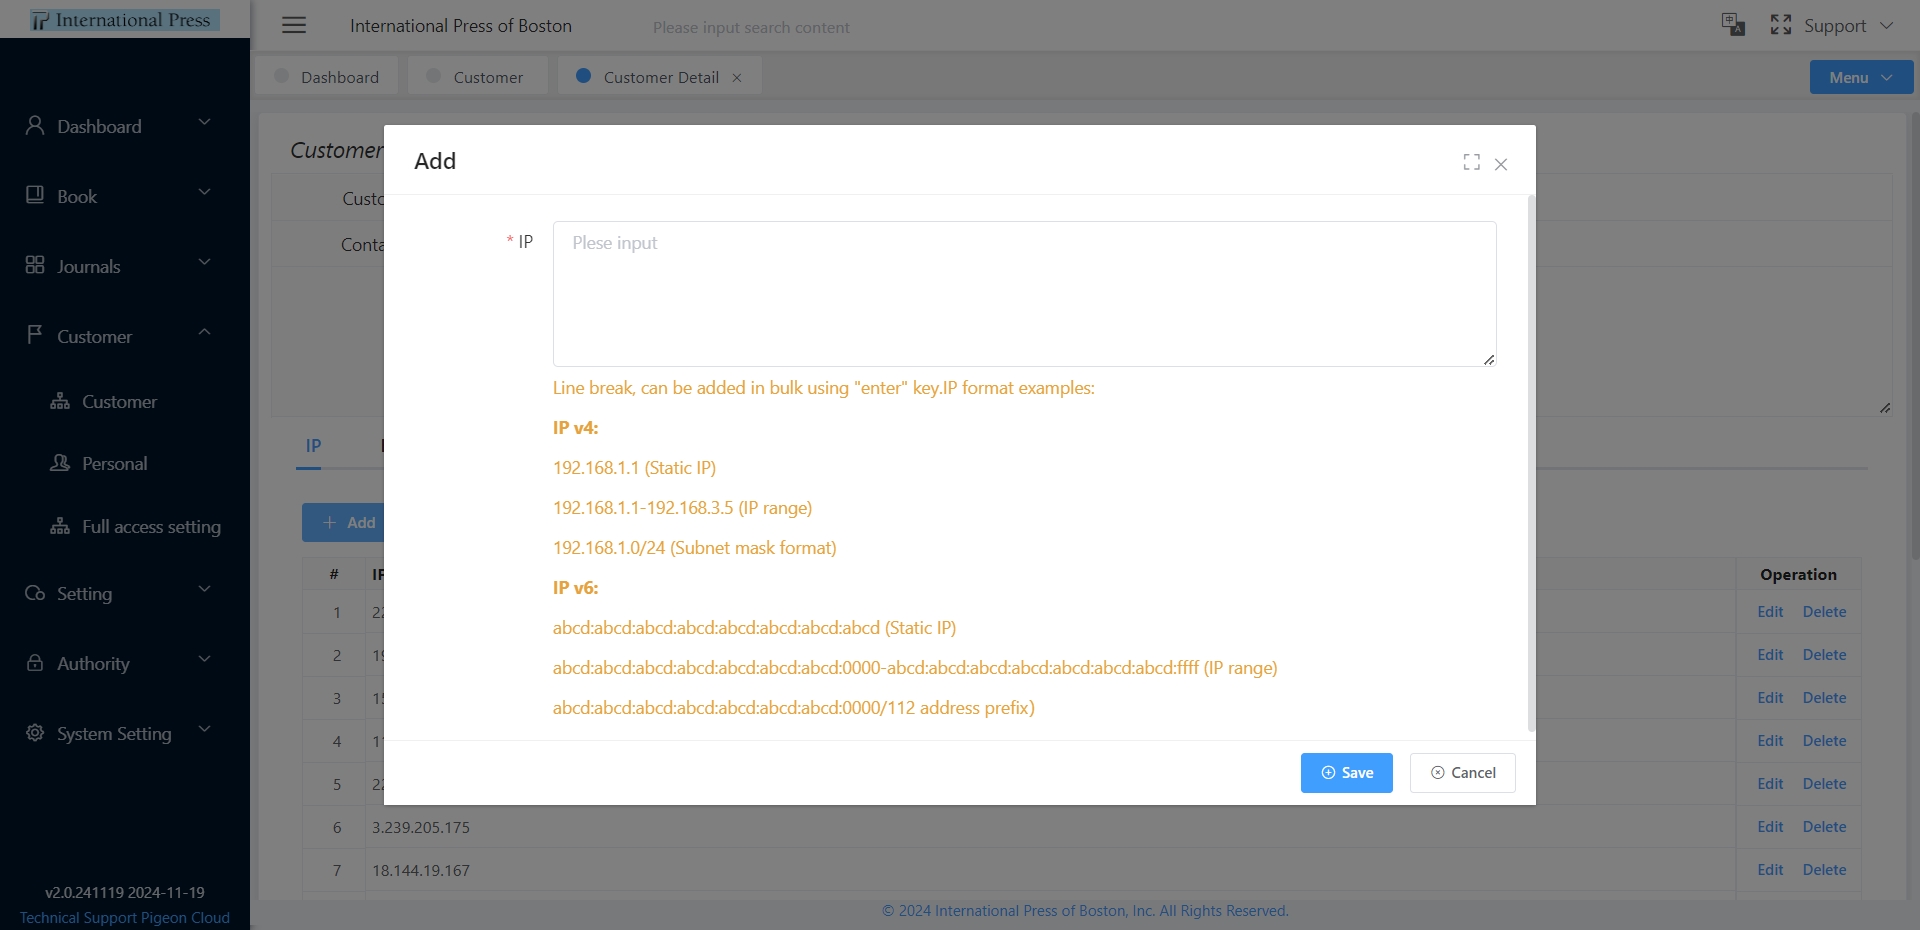
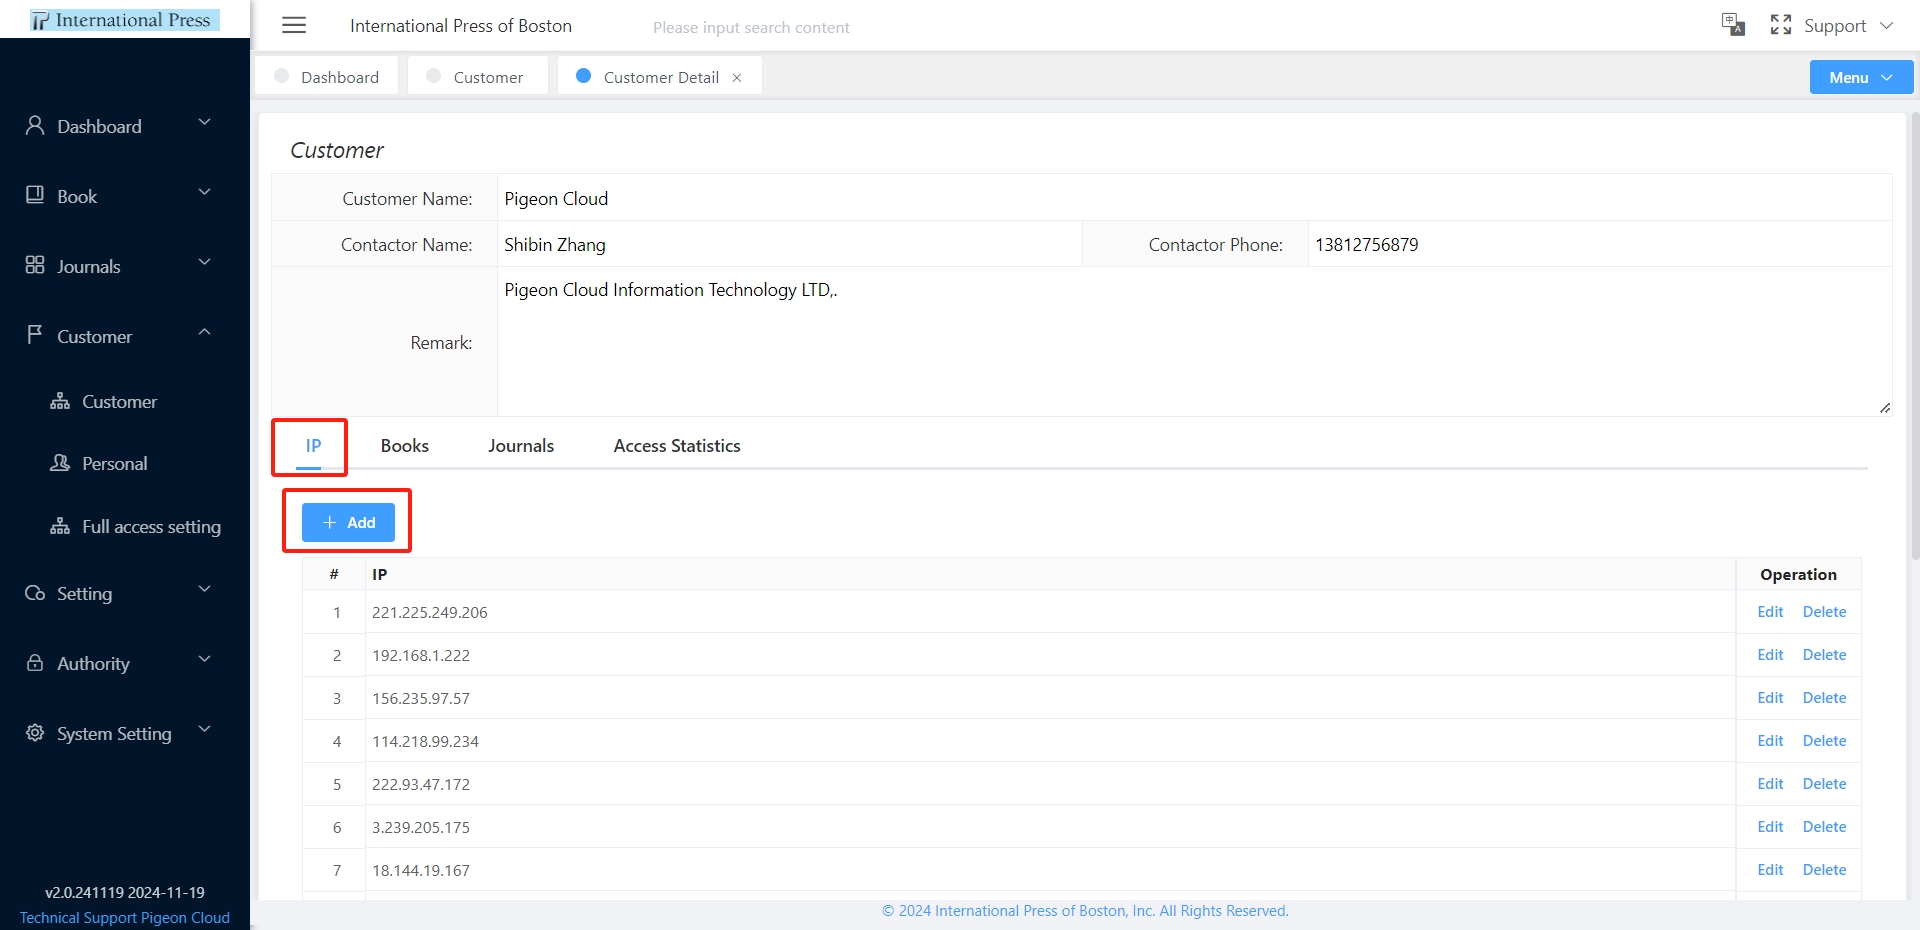 Click the 'Add' button to maintain the IP address. The set IP address can be modified and deleted.
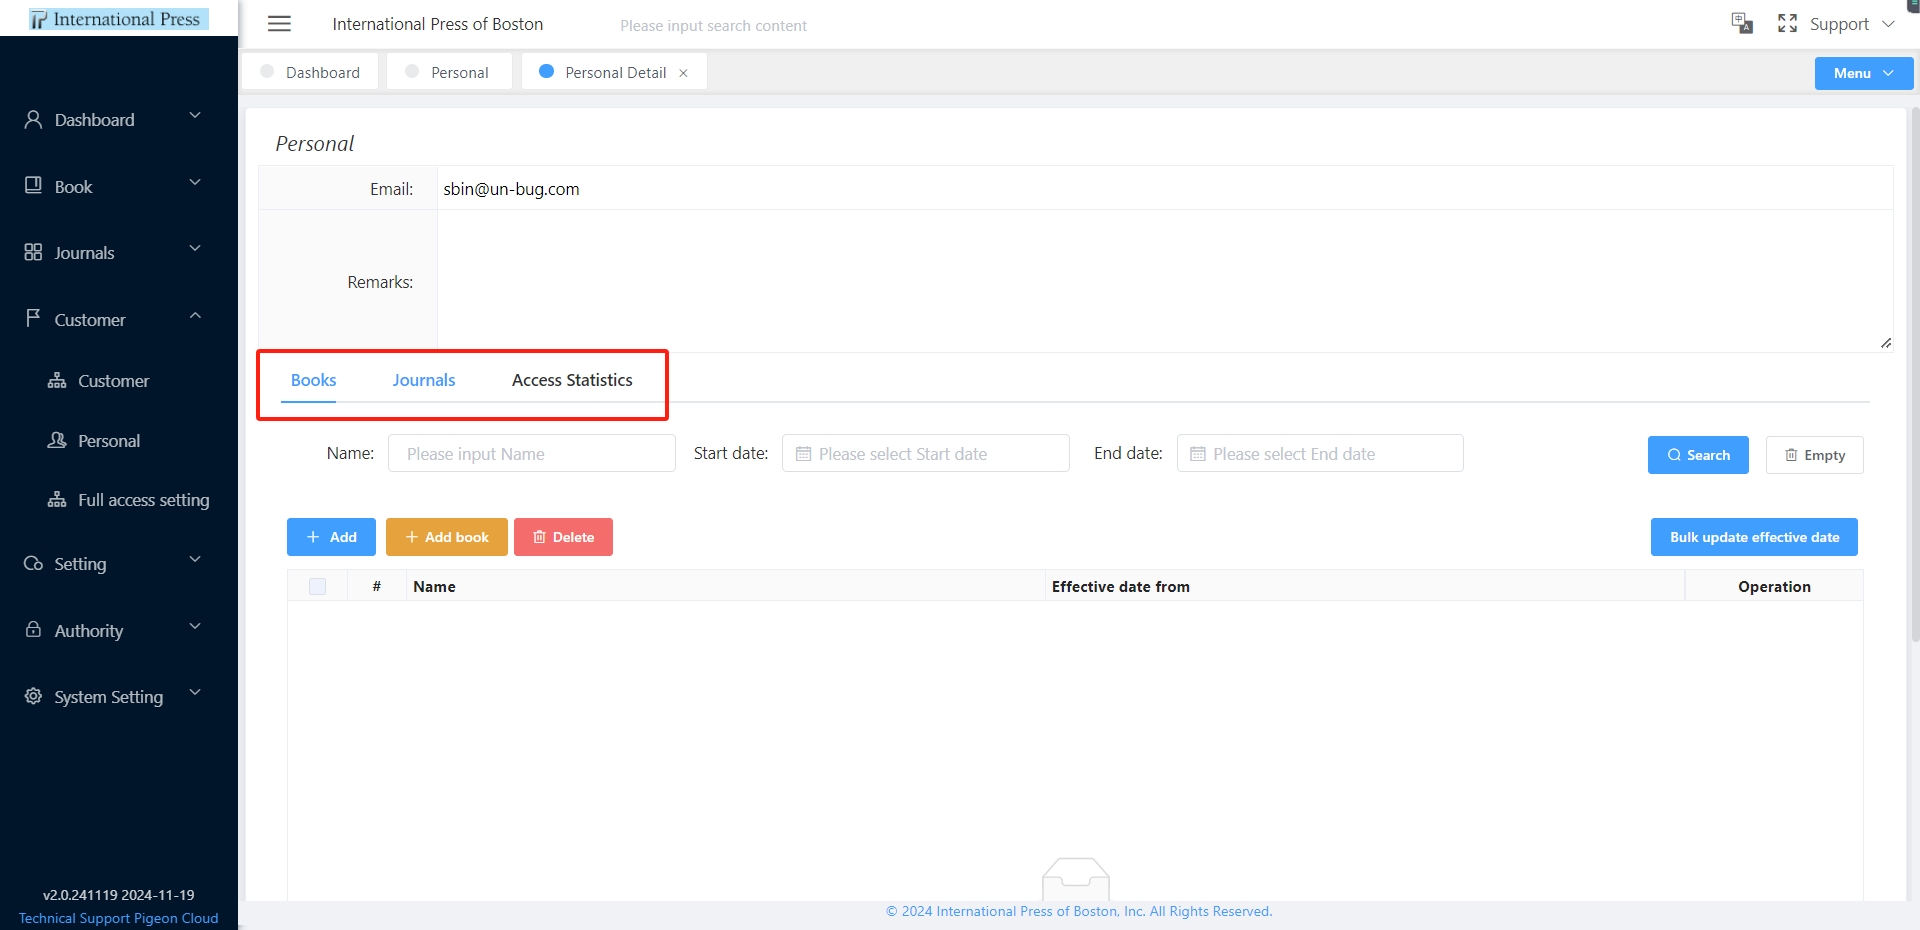
Management of Authorized Books
Under the "Books" tab, it is easy to manage the list of authorized books, add or remove books that require authorization to meet different reading needs and management strategies.
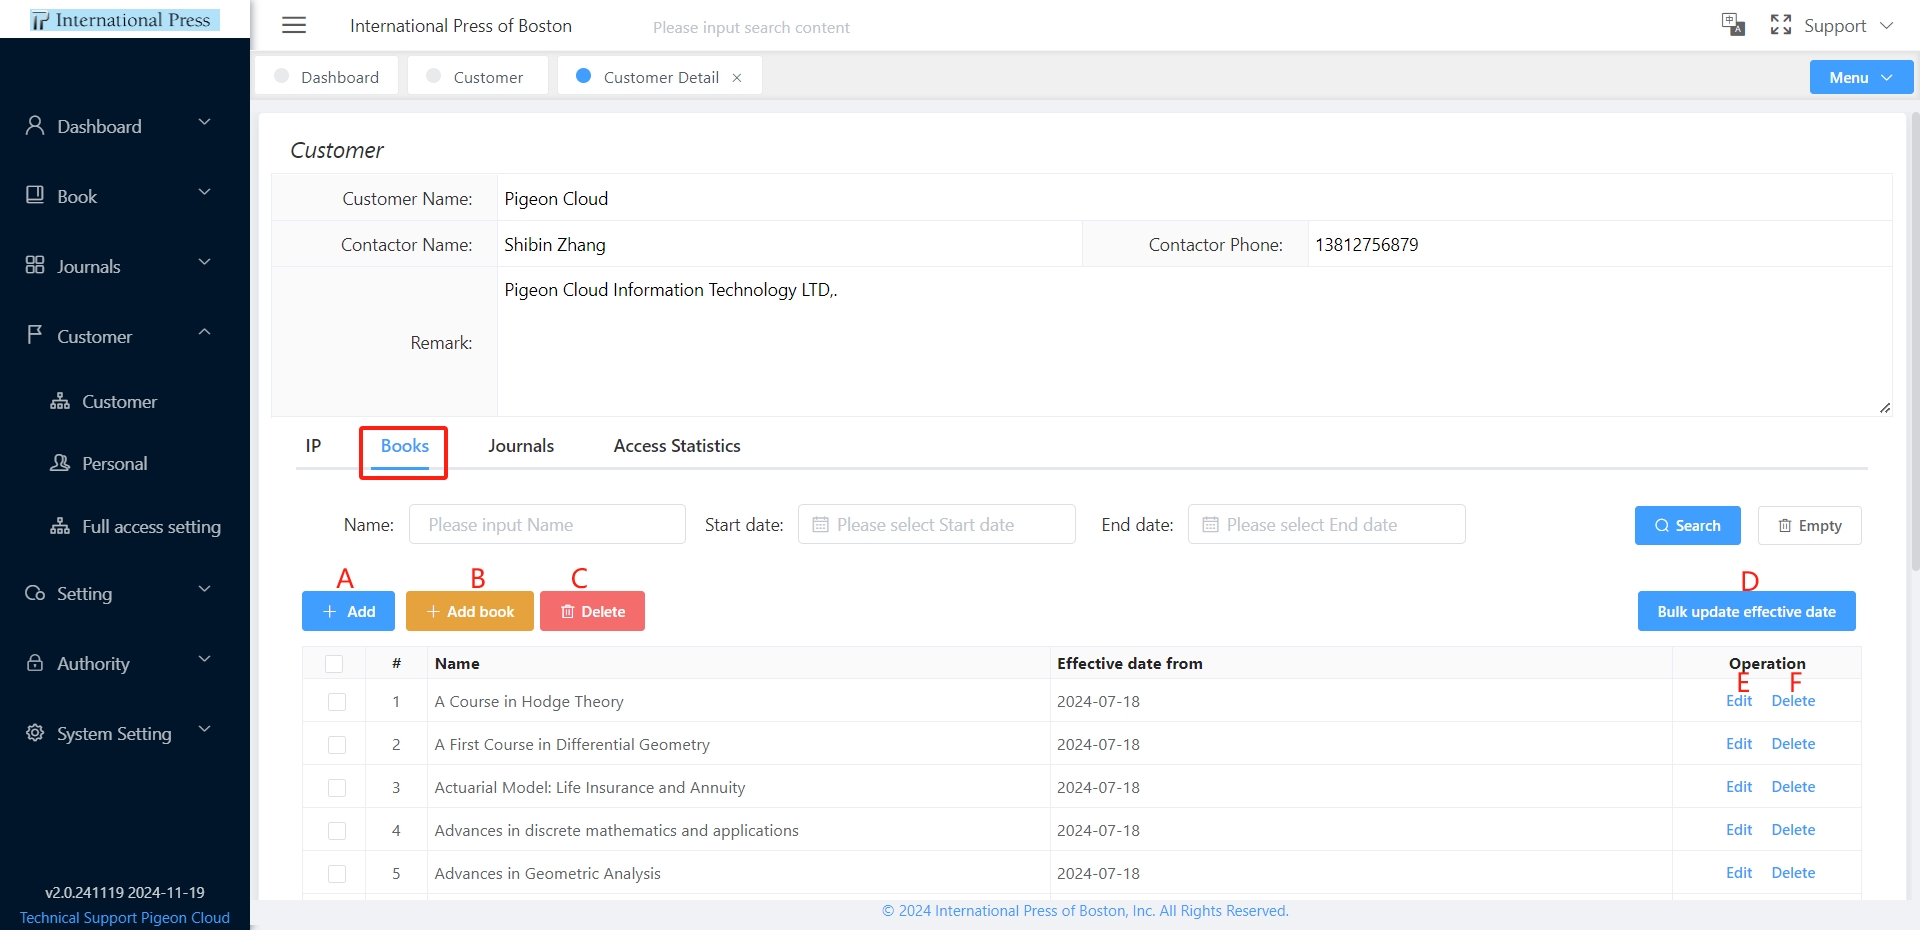
- A :
Click the "Add" button to open the configuration popup. Select the validity period, check the book bundle you wish to authorize, and then press "Save" to successfully add the authorization. All books within the bundle will be authorized in one go.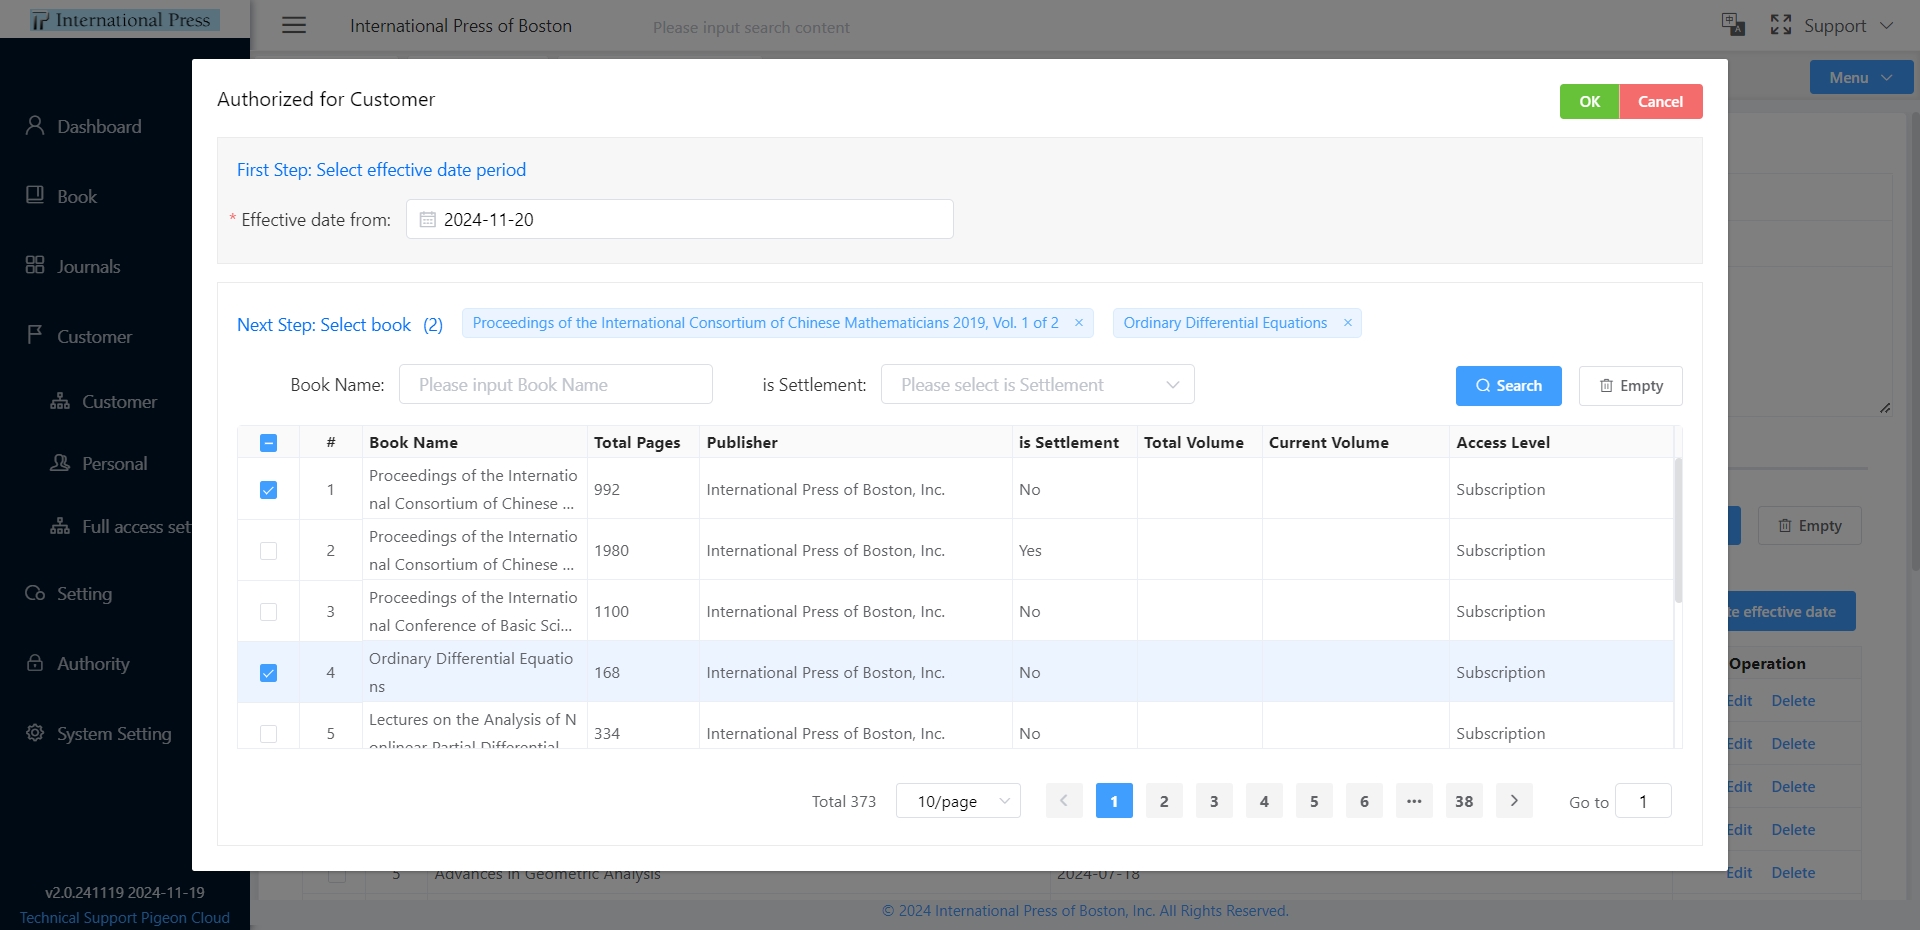
- B :
To add a book, press the "Add Book" button, which will trigger a popup. Choose the effective date, select the book you want to authorize, and click "Save" to complete the authorization process.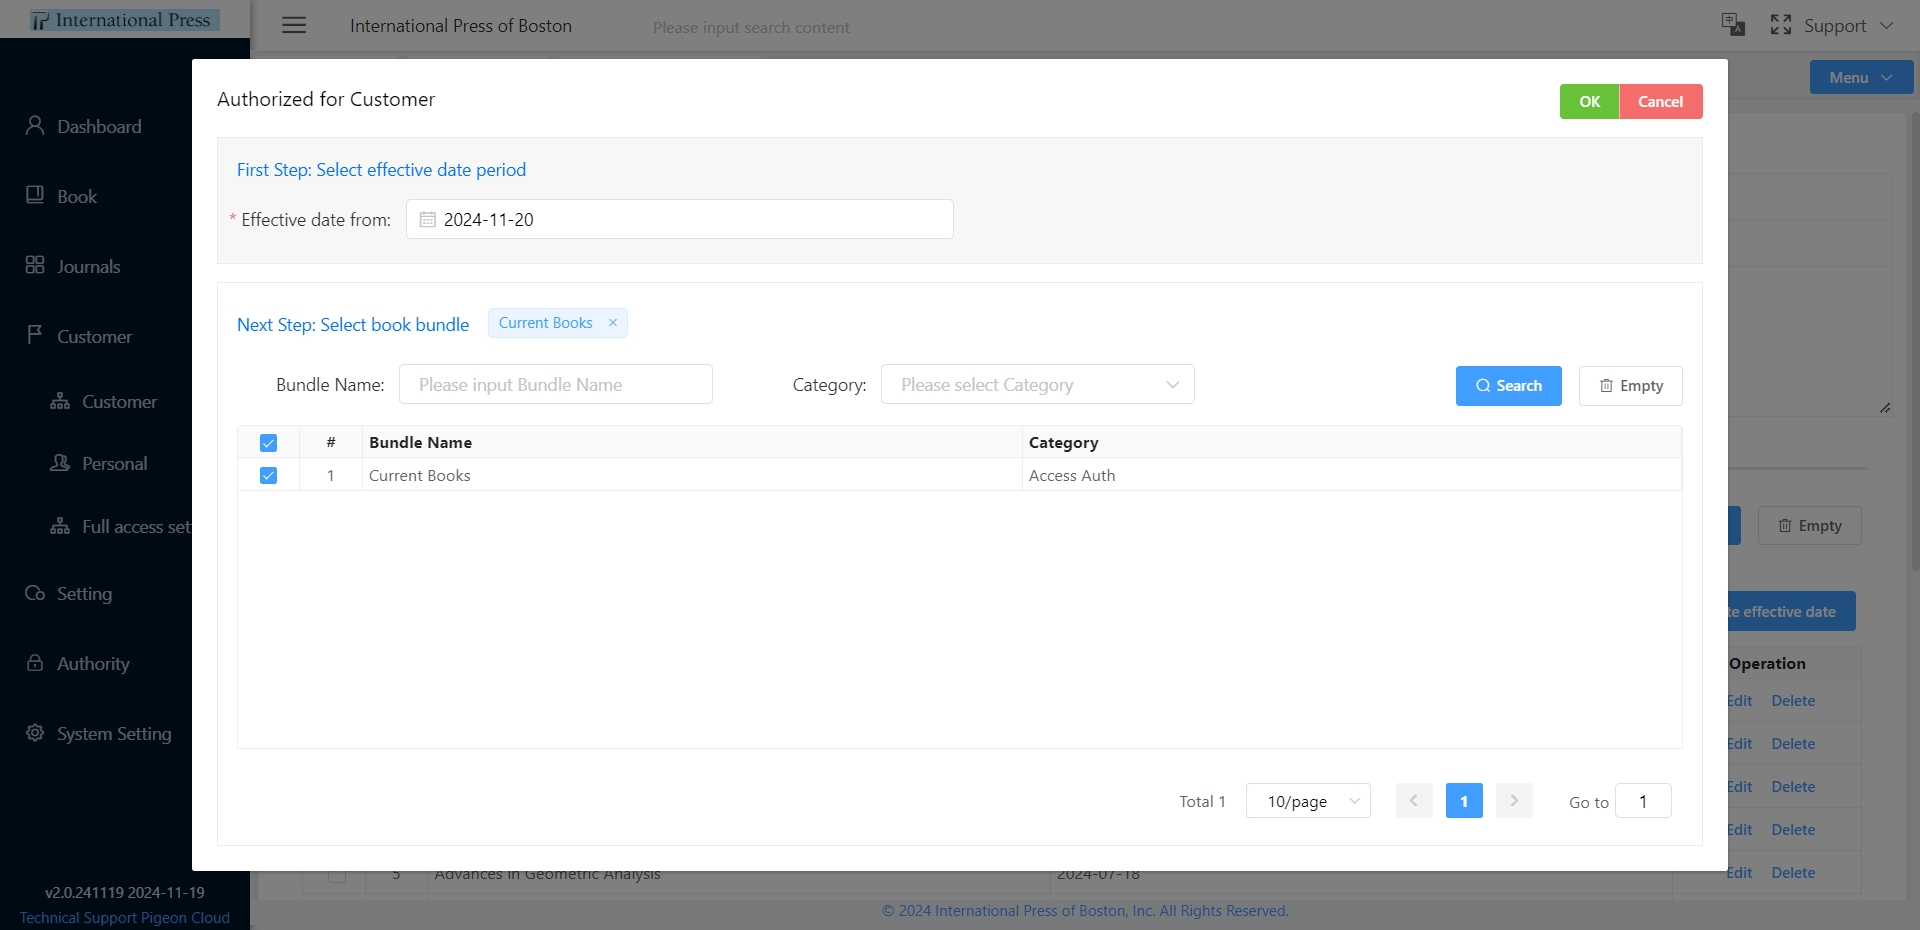
- C :
To delete a single book, select the corresponding row and click the "Delete" button in the action column. - D :
For bulk updating the effective date of books, check the books you wish to modify, and click the "Bulk Update Effective Date" button. A popup will appear, allowing you to update the effective dates for all selected books simultaneously.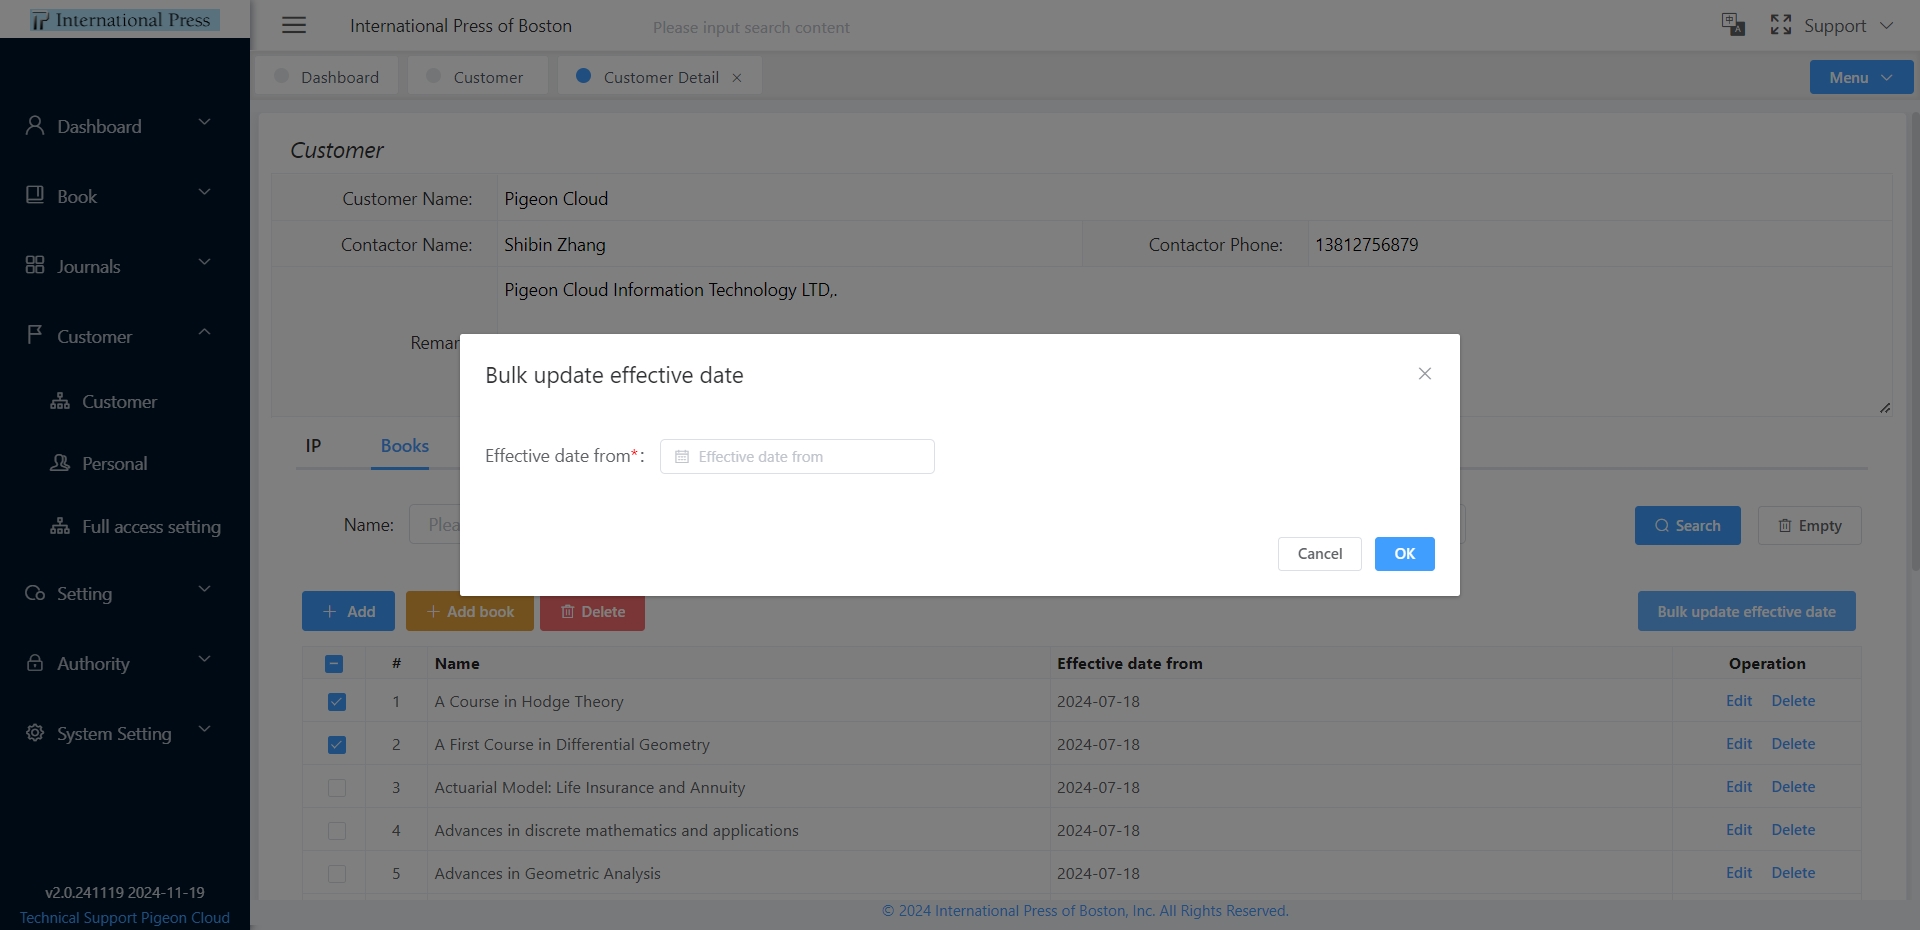
- E :
To edit the effective date of a book, click the "Edit" button next to the book's information. This will enable you to make changes to the effective date as needed. - F :
For bulk deletion, check multiple books and then click the "Delete" button at the top of the list to remove them all at once.
Management of Authorized Journals (Volumes)
Under the "Journals" tab, it is easy to manage the list of authorized journals, add or remove journals that require authorization to meet different reading needs and management strategies.
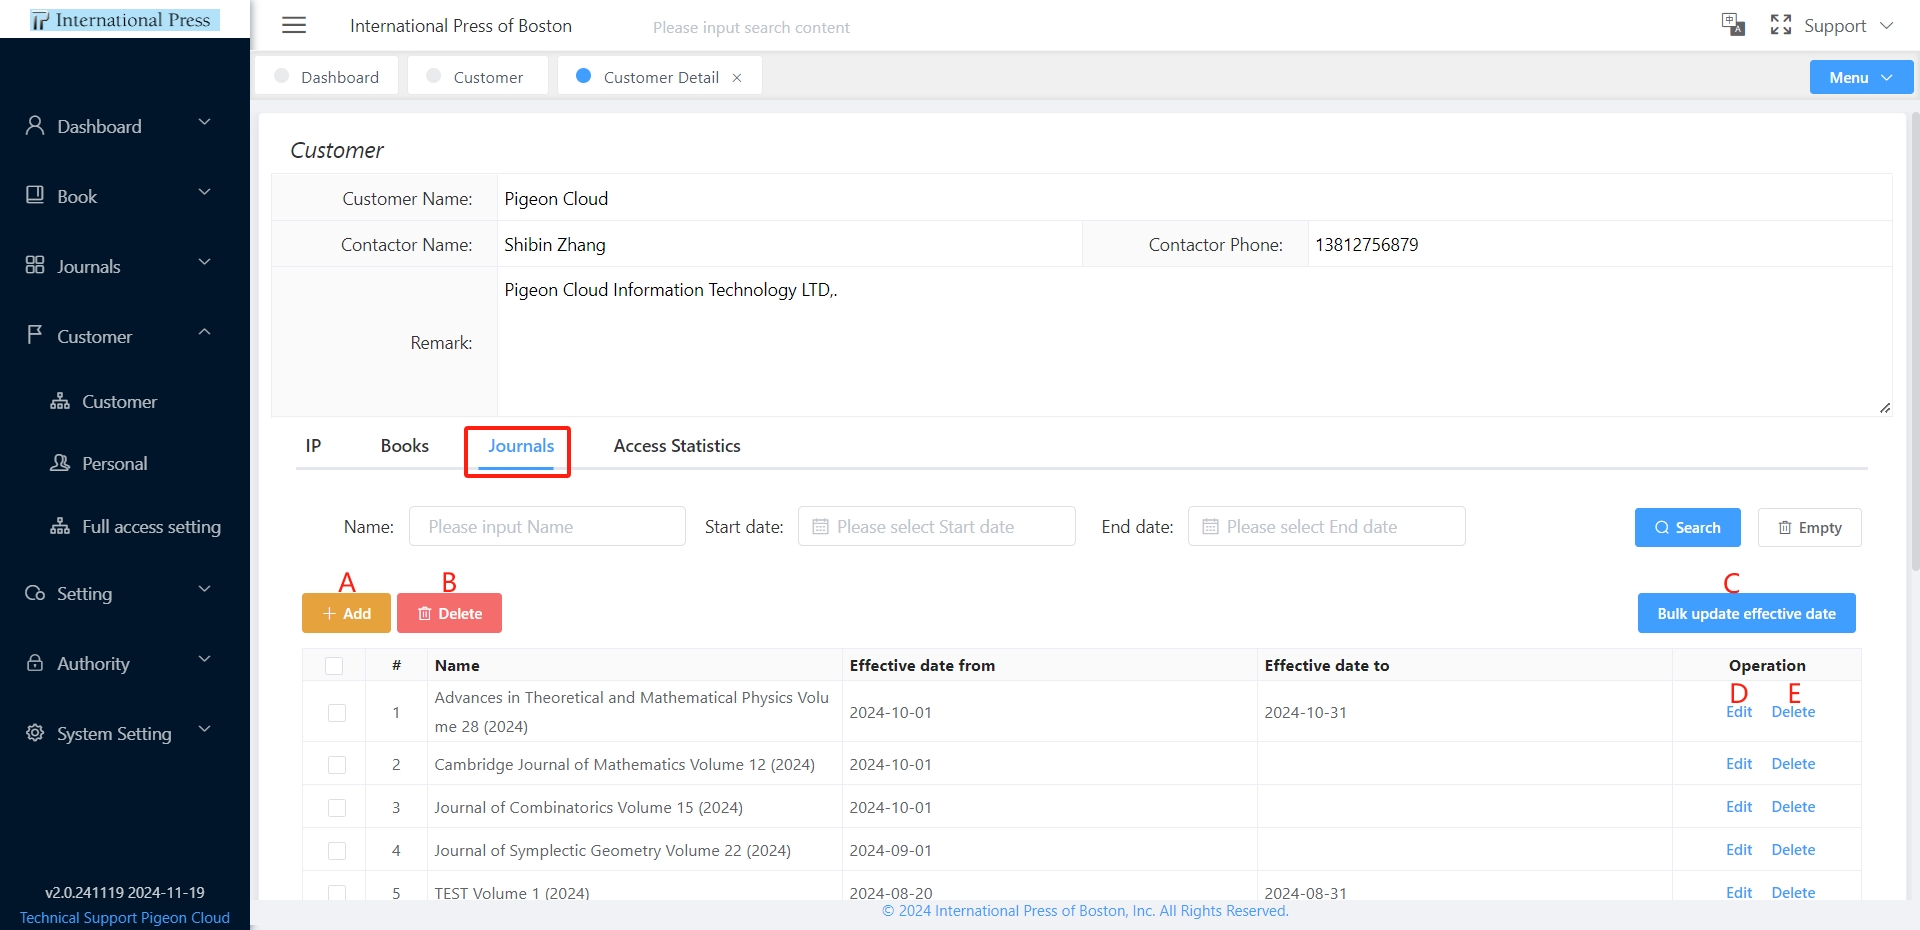
- A :
Click the "Add" button to instantly access the setup window. Within this window, you can set the expiration date for journal authorization, select the journal volumes you wish to authorize, and then click "Save" to successfully add the authorization.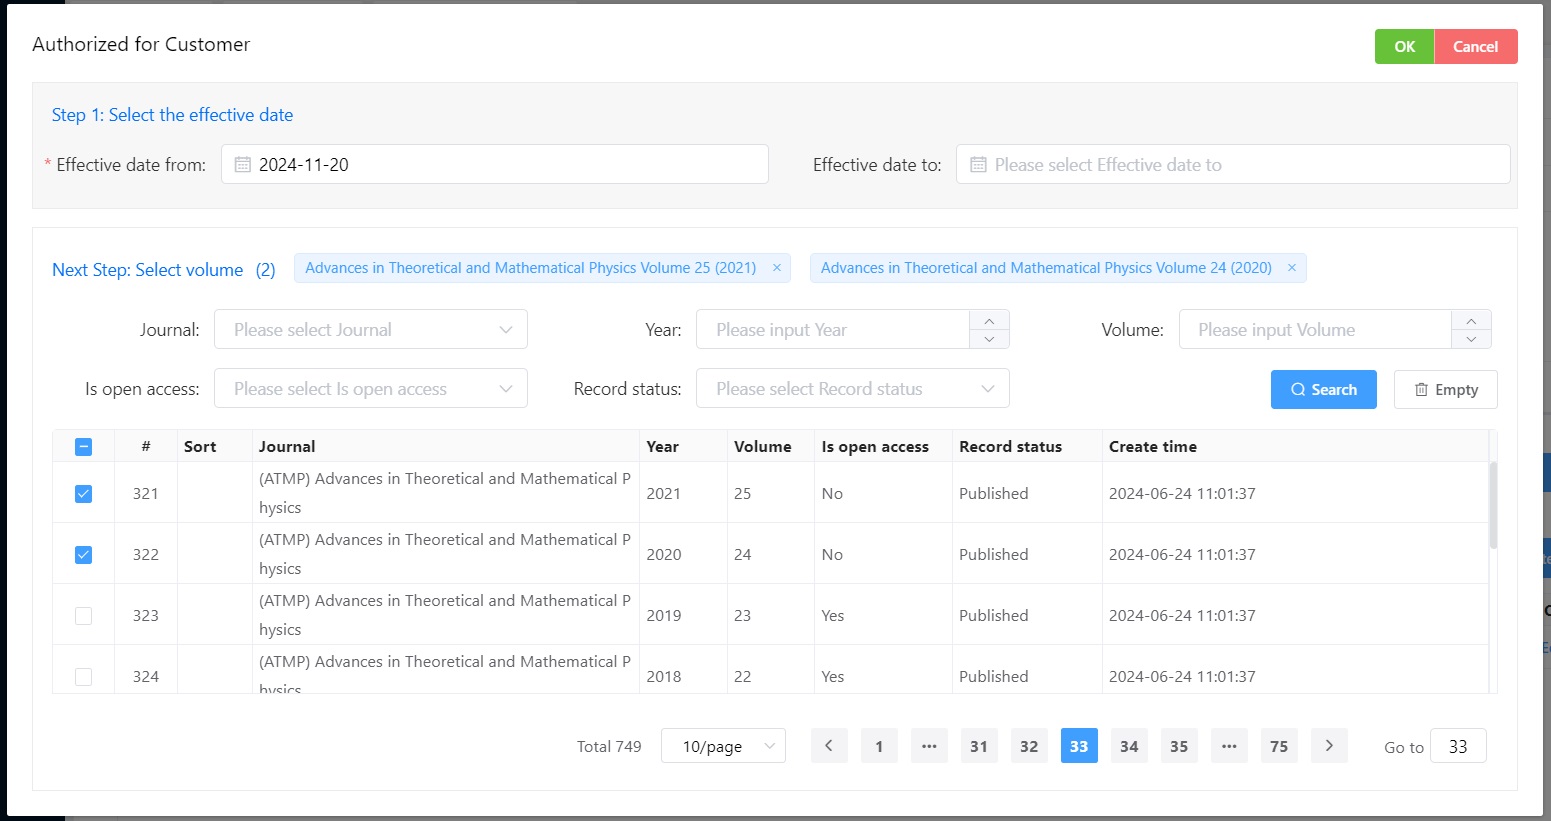
- B :
To remove the authorization for a specific journal volume, select the corresponding row in the list and click the "Delete" button in the action bar. - C :
For updating the effective dates of multiple journal volumes, first check the relevant volumes and then click the "Batch Update Effective Date" button. The popup window will allow you to adjust the effective dates for all selected journal volumes at once.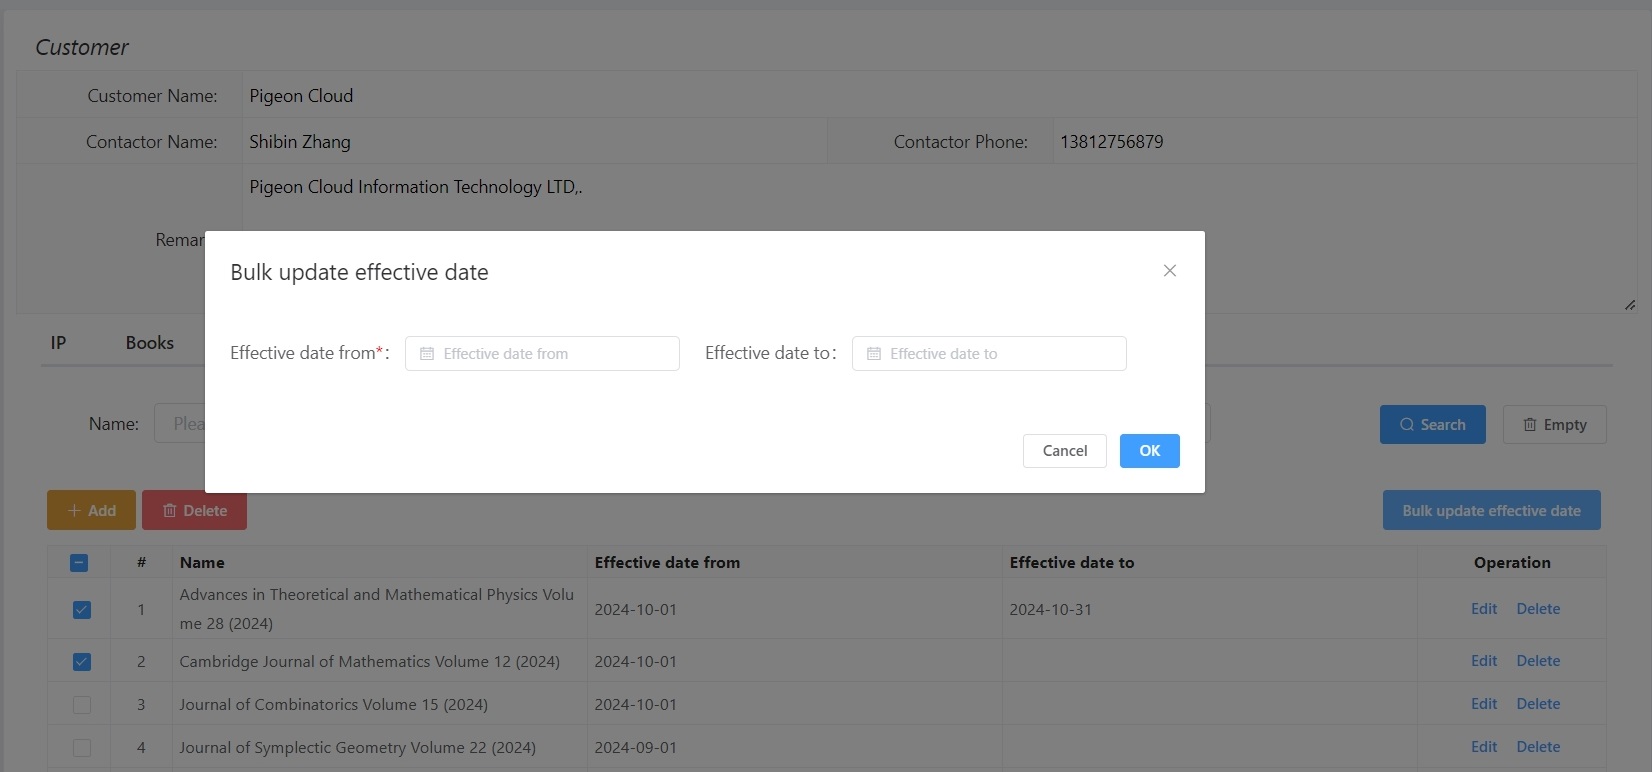
- D :
To update the information for a journal volume, click the "Edit" button to modify the effective date of the journal volume. - E :
To individually remove the authorization for a journal volume, select the specific row in the list and click the "Delete" button in the action bar.
Access Statistics
Switch to the "Access Statistics" tab to view customer access records. You can perform precise filtering based on the set search criteria to analyze customer behavior data.
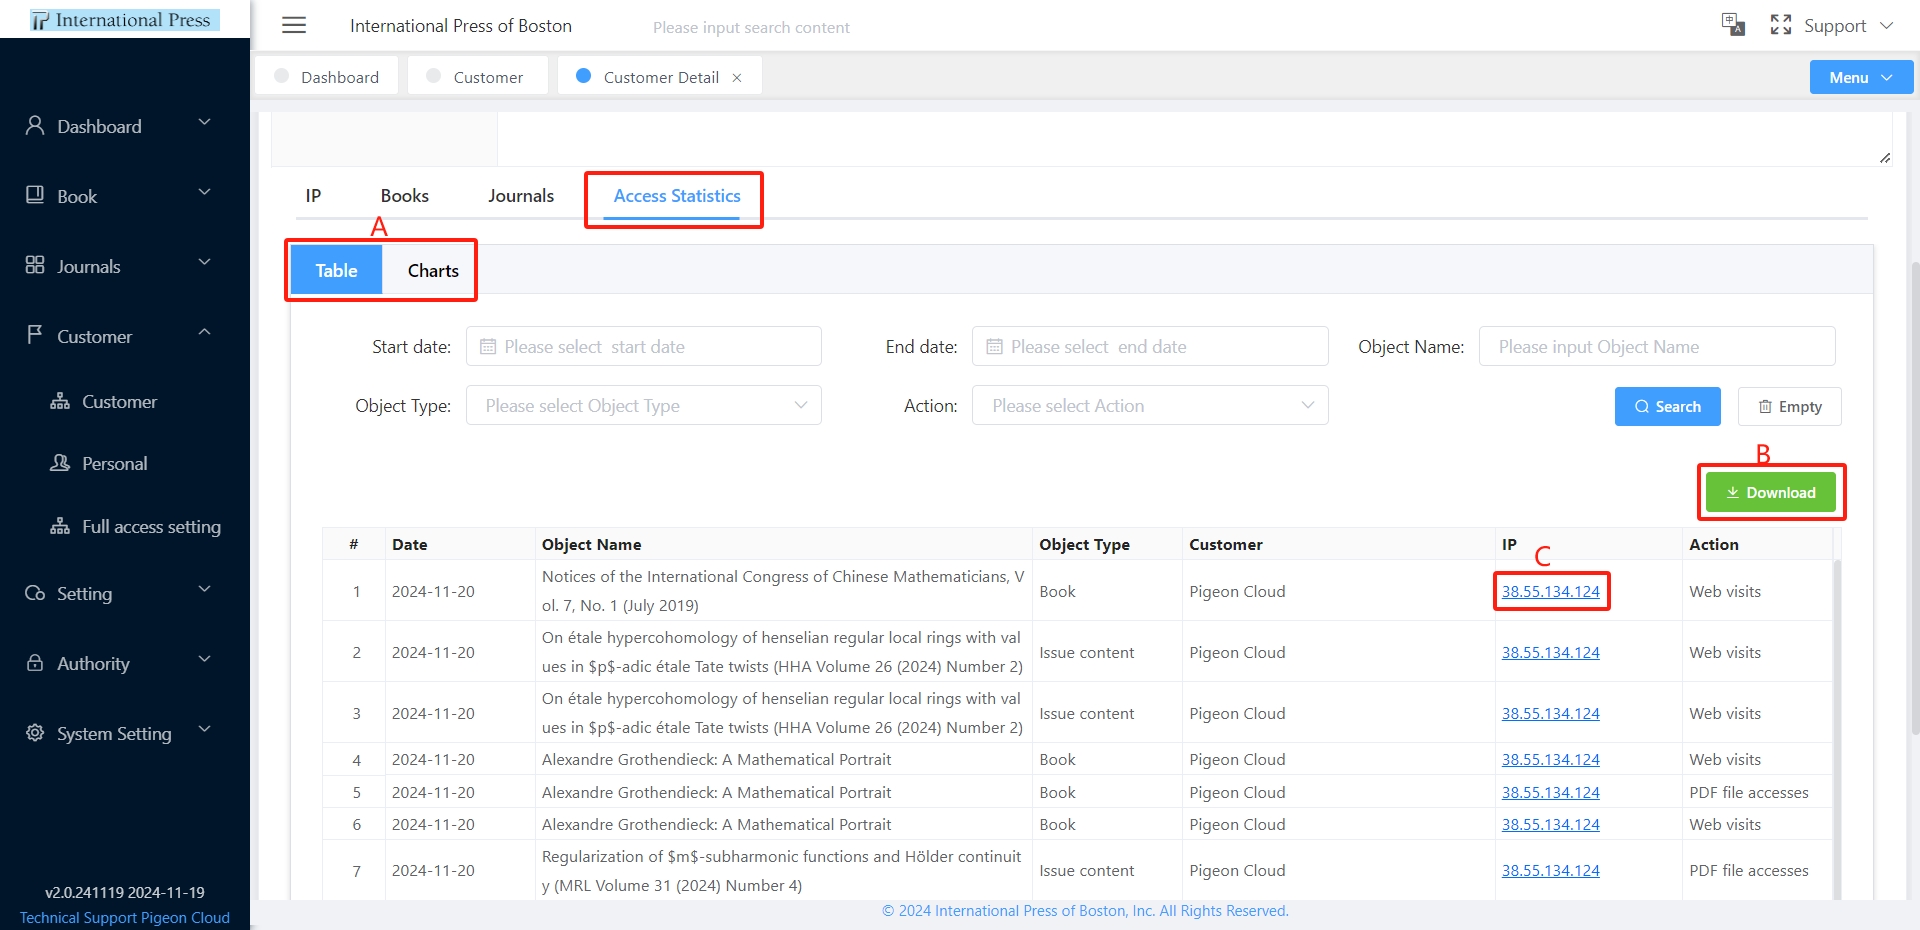
- A :
Through in-depth analysis of access data in the form of lists or charts, comprehensively grasp the viewing and downloading status of books or journals by the organization's IP. - B :
Click the 'Download' button to easily export access records to an Excel file for further data processing and analysis. - C :
Click on the IP address to quickly redirect to https://iplocation.io Accurately locate the geographic location information of the IP address.
Personal
For personal authorization, individuals need to obtain a set of account and password by registering an account. We authorize this account, and users can gain access from anywhere they have internet by logging into their account.
① On the individual user management list page, quickly pinpoint the data you need by entering filter criteria and clicking the "Search" button. To reset the filter criteria, simply press the "Empty" button to easily remove all set filter conditions.
② For bulk deletion, first select multiple individual users, then click the "Delete" button at the top of the list. After deletion, the selected user information will be removed from the list.
③ To update individual user profiles, directly click the "Edit" button to make real-time changes to the information.
④ Select the target user row in the list and click the corresponding "Delete" button to individually remove a personal user.
⑤ Click the "Management" button to enter the personal user permission settings interface, where you can perform detailed authorization operations.
On the personal user authorization management page, you can easily manage the authorization for individual books, book bundles, and journal subscriptions. Additionally, the system offers a "User Access Record Search" feature that detailedly logs the user's login time, book titles read, article names, journal titles and issues, as well as actions such as viewing and downloading, making it convenient for you to monitor and understand user activities at any time.
 Personal user authorization management book and journal services, convenient access to data statistics, this function is highly consistent with the customer module and can be operated according to the customer module functions.
Full access setting
When configuring permanent access to all journals for a specific organization, the first step is to create a group with full access privileges. Next, click the "Authorization" button to initiate the authorization process. Within the group settings, add the target organization and set the time restrictions. Within the specified time frame, the organization will have access to all journals.
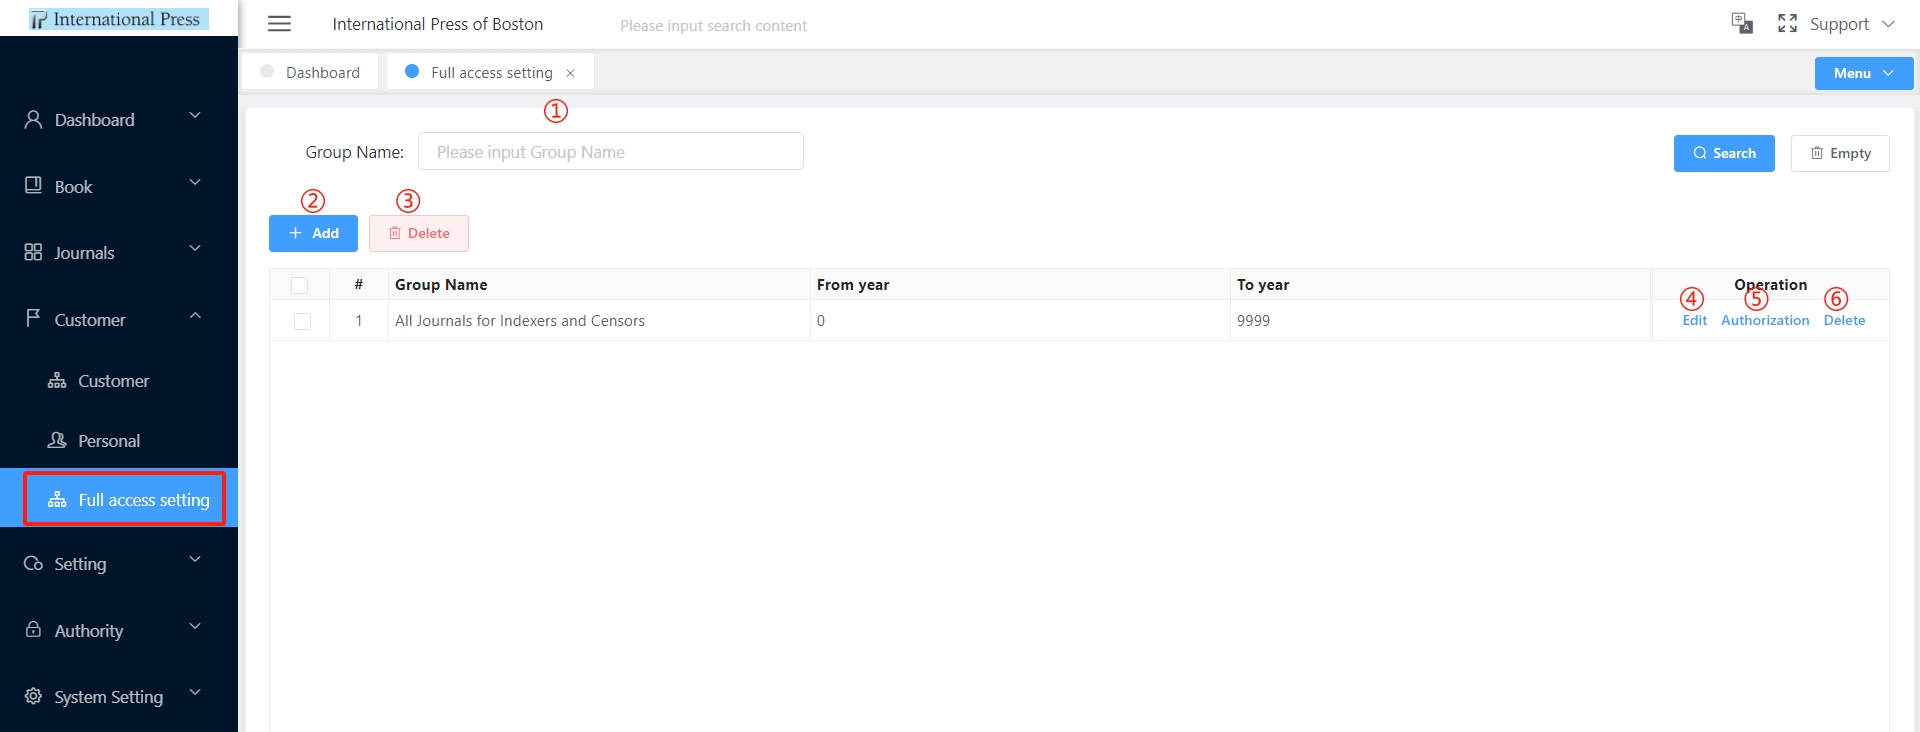
① On the "Full Access Setting" list page, enter the filter criteria and click the "Search" button to quickly filter out the desired data. To reset the filters, click the "Empty" button to reset all filter criteria with a single click.
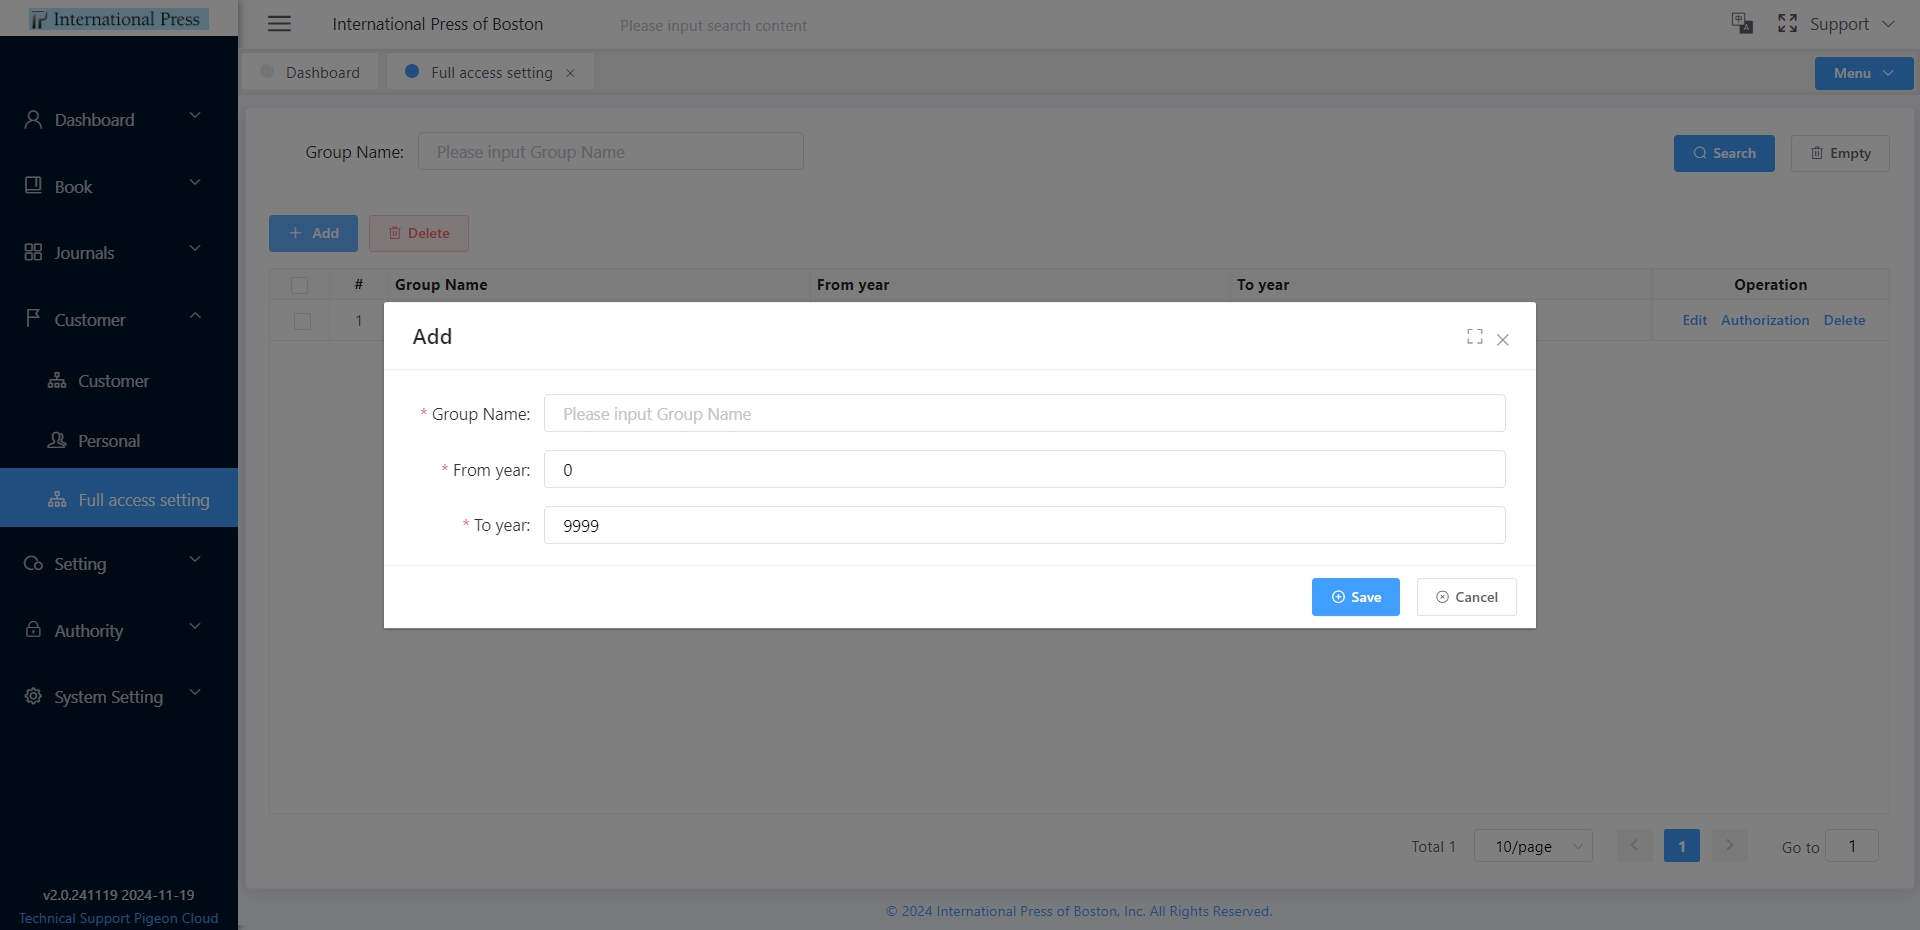
② Press the "Add" button to easily create a new "Full Access Group."
③ To delete in bulk, select multiple "Full Access Setting" items, and then click the "Delete" button at the top of the list. After deletion, the selected settings will be removed from the list.
④ To update "Full Access Settings" information, click the "Edit" button to modify the details.
⑤ Click the "Authorization" button to enter the "Full Access Settings" authorization management page for related authorization configurations.
Within the group settings, add the target organization and set the time restrictions. Within the specified time frame, the organization will have access to all journals.
⑥ Select the target item in the list, and click the "Delete" button in the action bar to individually remove a "Full Access Setting."